Amplifiers play a crucial role in bringing out the best sound from passive speakers. In this comprehensive guide, we’ll cover the essential factors to consider when choosing the right amplifier, including power requirements, frequency response, and noise floor.
Choosing the Right Amplifier for Passive Speakers
When it comes to selecting the perfect amplifier for your passive speakers, there are a few crucial factors to consider. After all, just like how a cup of coffee is ruined if its temperature is too high or too low, your music can be severely impacted if your amplifier isn’t up to the task. Let’s dive in and explore three essential considerations to keep in mind.
Determining Power Requirements
First things first, you need to determine how much power your passive speakers require. Think of it like trying to power a city – if you don’t have enough juice, the lights won’t turn on! Your speakers have an impedance rating, which is measured in ohms, and an efficiency rating, which is measured in decibels (dB). A higher efficiency rating means your speakers can draw more power from the amplifier. To determine the power requirement, you can use the following formula: Power (W) = Voltage (V) x Current (A). For example, if your speakers require 60 watts of power and have an impedance of 8 ohms, you’ll need an amplifier that can deliver 7.5 volts (60W / 8 ohms) and has an amplifier current rating of 0.7 amps (60W / 7.5V).
Considering Frequency Response
Next, think about the frequency response of your amplifier. You see, human ears can pick up sounds ranging from 20 Hz to 20,000 Hz, but the amplifier is responsible for amplifying all those frequencies. A good amplifier should have a flat frequency response, meaning it shouldn’t boost or cut any particular range of frequencies. This is especially important for passive speakers, as they don’t have built-in frequency correction. Look for amplifiers with a frequency response range that matches your speaker’s range. If you’re unsure, consult the manufacturer’s specifications or consult with an audio expert.
Evaluating Amplifier Noise Floor
Last but not least, consider the noise floor of your amplifier. Think of the noise floor like the hum of the refrigerator in the background – it’s annoying and distracting. A good amplifier should have a low noise floor, which means it produces minimal hiss, hum, or other unwanted sounds. Look for amplifiers with a low Total Harmonic Distortion (THD) rating, which measures the amplifier’s ability to reproduce pure tones. Aim for an amplifier with a THD rating of 0.01% or lower. If you’re still unsure, listen to audio samples or demo the amplifier before purchasing it.

Types of Amplifiers for Passive Speakers
When it comes to choosing the right amplifier for your passive speakers, understanding the different types of amplifiers available is crucial. Each type has its unique characteristics, advantages, and disadvantages, which can greatly impact the sound quality and overall performance of your system. In this section, we’ll dive into the world of amplifiers and explore the three most common types: Class A, Class AB, and Class D.
Class A Amplifiers
Class A amplifiers are known for their warm, smooth sound and are often considered the gold standard for audiophiles. These amplifiers operate by constantly providing a full output current to the load, even when the input signal is zero. This means that they consume more power and produce more heat than other types of amplifiers, but they offer superior sound quality and a clean, quiet background.
One of the key benefits of Class A amplifiers is their ability to produce a very low noise floor, making them ideal for high-fidelity applications. They’re also capable of delivering a high current, which is essential for driving low impedance speakers. However, their high power consumption and heat generation make them less suitable for portable or battery-powered applications.
Here are some pros and cons of Class A amplifiers:
| Pros | Cons |
|---|---|
| Warm, smooth sound | High power consumption |
| Low noise floor | High heat generation |
| High current delivery | Limited portability |
Class AB Amplifiers
Class AB amplifiers are a compromise between Class A and Class B amplifiers, offering a balance between sound quality and efficiency. They operate by providing a full output current to the load when the input signal is above a certain threshold, and a reduced current when the input signal is below that threshold. This allows them to consume less power and produce less heat than Class A amplifiers, while still maintaining a high level of sound quality.
One of the key benefits of Class AB amplifiers is their ability to deliver a high level of power with minimal distortion, making them suitable for a wide range of applications. They’re also relatively low-power-consuming and produce less heat than Class A amplifiers, making them a popular choice for portable or battery-powered devices.
Here are some pros and cons of Class AB amplifiers:
| Pros | Cons |
|---|---|
| High power delivery | Higher distortion than Class A |
| Low power consumption | Not ideal for high-fidelity applications |
| Relatively low heat generation | Not as well-suited for low-impedance speakers |
Class D Amplifiers
Class D amplifiers are the most efficient type of amplifier, using advanced switching technology to convert the input signal into a high-frequency switching signal that’s then filtered to produce the output signal. This allows them to consume minimal power and produce very little heat, making them ideal for portable or battery-powered devices.
One of the key benefits of Class D amplifiers is their high efficiency and low power consumption, which makes them suitable for a wide range of applications. They’re also relatively compact and lightweight, making them ideal for use in portable or mobile devices. However, their advanced switching technology can sometimes introduce distortion and noise into the audio signal, which can affect sound quality.
Here are some pros and cons of Class D amplifiers:
| Pros | Cons |
|---|---|
| High efficiency | Potential for distortion and noise |
| Low power consumption | May require additional filtering components |
| Compact and lightweight | Limited sound quality compared to Class A or AB |
Amplifier Features for Optimal Sound
When choosing the perfect amplifier for your passive speakers, it’s essential to consider the features that will unlock their full sonic potential. In this section, we’ll delve into three crucial components that will elevate your listening experience: Preamp Outputs, Direct Drive, and Multiple Input Channels.
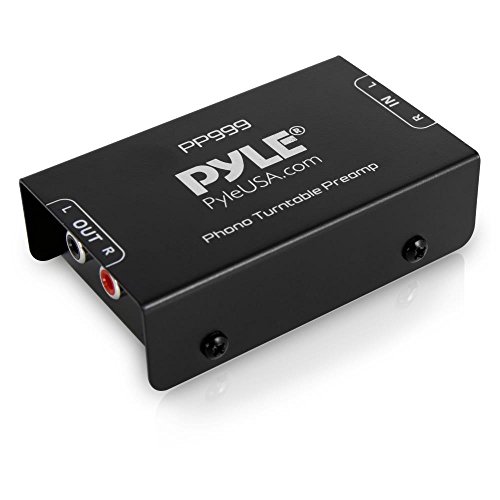
Preamp Outputs
Have you ever wondered why some amplifiers have multiple preamp outputs? Put simply, these outputs allow you to connect multiple sources to your amplifier, such as turntables, CD players, or even a TV. It’s like having multiple doors to enter your sound chamber – each one granting access to a unique sonic landscape. With multiple preamp outputs, you can easily switch between sources without disrupting your amplifier’s settings.
Direct Drive
Direct Drive amplifiers are like the track stars of the audio world – they provide a linear amplification of the signal, without any detours or deviations. This results in a more accurate and pure sound reproduction, untouched by external interference. Imagine a runner who’s focused on the finish line, without any distractions – that’s what a Direct Drive amplifier does for your music.
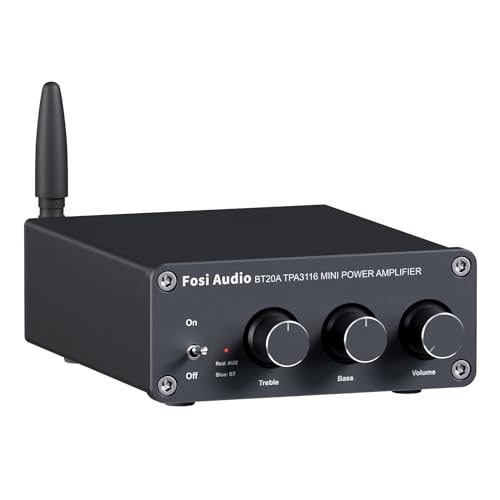
Multiple Input Channels
Ever find yourself juggling multiple cables, trying to connect all your gadgets to your amplifier? Multiple Input Channels are the solution to this chaotic scenario. With multiple inputs, you can connect multiple sources – say, a CD player, an MP3 player, and a Bluetooth device – and easily switch between them using the amplifier’s controls. It’s like having a central hub that connects all your devices, making it easy to access and enjoy your music.
Setting Up an Amplifier for Passive Speakers
Wiring Considerations
When setting up your amplifier for passive speakers, wiring considerations are crucial to ensure a seamless connection. Think of it like building a house – a strong foundation is essential to support the entire structure. In this case, the foundation refers to the wiring that connects your amplifier to your passive speakers.

To begin, you’ll need to ensure that your amplifier has the correct type and number of inputs to match your passive speakers. Typically, home stereo systems come equipped with RCA inputs, while professional speakers often require XLR or TRS connectors. Make a mental note of the type of connector your passive speakers use, as you’ll need to match this to the input type on your amplifier.
once you’ve determined the correct input type, you’ll need to consider the wiring layout. A good rule of thumb is to keep the wiring as short and direct as possible to minimize signal loss. This can be achieved by routing the wiring along the edges of the room, rather than crossing over other wires. Remember, the goal is to keep the signal as pure as possible, so avoid any unnecessary bends or kinks in the wire.
By following these wiring considerations, you’ll be able to establish a solid foundation for your amplifier and passive speakers. The next step is to fine-tune your setup by adjusting input sensitivity and gain levels.
Input Sensitivity Settings
Have you ever had to adjust the volume on your TV or stereo to compensate for a weak signal? This is where input sensitivity settings come into play. Input sensitivity refers to the amplifier’s ability to detect and amplify the signal from your passive speakers.
A common issue that can arise is that the amplifier may not be detecting the signal correctly, resulting in a weak or distorted sound. This is often due to incorrect input sensitivity settings. Think of it like adjusting the aperture on a camera – you need to find the perfect exposure to capture the desired image.

To adjust input sensitivity, typically, you’ll need to access the amplifier’s settings menu and adjust the input sensitivity level accordingly. Some amplifiers may have a separate sensitivity setting for each input channel, while others may have a global setting that applies to all channels. Be sure to consult your amplifier’s user manual for specific instructions on how to adjust input sensitivity.
By adjusting the input sensitivity settings correctly, you’ll be able to optimize the signal to sound its best. The final step is to fine-tune the gain levels to match your speaker’s power output.
Gain Adjustments
Gain adjustments are like fine-tuning the focus on a microscope – they allow you to dial in the perfect level to achieve optimal sound quality. Gain refers to the volume level of the signal as it is amplified by the amplifier. By adjusting the gain levels, you can compensate for differences in power output between your passive speakers and ensure that the sound is balanced and even.
When adjusting gain levels, it’s essential to start with the gain set to a moderate level and gradually adjust it upward or downward as needed. This will help you avoid overshooting the desired gain level and causing distortion or loss of detail.
Some amplifiers may have a specific gain setting for each input channel, while others may have a global gain setting that applies to all channels. Be sure to consult your amplifier’s user manual for specific instructions on how to adjust gain levels.
By following these steps, you’ll be able to set up your amplifier and passive speakers for optimal sound quality. Remember, the key is to approach each adjustment step-by-step, making subtle changes and listening for the desired effects.
Maintaining and Upgrading Your Amplifier
In the world of audio equipment, maintaining and upgrading your amplifier is crucial to ensure it continues to produce high-quality sound and prolong its lifespan.
Cleaning and Storing Components
Just like a well-maintained car runs smoothly and efficiently, a clean amplifier will perform better and last longer. Regularly cleaning the amplifier’s components using a soft cloth and a mild cleaning solution can prevent dust and dirt from accumulating and causing damage. It’s also important to store the amplifier in a dry, temperature-controlled environment to prevent moisture buildup or extreme temperature fluctuations that can affect its performance.
When storing the amplifier for an extended period, consider the following:
- Disconnect the power cord to prevent any accidental power-on
- Store the amplifier in its original packaging or a protective case to prevent scratches and damage
- Avoid storing the amplifier near sources of moisture, heat, or direct sunlight
- If you’re storing the amplifier for an extended period, consider applying a conditioning spray or solution to the components to prevent oxidation and corrosion
Upgrading Firmware
Just like how your phone’s operating system receives updates to improve performance and add new features, your amplifier’s firmware can also be upgraded to improve its performance, add new features, and fix any bugs. Firmware upgrades can often be downloaded from the manufacturer’s website and installed using a USB cable or other connection method.
Before upgrading your amplifier’s firmware, make sure to:
- Read the release notes and upgrade instructions carefully to ensure you understand what’s changing and what’s required
- Back up any custom settings or presets you’ve made to ensure they’re preserved after the upgrade
- Disconnect any connected speakers or headphones to prevent any unexpected behavior during the upgrade process
- Follow the manufacturer’s instructions for installing the update and restarting the amplifier
Replacing Capacitors
Over time, capacitors can degrade and affect the amplifier’s performance, causing distortion, noise, or even damage to other components. Fortunately, replacing capacitors is a relatively straightforward process that can be done using specialized tools and techniques.
When replacing capacitors, consider the following:
- Consult the amplifier’s schematics or repair manual to identify the specific capacitors that need to be replaced
- Use the correct type and value of capacitor replacement, taking into account the amplifier’s operating frequency and voltage
- Follow proper soldering and desoldering techniques to avoid damaging other components
- Consider hiring a professional if you’re not experienced with capacitor replacement or if the amplifier is complex or sensitive to repair
