Learn how to pairing mode on Beats Solo 3 headphones using the power button and Bluetooth settings. Troubleshoot common pairing issues and connect to effortlessly.
Activating Pairing Mode on Beats Solo 3
Using the Power Button
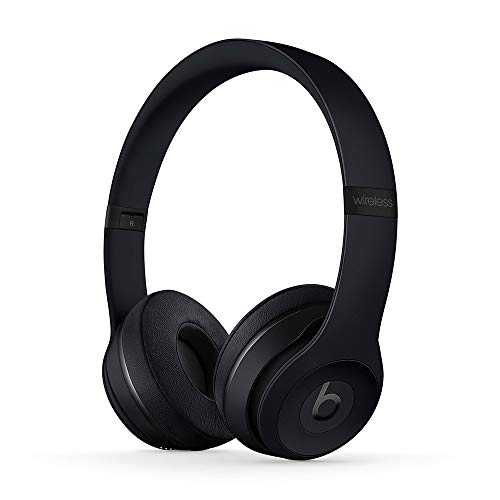
To on your Beats Solo 3 headphones, you will first need to locate the power button. The power button is typically located on the right ear cup of the headphones. Press and hold the power button for a few seconds until you see the LED indicator light start flashing. This indicates that the headphones are now in and ready to connect to a Bluetooth device.
Utilizing Bluetooth Settings
Once the Beats Solo 3 headphones are in , you will need to navigate to the Bluetooth settings on your device. Whether you are using a smartphone, tablet, or computer, the process is similar. Go to the Bluetooth settings menu and search for available devices. Look for the Beats Solo 3 in the list of available devices and select it to initiate the pairing process.
- Make sure Bluetooth is turned on in your device settings.
- Keep the headphones within close proximity to the device you are pairing with.
- If prompted, enter the pairing code provided by the headphones.
By following these steps, you can easily pairing mode on your Beats Solo 3 headphones and connect them to your favorite devices for an immersive listening experience.

Troubleshooting Pairing Issues with Beats Solo 3
Restarting the Headphones
Are you having trouble pairing your Beats Solo 3 headphones with your device? One of the first steps you can take to troubleshoot this issue is to restart the headphones. Sometimes, electronic devices can experience glitches or errors that can be resolved simply by restarting them. To restart your Beats Solo 3 headphones, follow these steps:
- Press and hold the power button on the headphones for about 10 seconds.
- Release the power button once the LED indicator light starts flashing.
- Wait for the headphones to power off completely, then turn them back on by pressing the power button again.
By restarting your headphones, you may be able to resolve any connectivity issues that were preventing them from pairing with your device.
Clearing Bluetooth Pairing List
If restarting the headphones doesn’t solve the pairing issue, another step you can take is to clear the Bluetooth pairing list. Over time, your headphones may have accumulated a list of paired devices that could be causing confusion when trying to connect to a new device. To clear the Bluetooth pairing list on your Beats Solo 3 headphones, follow these instructions:
- Turn on the headphones and put them into .
- Press and hold the power button and the volume down button simultaneously for about 10 seconds.
- The LED indicator light will flash white, indicating that the Bluetooth pairing list has been cleared.
After clearing the Bluetooth pairing list, try pairing your headphones with your device again to see if the issue has been resolved.
Updating Firmware
If restarting the headphones and clearing the Bluetooth pairing list still doesn’t fix the pairing issue, it may be necessary to update the firmware on your Beats Solo 3 headphones. Firmware updates can provide bug fixes and performance improvements that could help resolve connectivity issues. To update the firmware on your headphones, follow these steps:
- Download the latest firmware update from the Beats website or the Beats app.
- Connect your headphones to your computer using a USB cable.
- Open the firmware update file and follow the on-screen instructions to complete the update process.
Once the firmware update is complete, try pairing your headphones with your device again to see if the problem has been resolved. Firmware updates are essential for keeping your headphones functioning at their best and ensuring a seamless pairing experience.
Connecting Beats Solo 3 to Multiple Devices
Switching Between Devices
Have you ever found yourself in a situation where you want to seamlessly switch between listening to music on your phone and then taking a call on your laptop? With Beats Solo 3, connecting to multiple devices is a breeze. The headphones are equipped with the latest Bluetooth technology that allows you to effortlessly switch between devices without any hassle.
- To switch between devices, simply pause the audio on one device and play it on the other. The headphones will automatically disconnect from the first device and connect to the second device in a matter of seconds. It’s like magic!
- Another handy feature of Beats Solo 3 is the ability to manage pairing priorities. This means that you can prioritize which device you want to connect to first when multiple devices are in range. For example, if you always want your headphones to connect to your phone first, you can set that as the priority in the Bluetooth settings.
Managing Pairing Priorities
Managing pairing priorities is a useful feature that allows you to customize your listening experience. By setting a specific device as the priority, you can ensure that your headphones always connect to that device first. This can save you time and frustration, especially if you have that you use regularly.
To manage pairing priorities on Beats Solo 3, follow these simple steps:
- Go to the Bluetooth settings on your device.
- Find the list of paired devices and locate the Beats Solo 3 headphones.
- Look for an option to set the headphones as the priority device.
- Click on the option and confirm your selection.
By managing pairing priorities, you can make your listening experience more efficient and enjoyable. Say goodbye to the hassle of constantly switching devices or dealing with unreliable connections. With Beats Solo 3, to has never been easier.

