Discover the different types of headphone connections for TVs, including and options. Learn how to set up Bluetooth headphones, use an audio jack, and adjust TV settings for optimal audio output.
Types of Headphone Connections
When it comes to connecting to your TV, you have a couple of options to choose from: wired or wireless. Each type has its own set of advantages and disadvantages, so let’s break them down for you.
Wired Connection
If you prefer a more traditional approach, a wired connection might be the way to go. This involves using a physical cable to your headphones directly to your TV. One of the main benefits of a wired connection is that it typically provides a more stable and reliable audio signal compared to options. Additionally, you don’t have to worry about battery life or signal interference.
To set up a wired connection, simply plug one end of the audio cable into the headphone jack on your TV and the other end into your headphones. Make sure to check the compatibility of the cable with both your TV and headphones to ensure a proper connection.
- Ensure the audio cable is securely plugged in on both ends
- Adjust the volume on your TV to a comfortable level
- Enjoy your favorite shows and movies with crystal-clear audio
Wireless Connection
On the other hand, if you prefer a more seamless and clutter-free setup, wireless headphones might be the way to go. With technology, you can enjoy the freedom of moving around without being tethered to your TV by a cable. This can be especially convenient if you like to multitask or move around while watching TV.

To set up wireless headphones, you’ll need to pair them with your TV using Bluetooth or a wireless transmitter. This process may vary depending on the make and model of your headphones and TV, so be sure to consult the user manuals for specific instructions.
- Put your wireless headphones in pairing mode
- Access the Bluetooth settings on your TV
- Select your headphones from the list of available devices
- Follow any additional prompts to complete the pairing process
- Test the connection by playing audio from your TV
Whether you prefer the reliability of a connection or the convenience of wireless technology, there are plenty of options available to enhance your TV viewing experience. Experiment with both types of headphone connections to see which one works best for you.
Compatible TV Models
Smart TVs
Smart TVs have become increasingly popular in recent years due to their advanced features and connectivity options. These TVs are equipped with built-in Wi-Fi, allowing you to easily connect your Bluetooth headphones without the need for additional adapters. Smart TVs also typically have multiple audio output options, such as HDMI ARC and optical audio, ensuring compatibility with a wide range of headphones.
One of the key advantages of using Bluetooth headphones with a smart TV is the convenience it offers. You can seamlessly switch between watching TV and listening to music without having to deal with tangled wires or cumbersome connections. Additionally, many smart TVs come with dedicated headphone jacks or Bluetooth pairing menus, making the setup process quick and straightforward.

Non-Smart TVs
If you have a non-smart TV, don’t worry – you can still enjoy the benefits of using Bluetooth headphones with the right accessories. One option is to use a Bluetooth transmitter, which connects to your TV’s audio output and transmits the audio signal to your headphones wirelessly. These transmitters are easy to set up and can be found at affordable prices.
Another option for non-smart TV owners is to use a headphone jack or RCA adapter. By connecting your headphones directly to the TV’s audio output, you can enjoy high-quality sound without any lag or interference. This method is ideal for older TVs that may not have built-in Bluetooth capabilities.
Setting Up Bluetooth Headphones
Pairing Process
Pairing your Bluetooth headphones with your TV can seem like a daunting task, but fear not, it’s actually quite simple once you know the steps. First, make sure your are in pairing mode. This is usually done by holding down the power button for a few seconds until you see a flashing light indicating they are ready to .
Next, grab your TV remote and navigate to the Bluetooth settings. Depending on your TV model, this can usually be found in the settings menu under “Connections” or “Devices.” Once you’ve located the Bluetooth settings, select the option to pair a new device.

Now, it’s time to put your headphones into discovery mode. This is typically done by holding down the Bluetooth button for a few more seconds until your TV detects the headphones. Once the TV recognizes the headphones, you’ll see them appear on the list of available devices. Select your headphones from the list and confirm the pairing.
Congratulations, you’ve successfully paired your Bluetooth headphones with your TV! Now you can enjoy your favorite shows and movies without disturbing others around you.
Troubleshooting Connection Issues
But what happens if you encounter connection issues along the way? Don’t worry, we’ve got you covered. Here are some common troubleshooting tips to help you get your Bluetooth headphones working seamlessly with your TV.
- Check the Bluetooth Range: Make sure your headphones are within the recommended range of your TV to ensure a stable connection. Move closer to the TV if necessary.
- Restart Devices: Sometimes a simple restart of both your headphones and TV can solve connectivity issues. Turn them off, wait a few seconds, and then power them back on.
- Update Firmware: Check if there are any firmware updates available for your headphones or TV. Updating the firmware can often resolve compatibility issues.
- Forget and Re-Pair: If all else fails, try forgetting the headphones on your TV and re-pairing them from scratch. This can sometimes reset any connection glitches.
By following these troubleshooting tips, you should be able to overcome any Bluetooth connection issues and enjoy a seamless audio experience with your TV and headphones. Remember, patience and persistence are key when it comes to troubleshooting technology.
Using an Audio Jack
Connecting via Headphone Jack
When it comes to connecting your headphones to your TV using an audio jack, the process is quite straightforward. First, locate the headphone jack on your TV, which is usually located on the side or back of the television. Then, simply plug one end of the headphone cable into the headphone jack on the TV and the other end into your headphones.

- Make sure to adjust the volume on both your TV and headphones to a comfortable level before starting your viewing experience.
- If you’re using a longer cable to connect your headphones, consider using a cable management system to keep things organized and prevent potential tripping hazards.
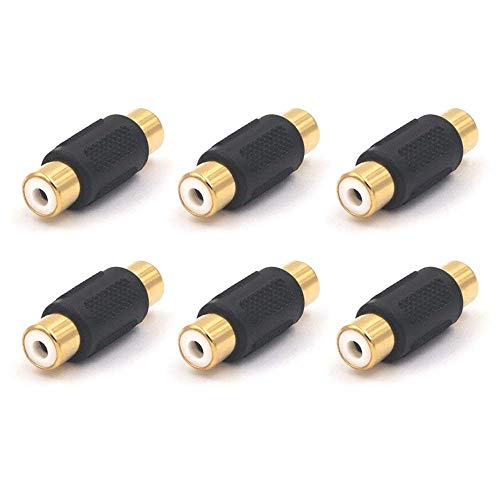
Using an RCA Adapter
If your TV does not have a headphone jack, don’t worry – you can still connect your headphones using an RCA adapter. This adapter allows you to convert the audio output from your TV into a format that can be used with your headphones.
- To use an RCA adapter, simply plug the red and white RCA cables into the corresponding audio output ports on your TV.
- Then, connect the other end of the RCA cables to the RCA adapter, which will have a headphone jack where you can plug in your headphones.
- Adjust the volume on both your TV and headphones to ensure optimal sound quality.
By following these simple steps, you can easily your headphones to your TV using an audio jack or RCA adapter, allowing you to enjoy your favorite shows and movies without disturbing others around you.
Adjusting TV Settings
When it comes to optimizing your TV settings for the best audio experience, there are a few key adjustments you can make. From fine-tuning the audio output settings to exploring different volume control options, taking the time to adjust these settings can make a significant difference in how you enjoy your favorite movies and shows.
Audio Output Settings
One of the first things you’ll want to check when adjusting your TV settings is the audio output settings. These settings determine how the audio from your TV is delivered to your or external speakers. Depending on your TV model, you may have a variety of options to choose from, including:
- Stereo: This setting delivers audio through two channels, creating a sense of depth and space in the sound.
- Surround Sound: For a more immersive audio experience, surround sound settings can simulate a multi-dimensional sound environment.
- Dolby Atmos: If your TV supports it, Dolby Atmos technology can provide a truly cinematic audio experience with sound that moves around you in three-dimensional space.
By experimenting with these different audio output settings, you can tailor the sound to suit your preferences and enhance your overall viewing experience.
Volume Control Options
In addition to adjusting the audio output settings, exploring different volume control options can also improve your audio experience. Most TVs offer a range of volume control settings, including:
- Manual Volume Control: The traditional method of adjusting the volume using the TV remote or buttons on the TV itself.
- Volume Normalization: This feature helps to balance the volume levels between different programs and commercials, preventing sudden changes in volume.
- Audio Equalizer: Some TVs allow you to customize the audio settings with an equalizer, adjusting the levels of bass, treble, and other frequencies to your liking.
Experimenting with these volume control options can help you find the perfect balance of audio levels for clear dialogue, impactful sound effects, and immersive music in your favorite TV shows and movies.
By taking the time to adjust your TV settings, including audio output settings and volume control options, you can enhance your overall viewing experience and enjoy high-quality audio that complements the visual content on your screen. So why not dive into your TV settings today and start fine-tuning for the best audio experience possible?
