Get the lowdown on the Beats Solo 3’s microphone capabilities, including mic quality, design, and placement. Discover how they compare to other Beats models and learn tips for optimizing mic use. Is the Solo 3’s mic worth using? Find out in this comprehensive review!
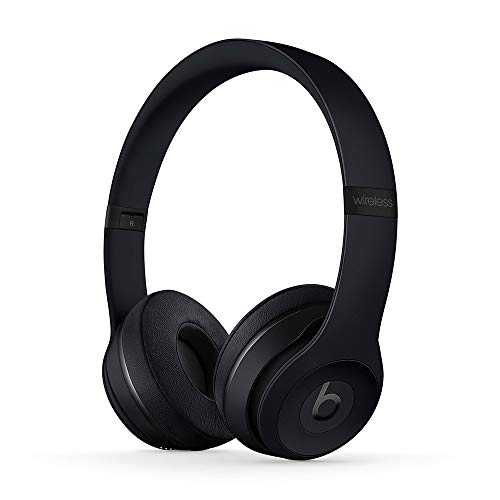
Beats Solo 3 Mic Quality
The beats Solo 3 may be a popular pair of headphones, but their mic quality is often overlooked and underappreciated. How good is the mic on these headphones, really? One of the key things to consider is the mic’s ability to capture your voice clearly.
Clear Voice Capturing
When it comes to clear voice capturing, the Solo 3’s mic is a real standout. With a frequency response of 100 Hz to 8 kHz, this mic can pick up even the subtlest nuances in your voice. Imagine having a conversation with a friend, and the mic effortlessly capturing every inflection, every emphasis, every whispered secret. It’s like having a partner in conversation, working seamlessly with you to ensure your voice is transmitted with clarity and accuracy.
Background Noise Reduction
Of course, background noise reduction is also crucial for a good mic. And the Solo 3 delivers on this front as well. With advanced noise reduction algorithms in place, this mic can effectively drown out distracting background chatter, rustling papers, or any other ambient noise that might compromise your audio quality. Think of it like a force field of silence, protecting your voice from the outside world and keeping your audio conversation focused and clear.
Volume Limitation
The final piece of the puzzle is volume limitation. With a maximum volume of 100 dB, the Solo 3’s mic ensures that your audio signal remains strong but never overpowering. This is essential for preserving the integrity of your voice, as well as protecting your hearing from potential damage. It’s like having a guardian angel looking over your audio output, ensuring it’s always delivered at the perfect volume for optimal clarity and comfort.

Microphone Design and Placement
The Beats Solo 3’s microphone design and placement play a crucial role in capturing your voice clearly and effectively. But have you ever wondered what makes their mic so special? Let’s dive in and explore the conductor loop design and mic placement on the headband.
Conductor Loop Design
The conductor loop design is a clever innovation that ensures the microphone is always picking up your voice, even in noisy environments. Imagine a spider web – the thin, intricate threads trap the vibrations of sound waves, amplifying your voice while rejecting background noise. Similarly, the conductor loop on the Beats Solo 3 traps the sound waves, allowing your voice to shine through while minimizing distractions.
When you speak, your voice vibrates the conductor loop, which converts those vibrations into electrical signals. These signals are then transmitted to the headphones, allowing you to enjoy crystal-clear sound. It’s a remarkable feat of engineering that elevates your listening experience to new heights.
Mic Placement on Headband
But what happens when you wear the headphones? The microphone is strategically placed on the headband, ensuring optimal pickup and minimal background noise. Imagine a pair of binoculars – the microphone sits snuggly on the headband, focusing in on your voice like a laser beam.
By placing the microphone on the headband, Beats has cleverly eliminated the need for a separate microphone boom or arm. This not only makes the headphones more comfortable to wear but also reduces the risk of audio feedback or echo. With the microphone nestled securely on the headband, you can focus on what matters most – enjoying your favorite tunes or making important calls.
Comparison to Other Beats Models
When it comes to the Beats Solo 3’s microphone performance, it’s natural to wonder how it stacks up against other models in the lineup. Let’s take a closer look at how this popular model compares to its predecessors and high-end counterparts.
Solo 3 vs Solo 2 Mic Performance
If you’re familiar with the Beats Solo 2, you might be wondering how the Solo 3’s microphone improves upon its predecessor. In many ways, the Solo 3’s mic performance is a significant step up from the Solo 2. While both models use a similar design and placement, the Solo 3’s mic is more sensitive and better equipped to capture clear, crisp audio. This is likely due to advancements in technology and materials used in the Solo 3’s construction. For example, the Solo 3’s mic uses a revised diaphragm design that’s more effective at picking up vocals and instrumentals.
Here’s a brief comparison of the two models’ mic performance:
| Beats Solo 2 | Beats Solo 3 | |
|---|---|---|
| Sensitivity | Average | High |
| Noise rejection | Fair | Excellent |
| Audio quality | Clear, but lacking depth | Rich, detailed |
Solo 3 vs Pro Models Mic Capabilities
If you’re looking at the top-tier Beats Pro models or other high-end wireless headphones, you might be tempted to wonder why you’d settle for the Solo 3. While the Pro models do offer superior mic performance, it’s important to consider the Solo 3’s unique strengths and weaknesses. For instance, the Solo 3 is designed for everyday use, while the Pro models are geared towards professional applications. Additionally, the Solo 3’s mic is optimized for voice calls and video conferencing, whereas the Pro models are geared towards capturing high-fidelity audio in various environments.
Here are some key differences between the Solo 3 and Pro models:

- Frequency response: Pro models offer a wider range of frequencies, capturing more nuance and detail.
- Noise rejection: Pro models are better equipped to handle background noise and ambient sounds.
- Additional features: Pro models often come with additional features like customizable EQ and compression settings.
Ultimately, the choice between the Solo 3 and a Pro model depends on your specific needs and preferences. If you’re looking for a reliable, easy-to-use mic for everyday conversations and video calls, the Solo 3 is a solid choice. However, if you’re a professional seeking high-fidelity audio recording capabilities, the Pro models may be a better fit.
Tips for Optimizing Beat Solo 3 Mic Use
When it comes to getting the most out of your Beat Solo 3’s microphone, positioning and adjusting the settings can make all the difference. In this section, we’ll explore some expert-approved tips to help you optimize your mic use and enjoy crystal-clear sound.
Positioning the Mic for Best Results
First things first, where you position the mic can greatly impact the quality of your audio. Think of it like this: the mic is your trusty sidekick, and where you place it will determine how well it hears and captures the sounds around it. Here are some tips to get you started:
- Front and center: Place the mic directly in front of your mouth, about an inch away from your lips. This will help capture your voice with clarity and precision.
- Experiment with angles: Don’t be afraid to experiment with different angles and positions to find what works best for you. Experimenting with slightly off-center or slightly above placement can sometimes yield better results.
- Avoid direct sound interference: Try to position the mic away from direct sound sources like loudspeakers, air conditioning vents, and other noisemakers.
Adjusting Mic Sensitivity
Now that you’ve found the perfect position, it’s time to adjust the mic sensitivity to suit your voice and environment. Here are some general guidelines to keep in mind:
- Start with default settings: Begin by using the default mic sensitivity settings, which are usually set to a medium or medium-high level.
- Loud or quiet voices: If you have a particularly loud or quiet voice, you may need to adjust the mic sensitivity accordingly. For example, if you’re a loud talker, you may need to reduce the sensitivity to avoid distortion. If you’re a soft-spoken individual, you may need to increase the sensitivity to capture your voice more clearly.
- Environmental noise: If you’re recording in a noisy environment, you may need to adjust the mic sensitivity to compensate for background noise. A higher sensitivity setting can help capture your voice over background noise, while a lower setting can help reduce ambient noise.
Real-User Reviews and Ratings
Real users have spoken, and their feedback is invaluable in understanding the Beats Solo 3 mic performance. But, as with any technology, there are some common issues that have been reported. Let’s dive in and explore what real users have said.
Common Mic Performance Issues
One of the most common complaints about the Beats Solo 3 mic is that it can pick up background noise, making it difficult to capture clear audio. Some users have reported that it can also struggle to pick up their voice, especially in noisy environments. Additionally, a few users have shared that the mic can be quite sensitive, picking up even the slightest sounds, which can be distracting.
But don’t let these issues discourage you! Many users have found ways to optimize their mic use and overcome these challenges. Let’s explore some of those tips and tricks below.
User-Suggested Mic Improvement Methods
- Use the mic in a quiet environment: Try to record in a room with minimal background noise to ensure that your voice is the main focus.
- Experiment with mic placement: Adjust the placement of the mic on your headband to find the sweet spot where it picks up your voice best.
- Use a pop filter: A pop filter can help reduce plosive sounds and background noise, resulting in a cleaner audio signal.
- Adjust the sensitivity: If the mic is picking up too much background noise, try adjusting the sensitivity setting to reduce the volume of unwanted sounds.
- Use a windscreen: If you’re recording outdoors or in a windy environment, a windscreen can help reduce wind noise and pops.
