This handbook covers the entire process of setting up and using the Focusrite Scarlett 2i2, from installing drivers and connecting to a computer, to recording in mono or stereo, and troubleshooting common issues.
Setting Up the Scarlett 2i2
Before you start using your Scarlett 2i2, there are a few initial setup steps to get you started. It’s like preparing a canvas for a masterpiece – you need to set the stage for a harmonious recording experience!
Installing the Drivers
The first step is to install the Scarlett 2i2 drivers, which are usually provided by Focusrite or can be downloaded from their website. Think of drivers as the bridges that connect your hardware to your computer. Without them, your Scarlett 2i2 wouldn’t be able to communicate with your machine, making it unable to function. You can usually find the drivers on the Focusrite website by searching for the specific Scarlett 2i2 model number.
Connecting to a Computer
Once the drivers are installed, it’s time to physically connect your Scarlett 2i2 to your computer. This is like plugging in the power cord to your device – it’s a crucial step that needs to be done correctly. Connect the USB cable provided with your Scarlett 2i2 to a free USB port on your computer. Make sure the USB cable is securely plugged in and won’t come loose during recording. With this connection established, you’re now ready to start using your Scarlett 2i2!
Recording with the Scarlett 2i2
Configuring Input Settings
Before you start recording, take a moment to configure your input settings to ensure the best possible sound quality. Think of this step as setting the tone for your recording, much like adjusting the settings on your camera before taking a photo. The Scarlett 2i2 features a range of input settings, including phantom power, polarity, and input gain. By configuring these settings correctly, you’ll be able to capture the precise sound you’re aiming for.
To access the input settings, navigate to the Scarlett 2i2’s control panel, usually found on the top-left corner of the interface. Look for the “Options” menu and select “Input Settings”. Here, you’ll find a range of settings that can be adjusted to suit your specific needs.
Setting the Input Gain
Once you’ve configured the basic input settings, it’s time to set the input gain. Input gain refers to the level at which the audio signal is amplified before it’s sent to the recording software. Think of input gain as the volume control on your favorite instrument – it needs to be set just right to capture the perfect sound.
To set the input gain, look for the “Gain” or “Level” control on the Scarlett 2i2’s control panel. This control allows you to adjust the gain in increments of 1.5 dB, giving you precise control over the level. When setting the gain, it’s a good idea to start with a moderate setting and adjust accordingly. If the signal is too quiet, increase the gain. If it’s too loud, decrease the gain.
Recording in Mono or Stereo
The Scarlett 2i2 allows you to record in either mono or stereo, depending on your specific needs. Mono recording is ideal for capturing a single sound source, such as a vocal or instrument, while stereo recording allows you to capture two separate sound sources, such as drums or two instruments. When deciding whether to record in mono or stereo, consider the type of recording you’re making and the level of detail you want to capture.
To record in mono, simply select the “Mono” option in the Scarlett 2i2’s recording software. This will combine the left and right channels into a single mono signal. For stereo recording, select the “Stereo” option and adjust the pan controls to place each channel in the correct location within the stereo field.

Using the Scarlett 2i2 with iOS Devices
When it comes to connecting your Scarlett 2i2 to an iOS device, you’re probably wondering what all the fuss is about. After all, can’t you just plug it in and go? Well, not exactly. But don’t worry, we’ve got you covered. In this section, we’ll walk you through the process step-by-step, so you can start recording with ease.
Connecting via USB
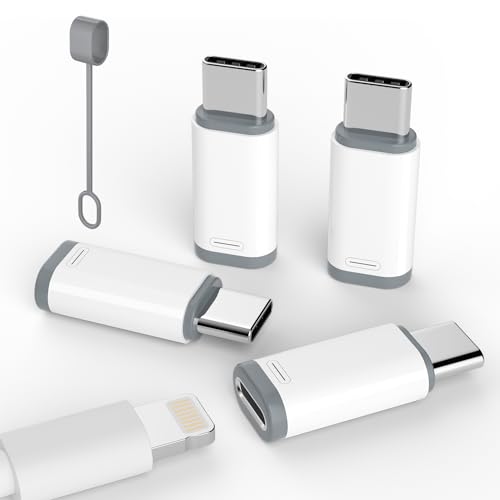
The first step in connecting your Scarlett 2i2 to an iOS device is to ensure you have the right cables. You’ll need a USB-C to USB-C cable, which is usually included with your Scarlett 2i2. If you have an older device with a Lightning port, you’ll need a Lightning to USB-C adapter. Now, let’s connect:
- Plug in your USB-C cable (or adapter) to the USB-C port on your Scarlett 2i2.
- Connect the other end to your iOS device’s Lightning port.
- Wait for your device to detect the Scarlett 2i2 (this might take a few seconds).
Once connected, you should see a popup on your device asking you to trust the device. Tap “Trust” to allow the connection.
Monitoring Audio on iOS
Now that you’ve connected your Scarlett 2i2, it’s time to monitor your audio. Monitoring is essential to ensure you’re capturing the sound you want. Here’s how:
- Open the Music app or a compatible DAW (digital audio workstation).
- Select the Scarlett 2i2 as your audio interface.
- Set the input source to the Scarlett 2i2 (this might vary depending on your DAW).
- Adjust the input levels to ensure you’re capturing the right volume.
- Listen back to your audio using headphones or speakers connected to your Scarlett 2i2.
That’s it! You’re now set up to record and monitor your audio on your iOS device using your Scarlett 2i2. In the next section, we’ll cover converting between formats.
Converting between Formats
When it comes to converting between different digital formats, you might find yourself needing to adapt to different recording standards. Whether you’re converting between Alesis ADAT and S/PDIF or vice versa, you’ll want to make sure you do it efficiently and effectively. In this section, we’ll delve into the world of format conversions and provide you with the insider knowledge to get the job done.
Converting Alesis ADAT to S/PDIF
Converting Alesis ADAT to S/PDIF is a relatively straightforward process that can be achieved through the use of an ADAT-to-S/PDIF converter. These devices allow you to connect your Alesis ADAT machine to a S/PDIF-enabled device, such as a mixing console or a digital audio workstation (DAW).
When choosing an ADAT-to-S/PDIF converter, consider the following factors:
- Sample rate compatibility: Make sure the converter can handle the same sample rate as your Alesis ADAT machine.
- Bit depth support: Ensure the converter can transmit the same bit depth as your ADAT machine.
- Compatibility: Check that the converter is compatible with your DAW or mixing console.
Converting S/PDIF to ADAT
Converting S/PDIF to ADAT is equally as simple as the previous process. You can use an S/PDIF-to-ADAT converter to connect your S/PDIF-enabled device to an Alesis ADAT machine. When choosing an S/PDIF-to-ADAT converter, consider the same factors as listed above.
In some cases, you might not need a dedicated converter to convert between formats. Many DAWs and mixing consoles come equipped with built-in converters that allow you to connect Alesis ADAT machines directly. Always check your device’s user manual or manufacturer’s website for more information on compatibility and conversion capabilities.
By following these simple steps and considering the factors mentioned above, you’ll be well on your way to converting between Alesis ADAT and S/PDIF formats with ease.
Troubleshooting Common Issues
Sometimes, despite your best efforts, you may encounter issues with your Scarlett 2i2. Don’t worry, we’re here to help you troubleshoot common problems and get you back to recording in no time!
No Sound or Distortion
Have you noticed that your Scarlett 2i2 is completely silent, or you’re getting distorted sound? This could be due to a few reasons. First, ensure that your device is properly connected to your computer and that the drivers are installed correctly. Check the Scarlett 2i2’s LED indicators to see if they’re lit up normally. If everything seems to be in order, try adjusting the input gain levels or resetting the Scarlett 2i2 to its default settings.
Input Noise or Hum
Are you dealing with unwanted noise or hum on your recordings? This is often caused by electromagnetic interference (EMI) or ground loops. To fix this issue, try moving the Scarlett 2i2 to a different location with fewer electronic devices nearby. You can also try grounding your equipment, such as connecting your Scarlett 2i2 to a ground wire on your surge protector.

Connection Problems
Are you experiencing connection problems between your Scarlett 2i2 and your computer? Ensure that you’re using the correct USB cable and that it’s securely plugged in. If you’re still experiencing issues, try restarting your Scarlett 2i2 and your computer, or try connecting your Scarlett 2i2 to a different USB port.
