Boosting bass, reducing mids, and cutting highs – learn the art of equalizer adjustments to enhance your music listening experience. Understand equalizer settings and types to get the best sound quality.
Understanding Equalizer Settings
When it comes to audio processing, equalizing your sound is a crucial step in bringing out the best in your music, podcast, or video. But what exactly do equalizer settings do, and how do you choose the right ones? Let’s dive in and explore the world of EQ settings.
Stereo Widening vs. Depth Control
Two fundamental concepts in equalizer settings are stereo widening and depth control. Stereo widening refers to the ability of the EQ to enhance the sense of space and width in the stereo field, making your sound more expansive and immersive. Depth control, on the other hand, affects the perceived distance and proximity of sound elements, allowing you to pinpoint specific frequencies or instruments within the mix. Think of it like adjusting the focus on a camera – stereo widening adjusts the aperture, while depth control adjusts the distance.
Frequency Response Explained
Frequency response is the range of frequencies that your EQ is capable of processing. It’s measured in Hertz (Hz), with lower frequencies ranging from 20-60 Hz (bass) and higher frequencies ranging from 2,000-20,000 Hz (treble). When adjusting the frequency response, you’re essentially telling the EQ where to emphasize or attenuate specific frequencies. For example, boosting the low end can add weight to your sound, while cutting high frequencies can reduce harshness.
EQ Frequency Ranges
Different frequency ranges serve different purposes in music production. Here’s a breakdown of the most common ranges and their uses:
* Low-end frequencies (20-60 Hz): Add weight, presence, and energy to your sound
* Mid-range frequencies (100-800 Hz): Focus on the body and definition of your sound
* High-end frequencies (2,000-20,000 Hz): Enhance clarity, brightness, and detail
Equalizer Types
Graphic EQ Basics
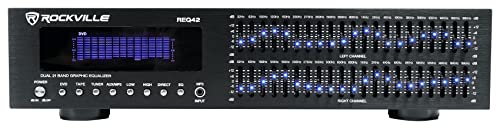
In the world of audio processing, equalizers are like puzzles – they help you adjust the of your audio to achieve the perfect fit. Among the various types, graphic equalizers (GEQs) are a popular choice. So, what makes them unique? A graphic equalizer is essentially a display of frequency response curves, allowing you to visualize and adjust up to 31 bands of frequency simultaneously. It’s like having a map to navigate the frequency spectrum, identifying areas that need attention and making targeted adjustments. Think of it as a scorecard for your audio; the more precise you are, the better the outcome.
GEQs are often used in live sound applications, such as concerts and public speaking events, where a wide range of frequencies needs to be addressed quickly. With a GEQ, you can make broad adjustments to the overall tone and balance of your audio, ensuring it resonates with the audience.
Parametric EQ Demystified
Parametric equalizers (PEQs) are the ninja warriors of the equalization world. With the ability to target specific frequencies, Peq’s are like precision-guided missiles that strip away unwanted resonance and boost desired frequencies. PEQs work by allowing you to adjust three key parameters: frequency, gain, and bandwidth.
The frequency parameter specifies the exact frequency you want to target, measured in Hertz (Hz). The gain parameter controls the amount of amplification or attenuation applied to that frequency. Lastly, the bandwidth determines the range of frequencies affected by the adjustment.
Imagine you’re trying to eliminate a pesky noise at 200 Hz. With a PEQ, you can target that specific frequency, adjust the gain to reduce its amplitude, and set the bandwidth to minimize the impact on neighboring frequencies. It’s like having a laser beam that hits the problem spot, leaving the rest of the audio undisturbed.
 Equalizer, The / Equalizer 2, The / Equalizer 3, The - Multi-Feature (3 Discs) - Blu-ray + Digital
Semiperfect EQ: A Hybrid Approach
Sometimes, the perfect equalizer doesn’t exist, but a semiperfect hybrid approach might. In reality, EQing is often a blend of graphic and parametric equalization. By combining the strengths of each, you can create a customized EQ that caters to your specific needs.
Think of it as having a supercar with advanced features like adaptive transmission, ABS, and traction control. In the same way, a semiperfect EQ provides a layer of adaptability, allowing you to fine-tune your audio by layering PEQs, GEQs, or even EQ plugins. This hybrid approach allows you to target specific frequencies with precision while also addressing broader tonal balance issues.
By embracing the diversity of equalizer types, you can unlock the full potential of your audio. Whether it’s a graphic equalizer’s visual arsenal, a parametric equalizer’s precision-guided attacks, or a semiperfect EQ’s adaptable hybrid approach, understanding each type will elevate your audio processing capabilities, transforming your recordings and live performances.
Adjusting the Equalizer
EQing for Music Genres
When it comes to adjusting the equalizer, one crucial aspect is understanding how different music genres require distinct EQ settings. You see, every genre has its unique sonic signature, and a well-calibrated EQ can make all the difference in bringing out the best in your music. Think of it like adjusting the mix of ingredients in a recipe – the right balance of frequencies can elevate your sound, making it more refined and polished.

For instance, when it comes to electronic dance music (EDM), a strong emphasis on the low-end is crucial to create that infectious bassline that gets people moving. In contrast, classic rock music often benefits from a more balanced EQ, with a slight boost in the midrange to emphasize the guitar riffs and vocals. Meanwhile, jazz and acoustical music often require a more restrained approach, with a focus on enhancing the nuances of the instruments and vocals.
By understanding the unique EQ requirements of your genre, you can make informed decisions about how to balance your sound. So, take the time to experiment with different EQ settings for your favorite tracks, and see how it can elevate your music to the next level.
EQ Settings for Common Issues
When it comes to adjusting the equalizer, it’s essential to identify and address common issues that can affect the sound quality. This section will provide an in-depth look at the most critical EQ settings for common audio problems.
Boosting Bass for Better Sound
Have you ever listened to music and felt that the bass is lacking? Perhaps the music seems flat and lifeless? Boosting the bass can be a great way to add depth and energy to your audio. But where do you start? The first step is to find the range of frequencies that correspond to the bass. This typically falls between 30-100 Hz. Once you’ve located this range, you can start boosting the levels to taste. However, be cautious not to overdo it, as excessive bass can lead to an unbalanced sound.
When boosting bass, it’s essential to consider the type of music you’re listening to. For example, genres like hip-hop and electronic music often benefit from boosted bass, while genres like classical music usually require more subtle boosting. Additionally, the type of room you’re in can also impact your perception of the bass. In a small room, boosting the bass can make the sound feel more intimate, while in a large room, it can help fill the space.

Reducing Boosted Bass for Clearer Mids
On the other hand, if you find that the bass is overpowering the midrange, it may be necessary to reduce the levels. This is particularly common with live recordings or music that features complex drum patterns. When reducing boosted bass, it’s crucial to be precise and gentle, as excessive cutting can lead to an unbalanced sound. Start by reducing the levels in the 100-200 Hz range, as this is typically where the bass and midrange overlap.
Another tip for reducing boosted bass is to focus on the resonance of the instrument. For example, if the bass is overpowering the vocals, try reducing the levels in the 100-150 Hz range. This will help to restore clarity and balance to the sound.
High-Frequency Cutting for Clarity
Clarity is a critical aspect of good sound quality, and high-frequency cutting can be a powerful tool in achieving this goal. High frequencies above 5 kHz can sound harsh and unnatural, especially in bright or reverby environments. Cutting these frequencies can help to smooth out the sound and reduce listening fatigue.
One common scenario where high-frequency cutting is necessary is in rooms with reflective surfaces. When sound bounces off these surfaces, it can create a harsh, boxy sound. By cutting high frequencies, you can reduce this reverberation and create a more natural sound.
In conclusion, EQ settings for common issues are crucial in achieving good sound quality. By understanding how to boost and cut frequencies, you can address common audio problems and create a balanced, natural sound that engages and delights listeners.
