Get the most out of your AirPods by calibrating them for a tailored listening experience. Discover how to identify potential issues and resolve common problems.
Before Calibrating Your AirPods
Before you start calibrating your AirPods, it’s essential to ensure that they’re in top condition. After all, you can’t expect perfect sound quality if your AirPods are damaged or ill-fitting. Let’s go through a quick check to get you started.
Checking AirPods for Damage
Take a glance at your AirPods and look for any visible signs of damage. Check for cracks, dents, or scratches on the surface. If you spot any damage, it’s recommended to get your AirPods repaired or replaced before proceeding with calibration. Remember, a damaged AirPod can affect the overall sound quality and even compromise the ergonomics of the fit.
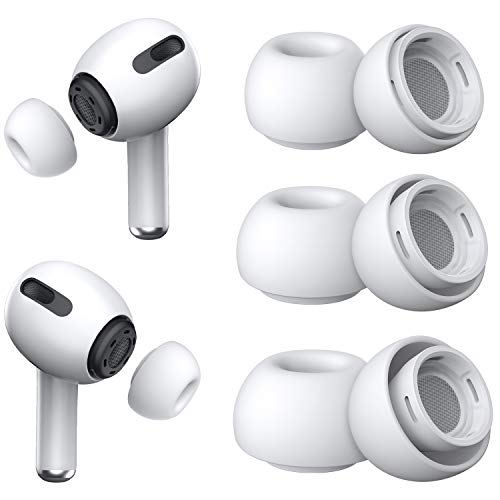
Ensuring Proper Fit
Next, ensure that your AirPods fit your ears properly. A proper fit is crucial for optimal sound quality and comfort. If your AirPods don’t fit snugly, you might experience ambient noise infiltrating the sound or even ear fatigue. To check the fit, simply put the AirPods in your ears and make sure they’re seated comfortably. If needed, try adjusting the ear tips to get a better seal. You can also try wearing them for a short period to get a feel for the fit.
Pre-Calibration Checklist
Before calibrating your AirPods, it’s essential to ensure that you have all the necessary settings in place to get the most out of the process. Think of it like preparing for a culinary masterpiece – you wouldn’t start cooking without having the right ingredients and utensils, would you?

Ensuring Default Settings
Take a moment to double-check that your AirPods are set to their default settings. This might seem obvious, but it’s surprising how often we overlook the little things. Make sure that:
- Your AirPods are set to the correct language and region
- The correct audio source is selected (e.g., music, phone call, or video)
- The equalization settings are set to automatic
- The noise cancellation and transparency mode are turned off (or on, depending on your preferences)
Updating AirPods Software
Now that you’ve checked your default settings, it’s time to make sure your AirPods are running on the latest software. This is like keeping your kitchen appliances up-to-date – you want the latest features and bug fixes to ensure seamless performance. To update your AirPods software:
- Open the Settings app on your iPhone or iPad
- Tap on “General” and then “About”
- Look for the “Wireless Updates” section and tap on it
- If an update is available, tap on “Download and Install”
- Wait for the update to complete, then restart your AirPods
By following these simple steps, you’ll be well-prepared to calibrate your AirPods and enjoy an enhanced listening experience.
Calibration Process
In the world of sound, calibration is like fine-tuning a musical instrument – it’s all about finding the perfect harmony. When it comes to your AirPods, calibration is crucial to ensure that the sound quality is tailored to your unique hearing preferences. In this section, we’ll take you through the process of adjusting your AirPods to perfection.
Adjusting Audio Balance
Before we dive into the nitty-gritty of audio calibration, let’s talk about audio balance. Imagine your ears as a pair of scales, weighing the volume of sound coming from left and right. When the sound is balanced, the scales are equal, but when it’s not, one side tips the other way. Adjusting audio balance is like leveling the scales, giving you a crystal-clear listening experience. Here’s how to do it:
- Open the Settings app on your iPhone or iPad
- Go to “Sounds and Haptics”
- Adjust the “Balance” slider to your liking
- Toggle “Live Listen” on or off to hear the effect in real-time
Tweaking EQ Settings
Now that we’ve got the audio balance sorted, it’s time to get finicky with the EQ settings. Imagine EQ as a tone knob on a guitar amp – it allows you to tap into specific frequencies and amplify or reduce them. For some, this might seem like a daunting task, but trust us, it’s worth the effort. Here’s a step-by-step guide to tweaking EQ settings:
- Open the Settings app on your iPhone or iPad
- Go to “Sounds and Haptics”
- Tap “EQ”
- Adjust the frequency sliders to your liking, taking into account factors like room acoustics and personal preferences
- Experiment with different EQ settings to find the perfect sound for your unique ears
Optimizing Sound Quality
When it comes to maximizing the sonic bliss of your AirPods, optimizing sound quality is the name of the game. In this section, we’ll dive into the nitty-gritty of how to tailor your listening experience to your unique ear shape and preferences. After all, music is a highly subjective art form, and what works for one person may not work for another.
Compensating for Ear Shape
Did you know that the shape of your ear canal can significantly affect the way sound waves reach your eardrum? It’s true! The contours of your outer and inner ear, including the ear canal’s diameter, length, and curvature, can either amplify or mute specific frequencies. For instance, if your ear canal is particularly narrow, you may find that bass notes become muffled or overwhelmingly dominant. To compensate for this, you can try adjusting the EQ settings to emphasize the mid-range frequencies, which tend to sit well in most ear canals. By taking the unique shape of your ears into account, you can create a more balanced and harmonious listening experience that’s tailored to your individual needs.
Customizing Bass Response
Bass response, in particular, is an area where ear shape can play a significant role. If your ear canal is relatively long or narrow, you may find that bass notes become over-accentuated or even overwhelming. This is because the sound waves have a longer distance to travel before reaching your eardrum, giving the bass notes a boost. Conversely, if your ear canal is short and wide, you may find that the bass notes are suppressed or lackluster. By adjusting the EQ settings to compensate for your ear shape, you can effectively rebalance the bass response to your liking. For example, if you prefer a more balanced sound, you can try boosting the mid-range frequencies to counterbalance the over-emphasis on bass notes. Experimenting with different EQ settings and adjusting to your ear shape can help you achieve the perfect blend of bass, mid-range, and treble.
Troubleshooting Issues
Resolving Audio Distortion
Are you experiencing distorted audio when using your AirPods? Don’t worry – it’s a common issue that can be resolved with a few simple steps. Audio distortion occurs when the sound waves are disrupted, resulting in a warbled or mutilated sound. Before we dive into the solution, let’s quickly identify some common causes of audio distortion:
- Faulty AirPods or earbuds
- Incorrect pairing with your device
- Environmental factors such as background noise or proximity to electromagnetic sources
- Software glitches or outdated software
If you’re experiencing audio distortion, try the following:
- Restart your AirPods and device
- Check for software updates and install the latest version
- Try resetting your AirPods by pressing and holding the setup button on the charging case for 10 seconds
- If none of the above steps resolve the issue, try resetting your device’s network settings
If the problem persists, it’s possible that there’s a hardware issue with your AirPods. In this case, it’s recommended to contact Apple support or visit an authorized service provider for further assistance.
Addressing Volume Imbalance
Struggling with an uneven volume when listening to your favorite tracks? Volume imbalance can be frustrating, especially when it affects your listening experience. Before we explore the solution, let’s quickly identify some common causes of volume imbalance:
- Worn or damaged earbuds
- Incorrect pairing with your device
- Hardware issues with your AirPods
- Software glitches or outdated software
To resolve volume imbalance, try the following:

- Check your AirPods for signs of wear or damage
- Restart your AirPods and device
- Update your AirPods software to the latest version
- Try resetting your AirPods by pressing and holding the setup button on the charging case for 10 seconds
If the problem persists, it’s possible that there’s a hardware issue with your AirPods. In this case, it’s recommended to contact Apple support or visit an authorized service provider for further assistance.
Remember, a well-maintained and properly calibrated pair of AirPods can greatly improve your listening experience. If you’re unsure about the best way to resolve volume imbalance or audio distortion, don’t hesitate to reach out to Apple support for personalized assistance.
