Get the best sound quality from your TV by connecting your loudspeakers. Follow this comprehensive guide to prepare your equipment, connect your speakers, and optimize your settings for an enhanced viewing experience.
Preparing Your Equipment
Before you start setting up your home theater system, it’s essential to prepare your equipment. Imagine building a house without laying a solid foundation – it won’t stand the test of time! Similarly, setting up your audio equipment requires attention to detail, patience, and a systematic approach.
Unpacking Your Loudspeakers
Take your time when unpacking your loudspeakers. It’s like unwrapping a gift – you want to unfold each component with care, ensuring that it’s free from damage and ready for use. Check the packaging for any signs of damage or wear, and inspect each speaker for any visible defects. Make sure you have all the necessary accessories, such as stands, cables, and remote controls.
Checking Your TV’s Audio Output
Next, you’ll need to check your TV’s audio output settings. Think of your TV’s audio output as the starting point of your home theater journey – it’s the foundation upon which your entire system is built. Check your TV’s settings menu to ensure that the audio output is set to the correct format, whether it’s HDMI, ARC, or optical. You can test your TV’s audio output by playing a movie or a music video and checking the sound quality.
Powering on Your Equipment
Now that you’ve prepared your equipment and checked your TV’s audio output, it’s time to power on your entire system. It’s like turning on the key to a newly assembled engine – you want to ensure that everything is working in harmony. Start with your TV, then power on your audio equipment, and finally, your speakers. Test each component to ensure that it’s functioning correctly, and make any necessary adjustments to the settings or volume levels.
Connectivity Options
When it comes to connecting your loudspeakers to your TV, you’ve got a few options to choose from. In this section, we’ll explore the most common ones and provide a step-by-step guide to help you get started.
HDMI Connection Guide
The HDMI connection is arguably the most popular and convenient way to connect your loudspeakers to your TV. Here’s why:
- HDMI is a digital connection that transmits high-quality audio and video signals with ease.
- It’s a single cable that can carry multiple channels of audio and multiple video inputs.
- HDMI is widely supported by most TVs and devices.
To connect your loudspeakers via HDMI, follow these steps:
- Locate the HDMI port on your TV.
- Locate the HDMI port on your loudspeaker (if it’s an HDMI-enabled device).
- Plug the HDMI cable into the TV’s port.
- Plug the other end of the HDMI cable into the loudspeaker’s port.
- Turn on both devices and adjust the settings as needed.
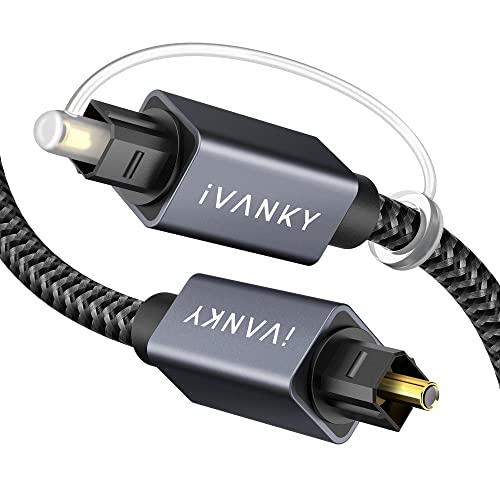
Optical Connection Process
The optical connection is another popular option for connecting your loudspeakers to your TV. Here’s what you need to know:
- Optical connections use light to transmit audio signals from your TV to your loudspeakers.
- They’re known for their high-quality audio transmission and are a popular choice for home theaters.
- TOSLINK cables, which are usually color-coded or labeled as optical cables, are used to connect devices via optical.
To connect your loudspeakers via optical, follow these steps:

- Locate the optical port on your TV.
- Locate the optical port on your loudspeaker (if it’s an optical-enabled device).
- Plug the optical cable into the TV’s port.
- Plug the other end of the optical cable into the loudspeaker’s port.
- Turn on both devices and adjust the settings as needed.
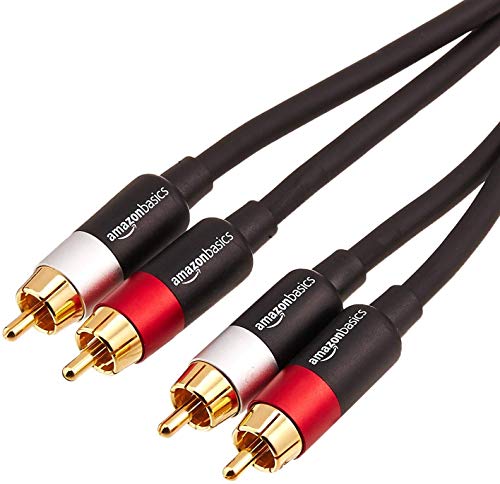
Analog Connection Tutorial
The analog connection is an older technology that’s still widely supported by many devices. Here’s how it works:
- Analog connections transmit audio signals as analog waves.
- They’re known for their simplicity and are often used for devices that require a simple, low-fidelity audio connection.
- RCA cables, which are usually colored or labeled as red and white, are used to connect devices via analog.
To connect your loudspeakers via analog, follow these steps:
- Locate the analog ports on your TV (typically labeled as “R” and “W” for red and white).
- Locate the analog ports on your loudspeaker (if it’s an analog-enabled device).
- Plug the RCA cables into the TV’s analog ports.
- Plug the other end of the RCA cables into the loudspeaker’s analog ports.
- Turn on both devices and adjust the settings as needed.
Remember to consult your TV and loudspeaker manuals for specific instructions, as the process might vary slightly depending on your devices.
Matching Your TV’s Settings
======================================================
When you’re all set with your TV and audio equipment, it’s time to bring it all together. The next step is to match your TV’s settings to ensure a seamless audio experience. This might sound like a daunting task, but don’t worry, we’re here to guide you through it.
Configuring Your TV’s Audio Settings
Your TV comes with its own set of audio settings that need to be configured to work with your audio equipment. Think of it like adjusting the dials on a radio to get the perfect signal. You want to make sure that your TV’s audio settings are calibrated to produce the best possible sound quality.
To start, navigate to your TV’s sound settings menu and look for options like “Audio Output” or “Sound Mode”. You’ll likely see a range of settings to choose from, including options like “Stereo”, “5.1 Channel”, or “Dolby Digital”. Take some time to explore these options and see what works best for you.
Here are some general tips to keep in mind:
- If you’re using a 5.1 channel speaker system, make sure that the TV’s audio settings are set to “5.1 Channel” to take full advantage of the surround sound.
- If you’re using a Dolby Digital system, ensure that the TV’s audio settings are set to “Dolby Digital” to decode the audio correctly.
- Experiment with different sound modes to find the one that works best for your content. For example, if you’re watching a movie, you may want to use a setting that emphasizes movie sound effects.
Adjusting the TV’s Volume Limit
Another important setting to adjust is the TV’s volume limit. You don’t want to blast your neighbors with loud audio, nor do you want to strain your hearing with extremely high volumes. The TV’s volume limit can help you achieve a comfortable listening level.
To adjust the volume limit, navigate to your TV’s sound settings menu and look for the “Volume Limit” or “Volume Control” setting. Here, you can set a maximum volume level that your TV will not exceed. This is typically set to a default level, but you can adjust it to your liking.

Enabling the TV’s Surround Sound Feature
Many modern TVs come with a surround sound feature that can enhance your audio experience. Imagine being transported to a movie theater without leaving your living room! This feature uses various audio processing algorithms to create a more immersive sound environment.
To enable the TV’s surround sound feature, navigate to your TV’s sound settings menu and look for the “Surround Sound” or “Virtual Surround” setting. This may be enabled by default, or you may need to toggle it on manually. Once enabled, you’ll notice that the audio comes alive with a more realistic soundstage.
Remember, the key to optimizing your TV’s audio settings is experimentation and patience. Take your time to explore the different options and find the settings that work best for you and your content. Happy viewing!
Testing Your Connection
=====
When it comes to testing your sound system connection, it’s crucial to ensure that it’s working smoothly and efficiently. After setting up your loudspeakers and connecting them to your TV, you’re probably eager to indulge in an immersive audio experience. In this section, we will walk you through the process of verifying sound quality, troubleshooting common issues, and optimizing your connection settings.

Verifying Sound Quality
A Symphony of Sound
Before you start enjoying your favorite movie or music, take a moment to verify the sound quality. This involves checking if the audio is clear, crisp, and free of distortions. To do this:
- Play a music file or a movie with a prominent soundtrack
- Sit in the middle of the room and listen to the audio critically
- Check if the sound is balanced, with no excessive frequency in any range
If you’re satisfied with the sound quality, you can proceed to the next step. But if you notice any issues, don’t worry! We’ll cover common issues and their solutions in the next section.
Troubleshooting Common Issues
A Solution to Every Problem
Even with proper setup, issues can arise. Fear not, for we have solutions to common problems that might be plaguing your sound system.
- Distorted sound: Check if the volume is too high. Try reducing the volume and see if the issue persists. If it does, try connecting the speakers to a different audio source.
- No sound: Check if the speakers are properly connected to the TV. Ensure that the connections are secure and not loose.
Optimizing Your Connection Settings
Unlocking the Full Potential
Once you’ve verified the sound quality and addressed any common issues, it’s time to optimize your connection settings for the ultimate listening experience.
- Audio settings: Check the TV’s audio settings to ensure that the audio output is set to the correct format (e.g., PCM or Dolby Digital)
- Equalizer settings: Adjust the equalizer settings to your liking. Some TVs come with pre-set equalizer settings that you can choose from
- Speaker settings: Adjust the speaker settings to match the type of speakers you’re using (e.g., bookshelf or floor-standing speakers)
