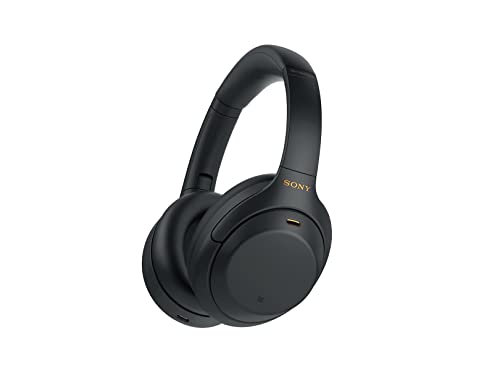
Effective ways to connect your Sony WH-1000XM4 wireless earbuds to your smartphone, tablet, or PC. Follow our step-by-step guide to get started with pairing and troubleshooting tips.
Preparing to Connect
Before you start using your earbuds, it’s essential to prepare them for connection. You want to make sure they’re ready to deliver exceptional sound quality and seamless connectivity.
Checking the Battery Level
Take a moment to check the battery level of your earbuds. A low battery can lead to connectivity issues, and you don’t want that. Make sure to charge them if necessary, and always keep an eye on the battery life throughout your listening session.
Pairing the Earbuds with Each Other
Pairing your earbuds with each other is a crucial step. Why? Because it enables them to work in tandem, providing you with a more immersive audio experience. To pair them, simply open the charging case, and the earbuds will automatically connect to each other. You might need to wait for a few seconds for this process to complete.
Note: If you’re having trouble pairing your earbuds, refer to the manufacturer’s instructions or contact their customer support for assistance.

Bluetooth Connection
When it comes to connecting your earbuds to a device, Bluetooth is often the most convenient and user-friendly option. But before you can start enjoying your favorite tunes, you need to activate Bluetooth mode on both your earbuds and the device you want to connect to. So, let’s dive in and explore the process of activating Bluetooth mode and searching for available devices.
Activating Bluetooth Mode
So, how do you activate Bluetooth mode on your earbuds? The process is actually quite straightforward. Simply put your earbuds in pairing mode by long-pressing the button on the left earbud. You’ll know it’s in pairing mode when the LED light starts flashing. This tells your device that it’s ready to connect. Easy peasy!
Searching for Available Devices
Now that your earbuds are in pairing mode, it’s time to search for available devices. Put your device’s Bluetooth in discoverable mode and scan for nearby devices. When you see your earbuds listed, select them to establish a connection. In most cases, this is where the magic happens, and your earbuds start streaming music to your device.
Note: The exact steps may vary depending on your device and operating system. Be sure to consult your device’s user manual or online support resources for specific instructions.
Connectivity Options
When it comes to connecting your earbuds to various devices, you have several options to choose from. This section will guide you through the process of connecting your earbuds to a smartphone, tablet, and PC.

Connecting to a Smartphone
Connecting your earbuds to a smartphone is a straightforward process. If your earbuds are properly paired, you can easily switch between your devices. Here’s how:
- Make sure your earbuds are paired with your smartphone.
- Open your smartphone’s settings and navigate to the Bluetooth section.
- Select your earbuds from the list of available devices.
- If prompted, enter the pairing code (usually “0000” or “1234”).
Connecting to a Tablet
Connecting your earbuds to a tablet is similar to connecting them to a smartphone. The process is almost identical, with a few minor differences:
- Navigate to your tablet’s settings and select the “Bluetooth” option.
- Put your earbuds in pairing mode (usually by holding the power button until the LED lights up).
- Select your earbuds from the list of available devices.
- Enter the pairing code if prompted.
Connecting to a PC
Connecting your earbuds to a PC is a bit more involved, but still easy to do:
- Make sure your PC has Bluetooth capabilities.
- Go to your PC’s settings and navigate to the “Devices” or “Bluetooth & other devices” section.
- Put your earbuds in pairing mode.
- Select your earbuds from the list of available devices.
- Follow the prompts to complete the pairing process.
Remember to check your device’s instructions for specific steps, as the process may vary slightly depending on the device and operating system you’re using.
Troubleshooting Connection Issues
When your earbuds are not connecting as expected, it can be frustrating. But don’t worry, we’re here to help you troubleshoot the issue and get you back to enjoying your music or calls in no time.
Earbuds Not Pairing
If your earbuds are not pairing, it’s likely because of a misconfiguration or a faulty connection. Here are a few common reasons why this might happen:
- Outdated earbud firmware: Make sure your earbuds are running the latest firmware. Check for updates and follow the prompts to install the latest version.
- Incorrect pairing process: Ensure you’re pairing your earbuds correctly. Consult the user manual if you’re unsure.
- Interference from other devices: Other devices in your vicinity might be interfering with the pairing process. Move away from other devices and try pairing again.
If none of these solutions work, it’s possible that there’s a hardware issue with your earbuds. Contact the manufacturer’s support team for further assistance.
Weak or No Connectivity
If your earbuds are connected, but the signal is weak or you’re experiencing dropped calls, there might be a few reasons why:
- Distance from the paired device: The farther you are from the paired device, the weaker the signal. Try moving closer to the device and see if the signal improves.
- Physical barriers: Physical barriers like walls, furniture, or other objects can weaken the signal. Try moving to an open area or removing obstacles to improve the signal.
- Interference from other devices: Other devices in your vicinity might be interfering with the signal. Turn off other devices or move away from them to see if the signal improves.
If none of these solutions work, it’s possible that there’s a hardware issue with your earbuds or the paired device. Contact the manufacturer’s support team for further assistance.
Advanced Features
Connecting with Your Ears
As you’ve mastered the basics of connecting your earbuds, it’s time to dive into the advanced features that can take your listening experience to the next level. In this section, we’ll explore two key areas: customizing sound settings and using the Sony Headphones Connect app.

Customizing Sound Settings
Just like a painter adjusts the brushes and strokes to create a unique masterpiece, you can fine-tune your earbuds to create a personalized audio masterpiece. The sound settings allow you to adjust the bass, treble, and midrange to suit your musical preferences.
Equalizer Settings: The equalizer (EQ) settings enable you to boost or cut specific frequencies to create a customized sound profile. This is particularly useful for music genres like classical, jazz, or heavy metal, where specific frequencies can greatly impact the listening experience.
Using Sony Headphones Connect App
The Sony Headphones Connect app is your gateway to unlocking advanced features and customizing your earbuds. This app allows you to:
- Update Firmware: Stay up-to-date with the latest firmware updates, ensuring your earbuds perform at their best.
- Customize Settings: Adjust volume levels, equalizer settings, and other customization options.
- Monitor Battery Life: Keep track of your earbuds’ battery life and plan your listening sessions accordingly.
- Access Exclusive Features: Download exclusive content, such as artist profiles and playlists, curated just for Sony earbuds users.
By leveraging these advanced features, you can transform your earbuds into a personalized listening companion that enhances your music experience.
