Connect your speakers to a receiver with this comprehensive guide. From understanding connectivity options to configuring speaker settings, we’ll walk you through every step.
Understanding Your Receiver’s Connectivity Options
==============================================
When it comes to connecting your speakers to your receiver, it’s essential to understand the available . Think of your receiver as a hub that connects all your audio devices, much like how a switchboard operator directs phone calls to the right extensions. Your receiver has various input ports that allow you to connect different sources, such as CD players, turntables, or gaming consoles. In this section, we’ll guide you through the process of finding and identifying the correct connection types.
Finding the Input Ports
locate the input ports on your receiver, which are usually located on the back or top of the device. These ports are designed to accommodate different types of cables, each with its own unique connector. Imagine finding the right port as solving a puzzle – you need to fit the right piece in the right spot.
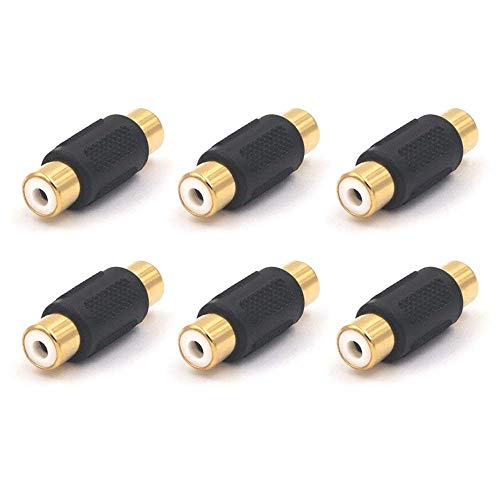
- RCA connectors: Typically found on the receiver, RCA (Recording Industry Association) connectors are analog ports that connect speakers, CD players, and other devices.
- 3.5mm audio jack: This port is commonly found on headphones, smartphones, and tablets, and can be used to connect these devices directly to your .
- Digital audio ports: Include optical, coaxial, and HDMI ports, which are designed for connecting digital devices like Blu-ray players, streaming devices, and video game consoles.
Identifying the Correct Connection Type
Now that you’ve found the input ports, it’s time to identify the correct connection type. Looking at the ports can be overwhelming, but think of it as identifying a specific language – each port has its own dialect, and you need to speak the same language to make a successful connection.
- Analog connections: Use RCA or 3.5mm connectors for devices that output analog audio signals, such as CD players or turntables.
- Digital connections: Use optical, coaxial, or HDMI ports for devices that output digital audio signals, such as Blu-ray players or streaming devices.
By understanding your receiver’s connectivity options, you’ll be well-equipped to connect your speakers and enjoy high-quality audio. In the next section, we’ll take a closer look at how to connect your speakers to your receiver.
Connecting Speakers to Your Receiver
The moment of truth arrives when you’re ready to connect your speakers to your receiver. This is the step that unleashes the full audio potential of your home theater system. In this section, we’ll walk you through the various connection types available for your speakers and receiver.
Analog Connections: RCA and 3.5mm
Analog connections are the most traditional and widely used method for connecting speakers to a receiver. These connections transmit audio signals as analog waves, which are then interpreted by the receiver and sent to your speakers.
- RCA connectors are commonly used for connecting speakers to a receiver. They’re typically color-coded, with red being the right channel and white being the left channel.
- 3.5mm connectors are the mini version of RCA connectors and are often used for connecting smaller devices like smartphones or MP3 players to a receiver.
Digital Connections: Optical and HDMI
Digital connections transmit audio signals in a digital format, which reduces the risk of signal degradation and distortion. These connections are ideal for devices that support high-definition audio formats like Dolby Atmos and DTS:X.
- Optical connections use light to transmit audio signals from a device to a receiver. They’re commonly used for connecting devices like Blu-ray players and gaming consoles to a receiver.
- HDMI connections not only transmit audio signals but also video signals. They’re commonly used for connecting devices like TVs and gaming consoles to a receiver.
Wireless Connectivity Options: Bluetooth and Wi-Fi
Wireless connectivity options allow for greater flexibility and convenience when connecting devices to your receiver. These connections eliminate the need for cables, making it easier to move devices around your home or set up a wireless home theater system.

- Bluetooth connections use radio waves to transmit audio signals from a device to a receiver. They’re commonly used for connecting devices like smartphones and tablets to a receiver.
- Wi-Fi connections use your home network to transmit audio signals from a device to a receiver. They’re commonly used for connecting devices like smart speakers and wireless hi-fi systems to a receiver.
Configuring Speaker Settings
When you’ve successfully connected your speakers to your receiver, it’s time to fine-tune them to get the best possible sound. This is like adjusting the knobs on your newly purchased guitar – you need to get the right strings in tune to produce that perfect riff. In this section, we’ll guide you through the process of setting up your speakers to produce the perfect harmony.
Setting the Correct Volume and EQ
The first step in configuring your speaker settings is to get the volume right. You need to find the sweet spot where the sound is neither too loud nor too soft. Think of it like adjusting the thermostat in your home – if it’s too hot or too cold, you won’t be comfortable. To do this, play some music and adjust the volume until it feels just right to your ears.
But that’s not all – you also need to adjust the equalization (EQ) settings to suit your music preferences. EQ is like adjusting the tone on your guitar – it helps you dial in the perfect balance of bass, midrange, and treble. If you’re listening to music with a lot of bass, you may want to boost the bass settings to get the full effect. Experiment with different settings until you find the perfect balance for your ears.
Configuring the Speaker Layout and Polarity
Now that you’ve got the volume and EQ settings just right, it’s time to think about the layout of your speakers. This is like setting up the layout of a concert hall – you need to consider the placement of the speakers to get the best possible sound coverage. Typically, the speakers are placed on either side of the listening area, but this can vary depending on the specific room layout and acoustics.
Another important consideration is the polarity of your speakers. Polarity is like the direction of the wind – it can have a big impact on the sound you hear. Check the receiver’s manual to see if it has phase reverse or polarity reversing options, and experiment with them until you find the setting that produces the best sound.

Adjusting the Subwoofer Settings
Finally, let’s talk about the subwoofer – that big, rumbling box of low-frequency goodness. Adjusting the subwoofer settings is like fine-tuning the bass amp on your guitar – it’s all about finding the right balance of low end to complement the rest of the sound.
First, turn off the subwoofer and listen to your music without it. Then, turn it back on and adjust the settings to see what works best for you. You may need to adjust the crossover point (the frequency at which the subwoofer takes over from the main speakers) or the subwoofer volume to get the perfect blend of low end and high end. Experiment with different settings until you find the perfect balance for your ears.
Troubleshooting Common Issues
When things don’t sound as sweet as they should, it can be frustrating. Don’t worry, we’re here to help you troubleshoot common issues and get your sound back on track. In this section, we’ll walk you through some common problems and their solutions.
No Sound Issues: Check the Connections and Volume
If you’re getting nowhere but silence, it’s time to investigate. Here are some potential culprits:
- Check your connections. Is the cable fully seated in both the receiver and the speaker? Try wiggling it gently to ensure a secure connection.
- Verify the volume is turned up. It might seem obvious, but it’s easy to overlook. Make sure both the receiver and speaker volume controls are set to a reasonable level.
- Check the speaker settings. Are they set to the correct input? Try switching to different inputs to see if the sound comes through.
- If you’re using wireless speakers, ensure they’re properly paired with the receiver and that the receiver is set to the correct wireless input.
Distorted Sound Issues: Check the Crossover Settings
Sometimes, you might experience distortion or a “warped” sound. This could be due to:

- Incorrect crossover settings. The crossover frequency dictates how the speaker handles different frequency ranges. If it’s not set right, you might get distortion or a “boxed-in” sound.
- Overlapping frequency ranges. If multiple speakers are producing sound in the same range, you might get a distorted or conflicting sound.
Static or Crackling Sound Issues: Check the Cable Quality
Static or crackling sounds can be annoying and distracting. Here are some potential causes:
- Poor cable quality. Old or damaged cables can introduce noise into the signal. Try replacing your cables with new ones to see if it improves the sound.
- Humid environment. Moisture in the air can cause electrical signals to interfere with each other. Try using cable protectors or shielding to reduce interference.
- Interference from other devices. Other devices in your home, such as computers or cordless phones, can introduce static or crackling sounds. Try moving them away from the receiver or speaker to see if it improves the sound.
