Take your sound quality to the next level by building your own loudspeaker. This detailed guide covers loudspeaker design basics, component selection, and assembly.
Loudspeaker Design Basics
Loudspeakers are an essential part of our everyday lives, from home stereos to concert halls. But have you ever stopped to think about the intricacies of loudspeaker design? It’s not just about throwing some wires and drivers together – it’s an art that requires a deep understanding of physics, acoustics, and electronics. In this section, we’ll dive into the fundamentals of loudspeaker design, covering the essential components, frequency response, and driver types.
Overview of Loudspeaker Components
A loudspeaker consists of several critical components that work together to produce sound. These include:
- Drivers: These are the cones or diaphragms that convert electrical energy into sound waves. Common types of drivers include woofers, mid-range, and tweeters.
- Crossover Network: This component divides the audio signal and sends it to the corresponding drivers, ensuring that each one receives the correct frequency range.
- Enclosure: This is the box or cabinet that houses the drivers and crossover network. Its design and material can greatly affect the sound quality.
- Amplifier: This component boosts the audio signal to a level that can drive the drivers. It’s essential to choose the right amplifier for your loudspeaker design.
Frequency Response and Sound Quality
Frequency response refers to the range of frequencies that a loudspeaker can produce, usually measured in Hz (Hz). A good loudspeaker should be able to reproduce a wide range of frequencies, from low bass notes to high treble notes. The frequency response of a loudspeaker is crucial in determining its sound quality. Here are some key considerations:
- Bass response: The low-frequency response (20-100 Hz) is responsible for the punch and weight of the sound. A loudspeaker with a strong bass response can add depth and energy to the music.
- Mid-range response: The mid-range frequencies (100-200 Hz) are crucial for the warmth and clarity of the vocals and instruments. A well-designed mid-range response can make the music sound more natural and engaging.
- Treble response: The high-frequency response (5,000-20,000 Hz) is responsible for the brightness and definition of the sound. A loudspeaker with a clear treble response can add sparkle and precision to the music.
Loudspeaker Driver Types
Loudspeaker drivers come in various shapes, sizes, and configurations. Here are some common types:

- Dome Tweeters: These use a domed-shaped diaphragm to produce high-frequency sounds.
- Paper Cones: These use a paper or composite cone to produce mid-range and low-frequency sounds.
- Silk Cones: These use a silk or woven material for the cone, which can add warmth and smoothness to the sound.
- Planar Magnetic Drivers: These use a flat, membrane-like diaphragm to produce high-frequency sounds.
Building the Loudspeaker’s Enclosure
When it comes to building a loudspeaker, the enclosure is one of the most crucial components. It’s the structure that houses the loudspeaker drivers, amplifiers, and wiring, and it plays a significant role in shaping the sound quality. In this section, we’ll explore the basics of building the loudspeaker’s enclosure, from choosing the right materials to designing the perfect shape and size.
Choosing the Right Materials
When selecting materials for your loudspeaker’s enclosure, there are several factors to consider. The primary goal is to find a material that is stiff, lightweight, and resistant to vibrations. Some popular options include:
- MDF (medium-density fiberboard): A cost-effective option with great stiffness and low resonance.
- Plywood: A more expensive option with excellent durability and resistance to vibrations.
- Fiber-reinforced plastic (FRP): A lightweight and stiff option with excellent acoustic properties.
- Glass-reinforced plastic (GRP): Similar to FRP, with added benefits of increased durability and resistance to moisture.
Consider the trade-offs between cost, durability, and acoustic performance when making your selection.
Building the Enclosure’s Shape and Size
The shape and size of the enclosure have a profound impact on the loudspeaker’s sound quality. A well-designed enclosure can improve clarity, precision, and overall soundstage, while a poorly designed one can lead to distortion, resonance, and muddy sound.
When designing the enclosure’s shape and size, consider the following factors:
- Volumes: A larger enclosure can provide more volume, but may introduce excess resonance.
- Shapes: A rectangular or square enclosure can provide more stability, while a curved or L-shaped enclosure can improve soundstage.
- Port sizes: Large ports can provide more bass, but may introduce resonance.
Use online design tools or simulation software to explore different configurations and optimize your enclosure’s design.
Acoustic Treatment and Damping
Acoustic treatment and damping are critical components of the loudspeaker’s enclosure, as they help to absorb unwanted vibrations, reduce resonance, and improve sound quality. Common methods include:
- Filling the enclosure with damping material: Materials like fiberglass, foam, or ceramic particles can help to reduce vibrations.
- Using acoustic panels: Specialized panels designed to absorb sound waves, often made from fiberglass or mineral wool.
- Sealing the enclosure: Sealing gaps and joints to prevent air leaks, which can compromise sound quality.
By incorporating these techniques into your enclosure design, you can significantly improve the overall sound quality and fidelity of your loudspeaker.
Wiring and Electronics
When it comes to building a loudspeaker, the wiring and electronics are just as crucial as the loudspeaker components themselves. In this section, we’ll delve into the importance of amplifier selection and connection, crossover network design and implementation, and shielding and noise reduction.
Amplifier Selection and Connection
Choosing the right amplifier for your loudspeaker is a critical step in the building process. But how do you know which one to choose? Consider this: you wouldn’t put a Formula 1 engine in a vintage golf cart. The two just aren’t compatible. Similarly, the amplifier you choose should be designed to power the loudspeaker drivers you’ve selected. A properly matched amplifier will provide clean power and avoid causing damage to your drivers.

When selecting an amplifier, consider the power output, frequency response, and impedance. Ensure the amplifier’s power output can handle the maximum power handling of your drivers. Also, consider the frequency response and ensure it complements the frequency response of your drivers. Impedance matching is crucial, as a mismatch can lead to poor performance, distortion, or even damage to your drivers.
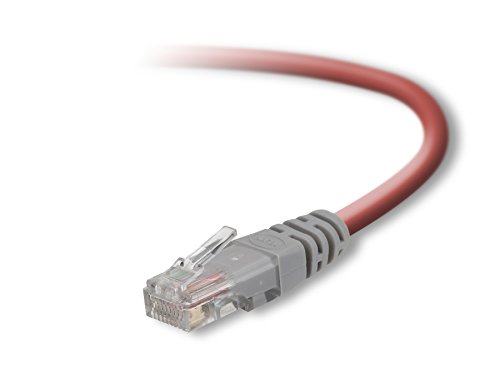
Once you’ve selected the amplifier, it’s time to connect the dots. Literally. Use high-quality wire and ensure all connections are secure and clean. Use wire nuts or terminal strips to keep things tidy, and avoid using staples or excessive wire strippers, as they can damage the wire.
Crossover Network Design and Implementation
A crossover network is a crucial component of a loudspeaker system, as it allows you to separate the frequency range into different drivers. Think of it like a traffic cop, directing the traffic flow between the drivers. But how do you design and implement the crossover network?
The design of the crossover network depends on the specific requirements of your loudspeaker. Consider the frequency response of your drivers, the crossover frequency, and the slope of the crossover. The goal is to create a smooth transition between the drivers, with minimal loss of sound quality.
When implementing the crossover network, ensure all components are accurately matched and connected. Use high-quality capacitors, resistors, and inductors, and ensure all connections are secure and clean. You can use a breadboard or a PCB to build the crossover network, but avoid using excessive wire or messy connections.

Shielding and Noise Reduction
Noise reduction is a critical aspect of loudspeaker design, particularly in high-fidelity systems. Noise can reduce the overall sound quality, making it difficult to enjoy your music. But what causes noise in a loudspeaker system? Common sources of noise include electromagnetic interference (EMI), radio-frequency interference (RFI), and mechanical noise.
To reduce noise, you can use shielding to protect the internal components. Shielded wire and shielded boxes can help reduce EMI and RFI. You can also use noise-reducing materials, such as acoustically transparent materials, to absorb sound and reduce reverberation.
In addition to shielding and noise-reducing materials, you can also optimize the loudspeaker’s enclosure to reduce noise. Use sound-absorbing materials, such as acoustic foam or fiberglass, to reduce reverberation and improve sound quality. By reducing noise and optimizing the enclosure, you can achieve a more immersive listening experience.
Assembling and Testing the Loudspeaker
Assembling and testing the loudspeaker is a crucial step in the process of building your own speaker. It’s like putting together a puzzle, where each component plays a vital role in the overall sound quality. In this section, we’ll guide you through the process of installing the components, adjusting the crossover network, and testing the speaker to ensure it’s working as expected.
Component Installation and Wiring
The first step in assembling the loudspeaker is to install the components and wire them correctly. This includes connecting the driver, crossover network, and amplifier. It’s like building a circuit, where each component is connected in a specific way to ensure the signal flows smoothly.

To start, locate the driver and connect the positive wire to the terminal marked “+” on the back of the driver. Then, connect the negative wire to the terminal marked “-” on the back of the driver. Make sure the wires are securely connected to avoid any loose connections that may affect the sound quality.
Next, connect the crossover network to the driver and amplifier. The crossover network is responsible for dividing the audio signal into different frequency ranges and sending them to the correct speaker drivers. Make sure the connections are secure and the wires are not tangled or bent, which can cause damage to the components.
Adjusting the Crossover Network and Tuning
Once the components are installed and wired, it’s time to adjust the crossover network and tune the speaker. This is like fine-tuning an instrument, where the goal is to achieve the perfect pitch.
The crossover network is adjusted by adjusting the values of the components, such as the inductors and capacitors, until the speaker produces the desired sound. This may require some trial and error, as the optimal settings will depend on the specific components and .
To tune the speaker, play some music and listen for any imperfections in the sound. If the sound is not balanced, adjust the crossover network and try again. This process may take some time, but the result will be a speaker that produces a clear and accurate sound.
Testing and Troubleshooting the Loudspeaker
Once the speaker is assembled and tuned, it’s time to test it. This is like taking a test drive, where you get to experience the fruit of your labor.
To test the speaker, play some music and listen for any imperfections in the sound. Check for any distortion, buzzing, or humming, which can indicate a problem with the components or wiring.
If the speaker is not producing the desired sound, it may be necessary to troubleshoot the problem. This can involve checking the connections, adjusting the crossover network, or replacing faulty components.
Remember, building a loudspeaker is a process that requires patience and attention to detail. Don’t be discouraged if it takes some time to get it right. With practice and persistence, you can build a speaker that produces a high-quality sound that you’ll enjoy for years to come.
Final Touches and Upgrades
Once you’ve assembled the loudspeaker, it’s time to fine-tune its performance and make any necessary upgrades. This is the part where you get to be creative and tailor your speaker to your specific needs and preferences.
Installing the Driver and Final Assembly
The installation process is crucial, as it can greatly impact the overall sound quality of your speaker. Make sure to follow the manufacturer’s instructions carefully, and consider using a driver alignment tool to ensure optimal placement of the driver. Remember, a poorly installed driver can lead to uneven sound distribution, frequency response issues, and even premature failure. Take your time and do it right – your ears will thank you!
Acoustic Tweaks and Optimization
With the driver installed, it’s time to tweak and optimize the acoustic characteristics of your speaker. This might involve adjusting the cabinet’s shape and size, experimenting with different port designs, or adding acoustic damping materials to control resonances. Think of it like fine-tuning the settings on your favorite piece of equipment – you’re refining the performance to get the best possible results. Don’t be afraid to try new things and see what works best for your unique setup.
Upgrading and Customizing the Loudspeaker
Upgrades and customizations are all about taking your speaker to the next level. Whether it’s swapping out drivers for higher-quality alternatives, upgrading the amplifier or crossover network, or adding unique features like wireless streaming capabilities, the possibilities are endless. Remember to research your options carefully, and consider factors like compatibility, cost, and ease of integration when making your decisions. With some creativity and experimentation, you can transform your speaker into a truly unique and exceptional listening experience.
