Enhance your mic sound quality by adjusting settings, using pop filters, positioning the mic correctly, upgrading your microphone, and improving room acoustics.
Adjusting Mic Settings
Gain Control
When it comes to adjusting the gain control on your microphone, it’s essential to find the right balance. Gain control determines the sensitivity of your microphone, affecting how loud or soft your audio will be. Setting the gain too high can result in distortion and clipping, while setting it too low can make your audio sound weak and distant.
To adjust the gain control effectively, start by speaking or singing into the microphone at your usual volume. Slowly increase the gain until the audio level is appropriate, making sure to avoid any peaking or distortion. It may take some trial and error to find the optimal setting for your specific microphone and recording environment, so don’t be afraid to experiment.
- Start by speaking or singing into the microphone at your usual volume
- Slowly increase the gain until the audio level is appropriate
- Avoid peaking or distortion
EQ Settings
Equalization, or EQ, settings play a crucial role in shaping the tone and characteristics of your audio. Each microphone has its own unique frequency response, so adjusting the EQ settings can help enhance the sound quality and clarity of your recordings.
When adjusting the EQ settings on your microphone, consider the type of sound you want to achieve. Boosting certain frequencies can make your voice sound warmer or brighter, while cutting others can help reduce background noise or unwanted sounds. Experiment with different EQ settings to find the perfect balance that suits your voice and style.

- Boost certain frequencies for a warmer or brighter sound
- Cut frequencies to reduce background noise
- Experiment with different EQ settings
Noise Reduction
Noise reduction is a critical aspect of mic settings, especially if you’re recording in a noisy environment. Unwanted background noise can detract from the quality of your recordings, so it’s essential to take steps to minimize it.
One effective way to reduce noise is to adjust the microphone’s sensitivity settings or use a noise gate. A noise gate helps to eliminate background noise when you’re not speaking or singing, resulting in cleaner and more professional audio. Additionally, positioning the microphone closer to your mouth can help capture your voice more clearly while minimizing external noise.
- Adjust microphone sensitivity settings
- Use a noise gate to eliminate background noise
- Position the microphone closer to your mouth
By mastering the art of adjusting mic settings, including gain control, EQ settings, and noise reduction, you can enhance the quality of your recordings and create professional-sounding audio content. Remember to experiment, trust your ears, and find the settings that work best for your unique voice and recording environment.
Using Pop Filters
Benefits of Pop Filters
Pop filters are essential tools for anyone looking to improve the sound quality of their recordings. These simple yet effective devices help to reduce plosive sounds, such as the harsh “p” and “b” sounds that can cause distortion in your recordings. By placing a pop filter in front of your microphone, you can ensure that your vocals sound clear and professional, without any unwanted pops or crackles.
Types of Pop Filters
There are several types of pop filters available on the market, each with its own unique features and benefits. The most common type is the nylon mesh pop filter, which is affordable and easy to use. Alternatively, you may opt for a metal pop filter, which offers greater durability and longevity. Some pop filters even come with adjustable arms for easy positioning, allowing you to find the perfect placement for your microphone.
Proper Placement
When using a pop filter, proper placement is key to achieving optimal results. It’s important to position the pop filter between your mouth and the microphone, ensuring that it intercepts any plosive sounds before they reach the microphone. Additionally, make sure that the pop filter is positioned at a slight angle to the microphone, rather than directly in front of it, to prevent any obstruction of your vocals.
Positioning the Mic
Distance from Mouth
When it comes to positioning your microphone, the distance from your mouth plays a crucial role in ensuring clear and crisp audio quality. Placing the mic too far away can result in a weak and distant sound, while placing it too close can lead to distortion and popping sounds. The ideal distance is typically around 6-12 inches from your mouth, but this can vary depending on the type of microphone you are using and the specific sound you are trying to capture.
Angle of Mic
In addition to the distance from your mouth, the angle of the microphone also plays a key role in capturing the best sound. The mic should be positioned directly in front of your mouth, at a slight angle to avoid picking up excessive breath sounds or plosives. Experiment with different angles to find the sweet spot that captures your voice clearly without any unwanted noise interference.
Avoiding Reflections
One common issue that many audio enthusiasts face when positioning their microphone is dealing with reflections. Reflections occur when sound waves bounce off hard surfaces, creating unwanted echoes and reverberations in your recordings. To avoid reflections, try to position your microphone in a space with minimal hard surfaces, such as a carpeted room or a room with acoustic panels. You can also use a reflection filter or shield to help absorb any unwanted sound reflections.
Upgrading Microphone
Determining Budget
When it comes to upgrading your microphone, one of the first things you’ll need to consider is your budget. Determining how much you’re willing to invest in a new microphone will help narrow down your options and ensure you get the best value for your money. Whether you’re a beginner looking for a budget-friendly option or a professional seeking top-of-the-line quality, setting a clear budget will guide your decision-making process.

Types of Microphones
There are various types of microphones available on the market, each with its own unique characteristics and intended uses. Understanding the different types of microphones can help you choose the one that best suits your needs. Here are some common types of microphones to consider:
- Condenser Microphones: Known for their sensitivity and ability to capture detailed sound, condenser microphones are popular choices for studio recording and vocals.
- Dynamic Microphones: Durable and versatile, dynamic microphones are often used for live performances and recording loud sound sources.
- Ribbon Microphones: Characterized by their warm and natural sound, ribbon microphones are ideal for capturing the nuances of acoustic instruments and vocals.
Researching Features
Once you have a budget in mind and have narrowed down the type of microphone you’re interested in, it’s time to research specific features. Each microphone model comes with its own set of features that can impact sound quality, usability, and compatibility. Some key features to consider include:
- Polar Patterns: The directionality of a microphone’s pickup pattern, such as cardioid, omnidirectional, and bidirectional.
- Frequency Response: The range of frequencies a microphone can accurately capture, which can affect the overall sound quality.
- Sensitivity: How well a microphone converts sound into electrical signals, influencing its ability to capture quiet or loud sounds.
- Connectivity: Whether the microphone uses XLR, USB, or other connections, determining how it interfaces with your recording equipment.
By thoroughly researching the features of potential microphones, you can make an informed decision that aligns with your budget and recording needs. Remember to prioritize quality and compatibility to ensure you get the most out of your microphone upgrade.
Room Acoustics
Soundproofing
When it comes to achieving top-notch audio quality in your recordings, soundproofing your recording space is essential. Soundproofing helps to block out unwanted external noises, ensuring that your recordings are clean and free from any distractions. There are several ways you can soundproof your room, from simple DIY solutions to more advanced professional techniques.
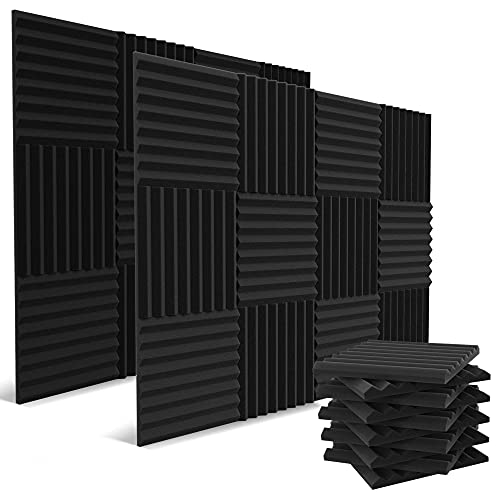
One effective method of soundproofing is to add acoustic panels to your walls. These panels are designed to absorb sound waves, preventing them from bouncing around the room and creating unwanted echoes. By strategically placing acoustic panels on your walls, you can significantly improve the acoustics of your recording space.

- Install acoustic panels on the walls
- Use soundproof curtains or blankets
- Seal any gaps or cracks in the walls
Adding Absorption Panels
In addition to soundproofing, adding absorption panels to your recording space can further enhance the audio quality of your recordings. Absorption panels are designed to absorb sound waves, reducing reflections and echoes in the room. By strategically placing absorption panels on the walls and ceiling of your recording space, you can create a more controlled acoustic environment that is ideal for recording crisp and clear audio.
- Place absorption panels on the ceiling
- Install bass traps in the corners of the room
- Use diffusers to scatter sound waves
Eliminating Echoes
Echoes can be a common issue in recording spaces, causing unwanted reflections that can distort the quality of your recordings. By properly soundproofing and adding absorption panels to your room, you can effectively eliminate echoes and create a more acoustically balanced environment for recording. Additionally, adjusting the placement of your microphone and monitoring your recording levels can also help reduce echoes in your recordings.
- Adjust the placement of your microphone to minimize echoes
- Monitor your recording levels to prevent audio clipping
- Use headphones to monitor your recordings in real-time
By taking the time to properly address room acoustics, including soundproofing, adding absorption panels, and eliminating echoes, you can significantly improve the audio quality of your recordings. Investing in these techniques will help you create professional-grade recordings that are free from unwanted noise and distractions.
