Are you struggling to measure speaker size accurately? Our guide covers various methods, including impedance, magnetic gap width, and physical measurements. Learn how to calculate and measure voice coil diameter, surround ribbon width, and more.
Measuring Speaker Size Methods
Speaker size is a crucial aspect of speaker design, as it can significantly impact the overall performance and sound quality of a speaker system. But how do we measure speaker size accurately? In this section, we’ll explore various methods for measuring speaker size, including taking impedance measurements, calculating magnetic gap width, and measuring voice coil diameter.
Taking Impedance Measurements
One common method for measuring speaker size is by taking impedance measurements. Impedance is the opposition a speaker presents to an electrical signal, and it’s affected by the speaker’s size and configuration. To take impedance measurements, you’ll need an impedance analyzer or a multimeter capable of measuring impedance. Simply connect the analyzer or multimeter to the speaker’s terminals and take readings at various frequencies. By analyzing these readings, you can determine the speaker’s impedance and, subsequently, its size.
Calculating Magnetic Gap Width
Another method for measuring speaker size is by calculating the magnetic gap width. The magnetic gap width is the distance between the speaker’s magnet and voice coil, and it’s a critical factor in determining the speaker’s size and performance. To calculate the magnetic gap width, you’ll need to know the speaker’s voice coil diameter, surround material, and surround width. With this information, you can use a simple formula to calculate the magnetic gap width.
Measuring Voice Coil Diameter
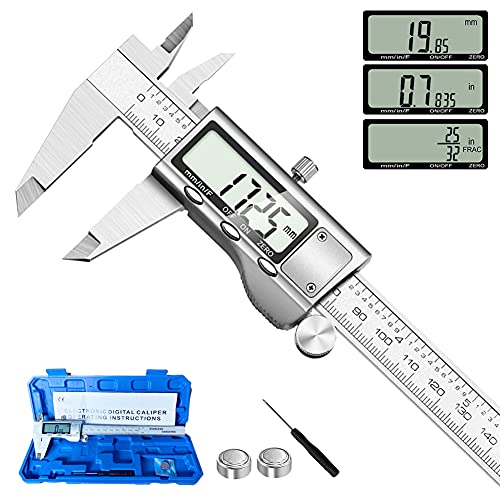
The voice coil diameter is another important factor in determining speaker size. The voice coil is the coil of wire that moves back and forth in the speaker’s magnetic field when audio signals are applied. To measure the voice coil diameter, you can use a caliper or a micrometer to measure the coil’s diameter at its widest point. This measurement is crucial in determining the speaker’s size and performance, as it affects the speaker’s sensitivity, efficiency, and overall sound quality.

These three methods – taking impedance measurements, calculating magnetic gap width, and measuring voice coil diameter – are all important for accurately measuring speaker size. By using these methods, you can gain a better understanding of your speaker’s size and performance, and make informed decisions when designing or upgrading your speaker system.
Physical Measurements
Measuring Speaker Cone Diameter
Measuring the speaker cone diameter is a crucial step in the process of understanding the physical properties of your speaker. Think of the cone as the main “container” that converts the electrical signal into sound waves. A larger cone diameter can produce more sound, but it also requires more power to drive it. On the other hand, a smaller cone diameter can be more efficient and easier to drive, but it may not produce as much sound. So, how do you measure it?
To measure the speaker cone diameter, you can use a combination of a tape measure or a caliper. Wrap the tape measure or caliper around the widest part of the cone, taking care not to touch the surrounding materials such as the surround or the voice coil. Record the diameter in inches or millimeters and use a benchmark standard, such as a screw or a coin, to ensure accurate measurement.
Calculating Surround Ribbon Width
The surround ribbon width is another important physical characteristic that can impact the performance of your speaker. The surround is the flexible material that surrounds the edge of the cone, helping to keep it in place and prevent damage. A wider surround ribbon can provide better separation and minimize distortion, while a narrower ribbon can lead to a looser fit and more distortion.
Calculate the surround ribbon width by measuring the gap between the cone and the surrounding material. Use a ruler or caliper to measure the distance at the widest part of the surround, making sure to record the measurement in inches or millimeters. You can also use a simple formula to estimate the surround ribbon width based on the cone diameter and the desired surround geometry.
Measuring Voice Coil Length
The voice coil length is a critical specification that determines the speaker’s ability to produce low frequencies and prevent distortion. The voice coil is the part of the speaker that converts the electrical signal into a physical movement, and its length can significantly impact the speaker’s performance. A longer voice coil can produce deeper bass notes, but it also requires more power and can be more prone to overheating.
To measure the voice coil length, you can use a caliper or a micro measuring tool. Locate the voice coil and take careful measurements from the end of the coil to the beginning of the next coil or the magnetic gap. Make sure to record the measurement in inches or millimeters and use it as a reference point for comparing different speakers or optimizing speaker design.
Understanding Measurement Units
Measuring speaker performance requires a solid grasp of various units and their conversions. In this section, we’ll delve into the world of speaker measurements and explore how to make sense of the numbers.
Converting Speaker Impedance to Ohms
Impedance, often represented by the symbol ‘Z’, is a crucial measurement in the audio world. It’s a complex quantity that encompasses resistance (R), inductive reactance (jL), and capacitive reactance (jC). While it’s more common to express impedance in ohms (Ω), there are instances where you might see it in ohms per meter (Ω/m) or ohms per centimeter (Ω/cm). Now, if you’re faced with a measurement in ohms per meter, you’ll need to convert it to ohms. Fear not! It’s a simple process:
| Conversion Factor | Impedance Value (Ω/m) | Converted Value (Ω) |
|---|---|---|
| 1 m | 100 Ω/m | 100 Ω |
| 0.1 m | 100 Ω/m | 10 Ω |
| 0.01 m | 100 Ω/m | 1 Ω |
For instance, if a speaker has an impedance of 100 Ω/m at a length of 0.1 meters, the converted value would be 10 Ω.

Interpreting Capacitance Measurements
Capacitance, typically denoted by the symbol ‘C’, is another vital parameter in speaker evaluation. It’s usually measured in farads (F) and represents the ability of a device to store energy. When dealing with capacitance measurements, keep in mind that a higher value doesn’t necessarily mean better performance. Here are some general guidelines to keep in mind:
- Higher capacitance values often indicate improved low-frequency extension and reduced sensitivity to resonance.
- Lower capacitance values may be beneficial for high-frequency response and reduced noise.
- Extreme values can be problematic, leading to compromised performance.
Understanding SPL Measurements
Sound Pressure Level (SPL) is a fundamental concept in the audio world. SPL is measured in decibels (dB) and represents the intensity of sound waves. When evaluating SPL measurements, remember that:
- SPL is logarithmic, meaning a 3 dB increase represents a doubling of pressure, while a 3 dB decrease represents a halving.
- A higher SPL doesn’t always translate to better sound quality. It’s essential to consider other factors like frequency response and distortion.
- SPL measurements can be affected by various factors, including the measurement distance, angle, and environment. Always consider the measurement setup when comparing results.
