Find out how to easily disassemble your Beats Solo headphones with this step-by-step guide. Learn which tools you need and how to remove each component, from the ear pads to the wiring.
Tools Needed to Disassemble Beats Solo Headphones
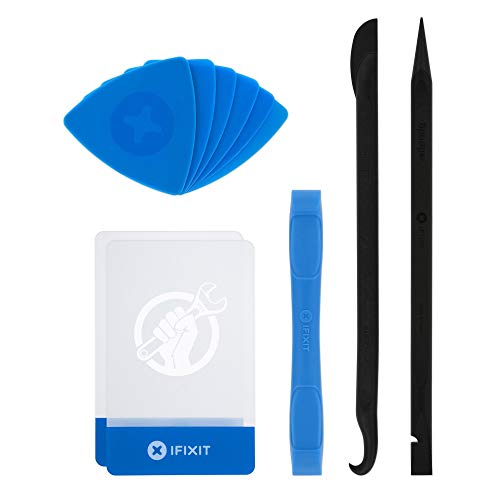
When it comes to disassembling your Beats Solo headphones, having the right tools is essential. Below are the tools you will need to successfully take apart your :
Screwdriver Size
One of the most important tools you will need is a screwdriver. The size of the screwdriver will depend on the type of screws used on your . You can check the size of the screws by looking at the screw head or checking the manufacturer’s manual. Once you have determined the size of the screwdriver, make sure you have one that fits snugly and securely.
Plastic Opening Tool
Another tool you will need is a plastic opening tool. This tool is used to pry open clips and connectors without damaging the plastic casing of your headphones. You can purchase a plastic opening tool online or at your local hardware store. It is important to use a plastic opening tool rather than a metal one to avoid scratching or damaging the plastic casing.
Tweezers
Tweezers are small, pointed tools that can be used to grab and manipulate small parts during the disassembly process. They are especially useful when working with small screws or wires. Make sure to use tweezers that have a pointed end, as this will make it easier to grab and hold onto small parts.

Spudger
A spudger is a tool that is used to pry open clips and connectors, much like a plastic opening tool. However, spudgers are made of a harder plastic or metal and are more durable than plastic opening . They are especially useful when working with connectors that are difficult to open.
In summary, to successfully disassemble your Beats Solo headphones, you will need a screwdriver, plastic opening tool, tweezers, and spudger. These tools will allow you to safely and effectively take apart your headphones without damaging any of the components. Make sure to have all of these tools on hand before beginning the disassembly process.
Removing the Ear Pads
Are your Beats Solo in need of a little TLC? Whether you’re looking to clean them or replace a damaged part, it’s important to know how to disassemble them properly. In this section, we’ll walk you through the steps required to remove the ear pads from your Beats Solo headphones.
Locate the Ear Pad Clips
The first step in removing the ear pads from your Beats Solo headphones is to locate the ear pad clips. These clips are located on the outside edge of each ear pad and hold them securely in place on the headphone.
Use a Spudger to Pry Open the Ear Pad Clips
To remove the , you’ll need to use a spudger. A spudger is a small tool that is used to pry open small clips or remove small parts. Place the spudger on the edge of the ear pad clip and gently pry it open. Be careful not to use too much force, as this can damage the clip or the ear pad itself.
Remove the Ear Pads from the Headphone
Once you have pried open the ear pad clips, you can then remove the ear pads from the headphone. Gently pull the ear pad away from the headphone until it comes loose. Repeat this process for the other ear pad.
When removing the ear pads, it’s important to be gentle and take your time. Rushing the process can lead to damaging the ear pads or the headphone itself. If you encounter any resistance, stop and assess the situation before continuing.
Now that you have successfully removed the ear pads from your Beats Solo headphones, you can clean them or replace them with new ones. If you’re looking to clean them, simply wipe them down with a soft cloth and mild cleaning solution. If you need to replace them, you’ll need to purchase new ear pads that are compatible with your specific model of Beats Solo headphones.
Overall, removing the ear pads from your Beats Solo headphones is a relatively simple process. With the right tools and a little bit of patience, you can have your headphones looking and sounding like new in no time.
- Use a spudger to pry open the ear pad clips
- Gently pull the ear pad away from the headphone until it comes loose
Removing the Headband
If you need to replace or repair the headband of your Beats Solo headphones, you will need to remove it first. Here are the steps to follow:

Locate the Headband Screws
The headband is secured to the rest of the headphone with two screws located on each side. You will need to locate these screws before you can remove the headband.
Use a Screwdriver to Remove the Screws
Once you’ve located the screws, you will need to use a screwdriver to remove them. The screws are small, so make sure you use the right size screwdriver to avoid damaging them.
Separate the Headband from the Rest of the Headphone
Once the screws are removed, you can gently separate the headband from the rest of the headphone. Be careful not to damage any of the wiring or other components inside the headphone.
It’s important to note that removing the headband is just one step in disassembling your Beats Solo headphones. If you need to replace or repair other components, such as the drivers or ear pads, you will need to follow additional steps.
Here are some tips to keep in mind while working on your headphones:
- Take your time and work carefully to avoid damaging any of the components.
- Keep track of any screws or other small parts you remove, so you can easily put them back in place later.
- If you’re not sure how to proceed, refer to your “reference” for guidance.
By following these instructions and taking your time, you should be able to remove the headband from your Beats Solo without any problems. Good luck with your repairs or upgrades!
Removing the Drivers
When attempting to disassemble a pair of Beats Solo headphones, one of the most important steps is removing the drivers. The drivers are the small speakers that produce the sound and are located within the ear cups of the . Here are the steps you need to follow to remove the drivers:
Locate the Driver Screws
The first step is to locate the screws that hold the drivers in place. Depending on the model of your headphones, the screws may be located on the outside of the ear cups or on the inside. You may need to remove the ear pads and speaker grilles to access the screws. Once you have located the screws, you can move on to the next step.
Use a Screwdriver to Remove the Screws
Once you have located the screws, you will need to use a screwdriver to remove them. It is important to use the correct size screwdriver to avoid damaging the screws or the headphones. Refer to your “reference” to determine the correct size screwdriver to use. Once you have the correct screwdriver, carefully unscrew the drivers from the ear cups.
Carefully Remove the Drivers from the Headphone
With the screws removed, you can now carefully remove the drivers from the headphones. It is important to be gentle when doing this, as the drivers are delicate and can be easily damaged. Use your fingers to gently pull the drivers away from the ear cups, taking care not to damage the wiring or other components inside the headphones.

It is important to note that removing the drivers is just one part of disassembling Beats Solo . You will need to follow the other steps outlined in your “reference” to fully disassemble the headphones. However, with these steps, you should be able to successfully remove the drivers without damaging your .
Removing the Speaker Grilles
When it comes to disassembling your Beats Solo headphones, removing the speaker grilles is an important step that you will need to take. The speaker grilles are the covers that protect the headphones’ speakers and can often become damaged or dirty over time. To remove them, you will need to follow these simple steps:
Locate the Speaker Grille Clips
The first thing you need to do is locate the speaker grille clips. These clips are located on the outside of the headphones and are what hold the speaker grilles in place. They are small and can be difficult to see, so you may need to use a magnifying glass to find them.
Use a Plastic Opening Tool to Pry Open the Clips
Once you have located the speaker grille clips, you will need to use a plastic opening tool to pry them open. A plastic opening tool is a small, flat tool that is designed to help you open up electronics without damaging them. Insert the tool into the space between the speaker grille and the headphone, and gently pry the clip open. You may need to do this several times to fully remove the grille.
*Note: Be careful not to use too much force when using the plastic opening tool, as you can damage the headphones if you are too rough.
Remove the Speaker Grilles from the Headphone
Finally, you can remove the speaker grilles from the headphone. Once you have pried open the clips, the grilles should come off easily. Be sure to keep the grilles in a safe place, as you will need to reattach them later when you are reassembling your headphones.
*Tip: If you are having trouble removing the speaker grilles, you can use a hairdryer to heat up the adhesive that is holding them in place. This will make it easier to pry them open with the plastic opening tool.
Removing the Wiring
Removing the wiring from your Beats Solo headphones can be a tricky process, but with the right and a bit of patience, it can be done. In this section, we’ll walk you through the steps to safely remove the wiring from your headphones.
Locate the Wiring Connections
First things first, you’ll need to locate the wiring connections on your . The wiring on the Beats Solo headphones is typically located near the ear cups or on the headband. Take a moment to inspect your and identify where the wiring is connected.
Use Tweezers to Disconnect the Wiring
Once you’ve located the wiring connections, you’ll need to use a pair of tweezers to disconnect them. Tweezers are a useful tool for this process because they allow you to get a firm grip on the wiring and gently pull it out of the connection.
Pro tip: If you’re having trouble getting a grip on the wiring, try using a pair of needle-nose pliers instead of tweezers. Needle-nose pliers offer a stronger grip and more precision when working with small parts like headphone wiring.
To disconnect the wiring, gently grip the exposed part of the wire with your tweezers and gently pull it out of the connection. Be sure to pull straight out and avoid twisting or pulling at an angle, as this can damage the wiring or the connection.
Carefully Remove the Wiring from the Headphone
Once you’ve disconnected the wiring from its connection, you’ll need to carefully remove it from the headphone. This can be done using your fingers or a small pair of pliers.
Pro tip: If you’re having trouble getting a grip on the wiring, try using a pair of needle-nose pliers instead of your fingers. Needle-nose pliers offer more precision and control when working with small parts like headphone wiring.
To remove the wiring, gently pull it out of the headphone, being careful not to twist or bend it. If the wiring is tightly secured, you may need to use a spudger or plastic opening tool to gently pry it loose.
Once you’ve removed the wiring from your , you can inspect it for any signs of damage or wear. If the wiring is damaged, you may need to replace it with a new wiring harness. However, if the wiring is in good condition, you can reattach it to your headphones and move on to the next step in the disassembly process.
Reassembling the Headphones
When it comes to reassembling your Beats Solo headphones, it is important to follow the correct steps in the correct order to ensure that everything fits together perfectly. In this section, we will cover the steps you need to take to reattach the wiring, speaker grilles, drivers, headband, and .
Reattaching the Wiring
The first step in reassembling your headphones is to reattach the wiring. First, locate the wiring connections and use tweezers to carefully reconnect them. It is important to ensure that the connections are secure and properly fitted to avoid any issues with sound quality.
Reattaching the Speaker Grilles
Next, you will need to reattach the speaker grilles. Locate the speaker grille clips and use a plastic opening tool to gently pry them open. Once you have removed the clips, carefully place the speaker grilles back in their original position and snap the clips back into place.
Reattaching the Drivers
The next step is to reattach the drivers. Locate the driver screws and use a screwdriver to carefully replace them. Once the screws are securely in place, carefully reattach the drivers to the headphone.
Reattaching the Headband
Now it’s time to reattach the headband. Locate the headband screws and use a screwdriver to replace them. Once the screws are secure, carefully reattach the headband to the rest of the headphone.
Reattaching the Ear Pads
Finally, it’s time to reattach the . Locate the ear pad clips and use a spudger to pry them open. Once the clips are open, carefully place the ear pads back onto the headphone and snap the clips back into place.
Overall, reassembling your Beats Solo headphones can be a daunting task, but if you follow these steps in the correct order, you should be able to do it with ease. Just remember to take your time, be patient, and ensure that everything is properly fitted and secure.
- Make sure all wiring connections are properly fitted
- Use a plastic opening tool to gently pry open the speaker grille clips
- Carefully reattach the drivers using a screwdriver
- Securely reattach the headband with screws
- Snap the ear pads back into place using a spudger
