Discover the world of equalization and learn how to use it to take your music production and live sound to the next level. Get a comprehensive guide to understanding equalizer basics, configuring your EQ preferences, and advanced techniques for specific genres.
Understanding Equalizer Basics
What is Equalization?
Equalization, or EQ, is a crucial aspect of and audio engineering that has fascinated many music enthusiasts and professionals alike. But what exactly is equalization, and why is it so important? Simply put, equalization is the process of adjusting the tone or timbre of an audio signal by boosting, cutting, or shelving specific frequency ranges. Think of EQ like tuning a guitar – you’re altering the way the instrument sounds to achieve a desired tone. In audio engineering, EQ is used to correct imperfections in the sound, make it more pleasing to the ear, and even create a specific tone or style.
Types of Equalizers
There are several types of equalizers, each with its unique characteristics and applications. Some common types of equalizers include:
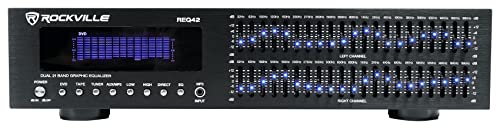
- Graphic equalizers: These are the most commonly used type of EQ, allowing you to adjust multiple frequency bands simultaneously. Graphic EQs are great for making small, precise adjustments to the tone.
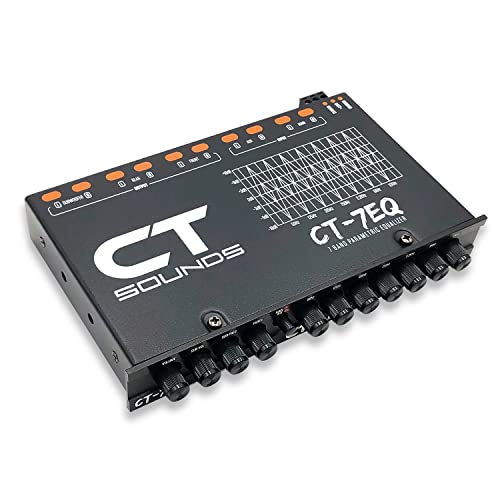
- Parametric equalizers: These offer more detailed control over the EQ process, allowing you to adjust frequency, gain, and bandwidth. Parametric EQs are ideal for making precise changes to specific frequency ranges.
- Semi-parametric equalizers: As the name suggests, these offer a balance between graphic and parametric EQs, providing more control than graphic EQs while still being easy to use.
- Multiband compressors: While not traditional EQs, multiband compressors can be used to control frequency response and are often used in conjunction with EQ.
Configuring Your Equalizer
Before you start tweaking the knobs on your , it’s essential to set it up correctly. Think of it like preparing a canvas for a masterpiece – you need a clean slate to let your creative juices flow. In this section, we’ll take a closer look at setting up your EQ preferences and adjusting frequency bands to get the most out of your equalizer.
Setting Up EQ Preferences
When setting up your EQ preferences, consider the type of music you’re working with. Are you a hip-hop producer, or a classical musician? The EQ settings you choose will depend on the specific requirements of your genre.

- For hip-hop and electronic music, you may want to emphasize the mid-range frequencies (around 500 Hz to 2 kHz) to bring out the beat and add depth to your sound.
- For classical music, you may want to focus on the higher frequency ranges (above 2 kHz) to accentuate the clarity and precision of the instruments.
- For voice recordings, you may want to emphasize the mid-to-high frequency ranges (around 1 kHz to 5 kHz) to bring out the clarity and warmth of the voice.
Adjusting Frequency Bands
Now that you’ve set up your EQ preferences, it’s time to adjust the frequency bands to get the perfect balance. Think of it like balancing a seesaw – you need to find the right balance between boosting and cutting frequencies to get the desired sound.
- Boosting: This refers to increasing the volume of a specific frequency range. Boosting bass (low frequencies) can add weight and depth to your sound, while boosting treble (high frequencies) can add clarity and brightness.
- Cutting: This refers to reducing the volume of a specific frequency range. Cutting resonance (mid-range frequencies) can help eliminate muddiness and add clarity to your sound.
- Shelving: This refers to gradually increasing or decreasing the volume of a specific frequency range. Shelving low frequencies can add weight and depth, while shelving high frequencies can add brightness and clarity.
By adjusting the frequency bands, you can fine-tune your EQ settings to get the perfect balance for your music. Remember to listen critically and make adjustments based on what sounds good to your ears.
Using EQ for Sound Enhancement
In this section, we’ll explore how equalization (EQ) can be used to enhance the sound quality of your music, speech, or other audio material. Whether you’re a musician, audio engineer, or music enthusiast, understanding how to use EQ effectively can be a game-changer.
Boosting Bass and Treble
When listening to music, bass and treble frequencies are often the most noticeable aspects of the sound. Boosting these frequencies can add depth and dimensionality to your music, making it sound more engaging and immersive. Here are some tips for boosting bass and treble:
- Bass boost: For electronic, hip-hop, and dance music, boosting the bass frequency (typically around 60-80 Hz) can add weight and energy to the sound. Be careful not to overdo it, as excessive bass can muddy the sound and make it difficult to hear other frequencies.
- Treble boost: For instruments like guitars, keyboards, and vocals, boosting the treble frequency (typically around 5-8 kHz) can add clarity and definition to the sound. This is especially useful for cutting through dense mixes or where the instrument is getting lost in the overall sound.
Cutting Resonance and Noise
Sometimes, adding frequency response can make a track sound better, but more often than not, it’s removing unwanted frequencies that can make the biggest impact. Cutting resonance and noise can help bring out the clarity and definition of your music.
- Resonance cutting: When a frequency response is boosted and then cut, it can create a “resonance” or “peak” in the sound. Cutting these peaks can help reduce muddiness and give your music a cleaner, more defined sound.
- Noise reduction: Also known as noise gating, cutting off unnecessary frequencies can help reduce hiss, hum, and other unwanted noise in your audio signal. This is especially useful for recordings or live performances where background noise can be a problem.
By understanding how to use EQ for sound enhancement, you can take your music from dull and lifeless to vibrant and engaging. Remember to experiment and adjust your EQ settings to find the sweet spot for your specific music or audio material. Happy EQ-ing!
Advanced EQ Techniques
When it comes to equalization, there’s a whole world of techniques that go beyond the basics. Whether you’re looking to enhance your sound or correct issues, advanced EQ techniques can help you achieve the perfect balance. Let’s dive deeper into the world of EQ and explore some of the most effective techniques.
EQ for Specific Genres
Different music genres have distinct sonic characteristics, and EQing for these genres can make all the difference. For instance, in hip-hop and electronic music, emphasizing low-end frequencies can give the track a punchy, energetic feel. On the other hand, in classical music, a smoother, more even response may be preferred. Here are some genre-specific EQ techniques to try:
- Hip-Hop and Electronic: Boost 60-80 Hz for added low-end weight, and 5k-8k Hz for clarity and definition.
- Rock and Metal: Boost 100-200 Hz for a more aggressive sound, and 8k-12k Hz for added attack and definition.
- Jazz and Acoustic: Cut 50-100 Hz for a smoother response, and emphasize 5k-10k Hz for clarity and presence.
EQ for Live Sound Applications
When it comes to live sound, EQing for specific instruments or vocalists can be a game-changer. Here are some techniques for live sound applications:
- Vocal EQ: Boost 200-300 Hz for a more present and forward vocal sound, and cut 100-200 Hz for reduced boxiness.
- Instrument EQ: For drums, boost 200-400 Hz for added attack, and cut 400-500 Hz to reduce ringing. For guitar, cut 200-400 Hz to reduce muddiness, and boost 5k-8k Hz for added clarity.
- Room EQ: Cut mid-range frequencies (200-500 Hz) to reduce echo and boxiness, and boost high-end frequencies (5k-10k Hz) for added brightness and clarity.
By applying these advanced EQ techniques, you’ll be able to take your sound to the next level and achieve a level of sonic sophistication that will leave your listeners in awe.