Elevate your Nintendo Switch gaming experience with the right microphone. Whether you’re playing online or recording voiceovers, we’ll help you choose the best mic for your needs.
Choosing the Right Mic for Nintendo Switch
Choosing the right microphone for your Nintendo Switch can be a daunting task, especially with the numerous options available in the market. But don’t worry, we’re here to help you navigate through the process.
Wired vs Wireless Options
Before we dive into the different types of microphones, it’s essential to consider whether you need a wired or wireless setup. Wired microphones are generally more reliable and offer better sound quality, but they can be more restrictive in terms of movement. Wireless microphones, on the other hand, offer more flexibility but may be prone to interference and require more battery management.
- Wired microphones are ideal for gamers who prefer a more immersive experience and are willing to compromise on mobility.
- Wireless microphones are better suited for gamers who need to move around or play games that require fast reflexes.
Types of Microphones: Cardioid, Omni, and Condenser
The type of microphone you choose will also depend on your specific needs and preferences. Here are the three main types of microphones:
Table: Microphone Types
| Type | Description | Best for |
| — | — | — |
| Cardioid | Picks up sound from in front, rejects sound from the sides and back | Voicemails, gaming chat |
| Omni | Picks up sound from all directions | Recording ambient noise, outdoor events |
| Condenser | More sensitive and can pick up a wider range of frequencies | Recording music, voiceovers |

Compatibility Requirements: USB, Bluetooth, and Analog
Finally, consider the compatibility requirements of your microphone. The Nintendo Switch has limited ports, so you’ll need to choose a microphone that connects via USB, Bluetooth, or analog cables.
- USB microphones are easy to connect and often come with a built-in audio mixer.
- Bluetooth microphones offer more flexibility but may require pairing and adjusting settings.
- Analog microphones require an analog-to-digital converter or a separate amplifier and can be more sensitive to electromagnetic interference.
Best Mics for Online Gaming
When it comes to online gaming, having the right microphone can be the difference between a triumph and a tragedy. Whether you’re dominating in Fortnite or coordinating with teammates in Overwatch, a good mic can help you communicate clearly and focus on the game. In this section, we’ll dive into the best mics for online gaming, highlighting top-rated wired and wireless options, as well as budget-friendly choices.
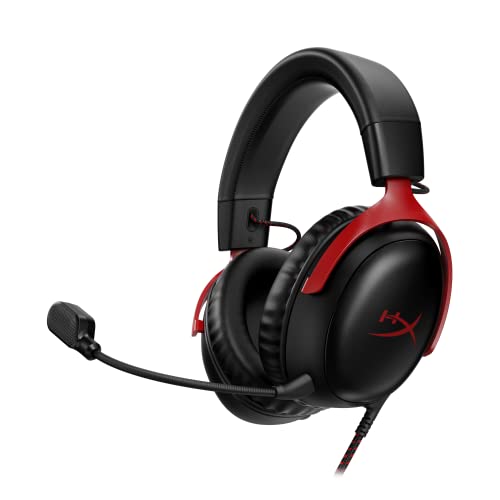
Top-Rated Wired Mics: HyperX, Razer, and SteelSeries
Wired mics are often the go-to choice for serious gamers, offering reliability and stability that wireless mics can’t match. Among the top-rated wired mics are HyperX, Razer, and SteelSeries, which offer outstanding sound quality and ease of use. For example, the HyperX QuadCast Gaming Microphone is a popular choice among streamers and YouTubers, delivering clear and crisp audio with minimal latency. The Razer Seiren X, on the other hand, is designed specifically for gaming and features a condenser capsule for detailed audio pickup. SteelSeries, meanwhile, offers the Arctis 7, a sleek and comfortable mic with Hi-Fi sound and a retractable boom arm.
| Mic | Mic Type | Frequency Response | Sensitivity |
|---|---|---|---|
| HyperX QuadCast | Condenser | 20 Hz – 20 kHz | -35 dB |
| Razer Seiren X | Condenser | 20 Hz – 20 kHz | -30 dB |
| SteelSeries Arctis 7 | Condenser | 20 Hz – 20 kHz | -35 dB |
Wireless Mics for Lag-Free Gaming: Turtle Beach and Astro
While wired mics are reliable, wireless mics offer the freedom to move around while gaming, which is essential for many modern games. Turtle Beach and Astro are among the top wireless mic options, offering lag-free gaming with minimal interference. For example, the Turtle Beach Recon 200 is a popular choice among console gamers, delivering 12-hour battery life and a compact design that fits easily in your pocket. Astro, meanwhile, offers the Astro Gaming A10, a lightweight and comfortable mic with a long-lasting battery and a robust audio signal.
| Mic | Battery Life | Frequency Response | Range |
|---|---|---|---|
| Turtle Beach Recon 200 | 12 hours | 20 Hz – 20 kHz | Up to 10 meters |
| Astro Gaming A10 | Up to 15 hours | 20 Hz – 20 kHz | Up to 5 meters |
Budget-Friendly Options: Aukey, Edifier, and E posi
Not everyone needs a high-end mic, and budget-friendly options can be just as effective. Aukey, Edifier, and E posi offer affordable wireless and wired mics that deliver decent audio quality and ease of use. For example, the Aukey Wireless Gaming Microphone is a budget-friendly option that offers 8-hour battery life and decent sound quality. The Edifier Gaming Microphone, meanwhile, is a wired option with a compact design and a built-in pop filter. E posi, a lesser-known brand, offers the E posi Wireless Gaming Microphone, a budget-friendly wireless option with a rechargeable battery and a compact design.

| Mic | Mic Type | Frequency Response | Price |
|---|---|---|---|
| Aukey Wireless Gaming Microphone | Condenser | 20 Hz – 20 kHz | $25 |
| Edifier Gaming Microphone | Condenser | 20 Hz – 20 kHz | $30 |
| E posi Wireless Gaming Microphone | Condenser | 20 Hz – 20 kHz | $35 |
Recording with External Mics
When it comes to capturing high-quality audio for your Nintendo Switch gaming sessions or voiceovers, using an external microphone can be a game-changer. But, before you start recording, it’s essential to connect your mic to the console correctly.
Connecting External Mics to Nintendo Switch
Connecting an external mic to the Nintendo Switch is relatively straightforward. You’ll need to use the console’s built-in audio jack, which is compatible with most 3.5mm headphones and microphones. Simply plug in your mic, and you’re ready to roll! However, if you’re using a USB microphone, you’ll need to use a third-party adapter or a specialized device like the Nintendo Switch Audio Capture card.
Optimizing Audio Settings for Recording
To get the best possible audio quality, you’ll need to optimize the audio settings on your Nintendo Switch. Here are some tips to help you get started:
- Audio Output: Make sure the audio output is set to “Stereo” to capture a wealth of audio information.
- Mic Gain: Adjust the mic gain to balance the volume levels between your mic and the in-game sound effects.
- Echo Cancellation: Enable echo cancellation to remove unwanted background noise and echo.
Best Practices for Recording Voiceovers and Podcasts
When recording voiceovers or podcasts, it’s crucial to follow some best practices to ensure high-quality audio:
- Find a Quiet Room: Create an ideal recording environment by finding a quiet room with minimal background noise.
- Position Your Mic: Place your microphone around 6-8 inches from your mouth to capture the clearest, most natural sound.
- Speak Clearly: Speak clearly and at a moderate pace to ensure your words are loud and clear.
- Use a Pop Filter: Invest in a pop filter to reduce plosive sounds and reduce the risk of distortion.
- Editing: Don’t forget to edit your recordings to remove any unwanted pauses, mistakes, or background noise.
Gaming Mics with Chat Mixing
Gamers know how important it is to stay connected with teammates and friends while playing online. But let’s face it, too often voice chats can get drowned out by game audio, making it tough to communicate effectively. That’s where mics with chat mixing come in – a game-changer for online gaming! In this section, we’ll explore the world of gaming mics with chat mixing, and help you find the perfect one for your gaming needs.
Mic Models with Built-In Chat Mixing: Turtle Beach and HyperX
When it comes to chat mixing, some mics are designed with this feature in mind. Brands like Turtle Beach and HyperX have created mics that allow you to seamlessly toggle between game audio and voice chat. These mics typically come with a mix control, which enables you to adjust the levels of both game audio and voice chat to your liking. This means you can have a balance of both, so you don’t miss out on crucial game sounds or teammate chatter.
For example, the Turtle Beach Recon 200 features a chat mix dial, which allows you to adjust the levels of game audio and voice chat in real-time. On the other hand, the HyperX Cloud II has a dedicated chat mix button that lets you switch between game audio and voice chat with ease. These mics are perfect for gamers who want to stay connected without sacrificing game audio quality.
Best Chat Mixing Settings for Multi-Player Games
So, how do you set up your chat mixing for optimal gaming performance? The key is to find a balance that works for you and your teammates. Here are some general guidelines to help you get started:
- Start with the game audio at 50-60% volume, and voice chat at 40-50%.
- Adjust the levels based on the game’s audio cues. For example, if the game has a loud soundtrack, you may want to increase the volume of the game audio.
- Experiment with different chat mixing settings until you find a balance that works for you.
How to Prioritize Voice Chat and Game Audio
Now that you have a mic with chat mixing, it’s time to learn how to prioritize voice chat and game audio. Here are some tips to help you get the most out of your mic:
- Use your chat mix settings to prioritize voice chat during critical moments in the game, such as during team fights or when coordinating strategies.
- Adjust your game audio levels based on the game’s intensity. For example, during a quiet moment in the game, you can increase the volume of the game audio to support more ambient sounds.
- Pay attention to your teammates’ feedback. If they’re having trouble hearing you, you may need to adjust your chat mixing settings to increase the volume of your voice chat.
- Don’t be afraid to experiment with different settings until you find a balance that works for you and your team.