Choosing the right microphone for your PC is crucial for clear audio quality. Here, we explore the top options including USB, wireless, and XLR microphones, along with settings and features to ensure optimal sound performance.
Choosing the Right Microphone for PC
When it comes to capturing high-quality audio for your PC, choosing the right microphone is crucial. It’s like finding the perfect pair of shoes – it might seem like a trivial decision, but it can make all the difference in the world. In this section, we’ll explore the various options available for PC microphones, helping you find the one that suits your needs and budget.
USB Microphone Options
USB microphones are a popular choice for PC users, and for good reason. They’re plug-and-play, meaning you can simply connect them to your computer via a USB port and start recording. Some popular USB microphone options include:
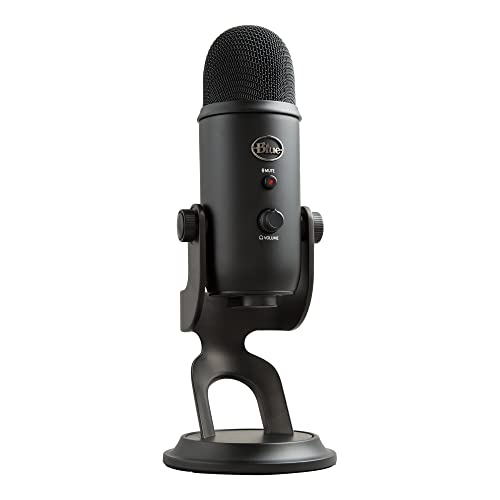
- Blue Yeti: A popular and highly-regarded USB microphone that’s great for podcasting, voice-overs, and music recording.
- Rode NT-USB: A studio-grade USB microphone that’s designed for professional recordings.
- HyperX QuadCast Gaming Microphone: A high-quality USB microphone specifically designed for gamers.
Wireless Microphone Options
If you’re looking for a more portable and convenient option, wireless microphones might be the way to go. They eliminate the need for a physical connection to your computer, making it easier to move around while recording. Some popular wireless microphone options include:
- Logitech Zone Wireless Microphone: A wireless microphone that’s great for gaming and online meetings.
- Sennheiser wireless microphone: A professional-grade wireless microphone that’s designed for public speaking and presentations.
- Audio-Technica ATW-1102 System 10 Wireless Microphone: A high-quality wireless microphone system that’s great for live performances and recordings.
XLR Microphone Options for PC Connection
If you’re looking for a more traditional, high-quality audio recording experience, XLR microphones might be the way to go. These microphones require a separate audio interface to connect to your PC, but offer superior sound quality and flexibility. Some popular XLR microphone options include:
- Shure SM7B: A popular and highly-regarded dynamic microphone that’s great for podcasting and voice-overs.
- Neumann TLM 103: A high-end condenser microphone that’s designed for professional recordings.
- AKG C414 XLII: A high-quality condenser microphone that’s great for live performances and recordings.
Microphone Connectivity Options for PC
When it comes to connecting your microphone to your PC, you have several options to consider. Each type of connection has its own advantages and disadvantages, and choosing the right one can make all the difference in terms of audio quality and convenience.
USB Connection for Plug-and-Play
One of the most popular and user-friendly options is the USB connection. This type of connection allows you to plug your microphone directly into your PC’s USB port, making it easy to use without any additional hardware or software setup.USB microphones are plug-and-play, meaning that your PC will automatically detect and recognize the device, allowing you to start recording or communicating immediately. This makes them ideal for beginners or those who want a hassle-free experience.
3.5mm Jack Connection for Analog Audio
Another option is the 3.5mm jack connection, which is often found on laptops or PC speakers. This type of connection uses analog audio signals and is commonly used for microphone inputs, headphone jacks, and other audio peripherals. The main advantage of this type of connection is that it’s widely supported and can be easily integrated into most sound cards. However, keep in mind that this type of connection may not offer the same level of quality as a USB connection.
XLR Connection for External Audio Equipment
For those who require high-fidelity audio or need to connect their microphone to external audio equipment, such as mixers or soundboards, an XLR connection may be the best option. XLR connectors are commonly used in professional audio settings and offer high-quality, balanced audio signals. However, keep in mind that this type of connection typically requires a separate audio interface or sound card to function properly.
Remember to choose a connection type that matches your microphone’s specifications and your PC’s capabilities. By considering your options carefully, you can ensure the best possible audio quality and a seamless recording or communication experience.

Microphone Features for Clear PC Audio
When it comes to achieving high-quality audio while gaming, streaming, or video conferencing on your PC, microphone features play a crucial role. You want to ensure that your voice sounds clear, crisp, and free from distractions. This section delves into the various microphone features that can help you achieve this goal.
Condenser Microphones for Clearer Audio
Condenser microphones are often the go-to choice for those seeking crystal-clear audio. But what makes them so special? The answer lies in their design. Condenser microphones have a larger diaphragm than their dynamic counterparts, which allows them to capture a wider range of frequencies. This results in a more detailed and nuanced sound that’s perfect for podcasting, music production, or voiceovers.
Here are some key benefits of condenser microphones:
- Higher frequency response: Condensers can pick up higher frequency sounds, resulting in a brighter and more detailed sound.
- Increased dynamic range: They can handle a wider range of volume levels, from gentle whispers to loud screams, without distorting the sound.
- Better transient response: Condensers can capture the sudden changes in sound, like the attack of a snare drum, more accurately.
Cardioid Microphones for Reduced Background Noise
Cardioid microphones are another type of microphone that’s designed to reduce background noise and focus on your voice. Their unique polar pattern, which picks up sound from the front and rejects sound from the sides and rear, makes them ideal for noisy environments or situations where you want to minimize echo.
Here are some benefits of cardioid microphones:

- Background noise reduction: Cardioids are designed to reject unwanted sounds, like ambient chatter or fan noise, and focus on your voice.
- Improved voice separation: They can help isolate your voice from other sounds, making it easier to pick out individual voices in a crowded room.
- Studio-quality sound: Cardioids are often used in professional recording studios to capture high-quality audio with minimal background noise.
Polar Pattern Options for Directional Microphone Selection
When choosing a directional microphone, the polar pattern is a crucial consideration. The polar pattern refers to how the microphone responds to sound waves from different directions. Here are some common polar patterns and their applications:
| Polar Pattern | Description | Application |
|---|---|---|
| Omni-directional | Picks up sound from all directions | Recording in a silent room or in a situation where you want to capture a wide field of sound. |
| Cardioid | Picks up sound from the front and rejects sound from the sides and rear | Recording in a noisy environment or prioritizing the main sound source. |
| Supercardioid | Picks up sound from the front and sides, while rejecting sound from the rear | Recording in a slightly noisy environment or where there’s a primary sound source. |
| Hyper-cardioid | Picks up sound from the front and sides, while rejecting sound from the rear and sides | Recording in a very noisy environment or where there’s a strong primary sound source. |
By understanding the different polar patterns and their applications, you can choose the right directional microphone for your specific needs and achieve high-quality audio on your PC.
PC Microphone Settings and Adjustments
When it comes to getting the most out of your PC microphone, adjusting the settings and making a few tweaks can make all the difference. In this section, we’ll explore the importance of microphone sensitivity, noise reduction, and echo cancellation settings for optimal audio quality.
Microphone Sensitivity Adjustment for Optimal Audio
Have you ever noticed that your microphone is picking up too much background noise or, on the other hand, not picking up your voice loud and clear? This is where microphone sensitivity comes into play. Adjusting the sensitivity of your microphone is crucial to ensure that your audio levels are optimal. Think of microphone sensitivity like the volume control on your TV – you need to find the sweet spot where the audio is loud and clear without distortion.
To adjust your microphone sensitivity, look for the “Microphone Sensitivity” option in your audio settings. This option is usually available in the device settings or audio properties. Depending on your device, you may have a slider or a drop-down menu to choose from. Here are some general guidelines to keep in mind:

- If you’re using a condenser microphone, start with a sensitivity setting of around 30-40 dB. This setting will give you a good balance between loud and clear audio.
- If you’re using a dynamic microphone, start with a sensitivity setting of around 10-20 dB. This setting will help reduce background noise and amplify your voice.
Remember, microphone sensitivity is a matter of personal preference. Experiment with different settings to find what works best for you.
Noise Reduction Settings for Improved Audio Quality
Have you ever recorded a video conference call or podcast only to be disappointed by the quality of the audio? This is where noise reduction settings come into play. Noise reduction is a feature that helps eliminate background noise, hissing, and other unwanted sounds from your audio recordings.
To enable noise reduction settings, look for the “Noise Reduction” option in your audio settings. This option is usually available in the device settings or audio properties. Depending on your device, you may have a slider or a drop-down menu to choose from. Here are some general guidelines to keep in mind:
- If you’re recording in a noisy environment, enable noise reduction to help eliminate background sounds.
- If you’re recording in a quiet environment, you can try disabling noise reduction to preserve the natural sound of your voice.
Remember, noise reduction is not a one-size-fits-all solution. Experiment with different settings to find what works best for your specific recording environment.
Echo Cancellation Settings for Clearer Audio Transmissions
Have you ever experienced echo or reverberation in your audio recordings? This is where echo cancellation settings come into play. Echo cancellation is a feature that helps eliminate echoes and reverberations from your audio recordings.

To enable echo cancellation settings, look for the “Echo Cancellation” option in your audio settings. This option is usually available in the device settings or audio properties. Depending on your device, you may have a slider or a drop-down menu to choose from. Here are some general guidelines to keep in mind:
- If you’re recording in a room with a lot of reflective surfaces, enable echo cancellation to help eliminate echoes.
- If you’re recording in a room with a lot of soft surfaces, you can try disabling echo cancellation to preserve the natural sound of your voice.
Remember, echo cancellation is not a foolproof solution. Experiment with different settings to find what works best for your specific recording environment.
