Get started with Razer Synapse 3 on your Mac by downloading and installing the software. Explore features like customizable macro keys, adjustable mouse sensitivity, and Razer Chroma lighting.
Downloading and Installing Razer Synapse 3 on Mac
Getting started with Razer Synapse 3 on your Mac is relatively straightforward. Before diving into the installation process, it’s essential to make sure your system meets the minimum requirements to run this software.
Razer Synapse 3 Mac System Requirements
Before downloading and installing Razer Synapse 3, ensure your Mac meets the following system requirements:
| System Requirement | Details |
|---|---|
| Operating System | macOS High Sierra (10.13) or later |
| Processor | Intel Core i3 or AMD equivalent |
| RAM | 4 GB or more |
| Storage | 200 MB or more available space |
If your Mac meets these requirements, proceed to the next step.
Downloading Razer Synapse 3 for Mac
To download Razer Synapse 3 for Mac, follow these steps:

- Open a web browser on your Mac and navigate to the Razer official website.
- Click on the “Support” tab and select “Software” from the dropdown menu.
- Scroll down to the “Razer Synapse 3” section and click on the “Download” button.
- Wait for the download to complete. The file size is approximately 200 MB.
Installing Razer Synapse 3 on Mac
Once the download is complete, follow these steps to install Razer Synapse 3 on your Mac:
- Double-click on the Razer Synapse 3 download file to initiate the installation process.
- Click “Continue” to begin the installation process.
- Review the terms and conditions, then click “Agree” to accept them.
- Choose the installation location and click “Install” to proceed.
- Wait for the installation process to complete. This may take a few minutes.
After installing Razer Synapse 3, you’ll need to restart your computer to complete the installation process. Once your Mac is restarted, you can launch Razer Synapse 3 from the Applications folder or using Spotlight search.
Razer Synapse 3 Mac Features
================================
Razer Synapse 3 is a powerful software that unlocks the full potential of your Razer devices, and the Mac edition is no exception. With Razer Synapse 3, you can customize and control your Razer devices to suit your gaming needs. But what exactly can you do with this amazing software? Let’s dive into the features that make Razer Synapse 3 a must-have for Mac users.
Customizing Macro Keys on Razer Synapse 3 for Mac
One of the most exciting features of Razer Synapse 3 is the ability to customize macro keys. With a simple drag-and-drop interface, you can assign complex sequences of commands to individual keys, allowing you to dominate your favorite games. Imagine being able to perform a sequence of actions with a single key press – it’s like having an extra pair of hands!
Adjusting Mouse Sensitivity with Razer Synapse 3 for Mac
Gaming precision is key, and Razer Synapse 3 makes it easy to adjust your mouse sensitivity to suit your playing style. Whether you’re a fast-paced FPS gamer or a strategic RTS player, you’ll appreciate the intuitive interface that lets you fine-tune your mouse settings. Say goodbye to frustrating moments of aiming uncertainty – with Razer Synapse 3, you’ll be accurate and in control.
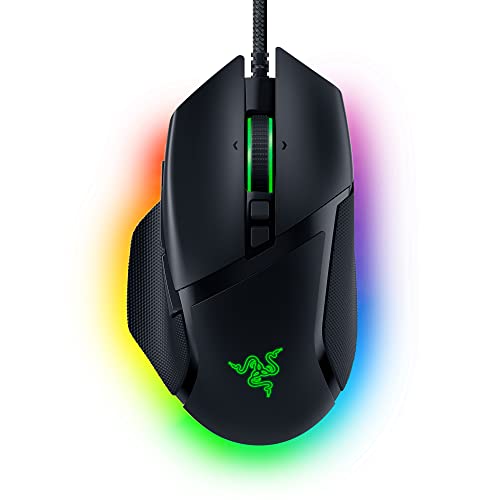
Using Razer Chroma Lighting with Razer Synapse 3 for Mac
Light colors, anyone? Razer Synapse 3’s Chroma lighting system is a game-changer for visual effects enthusiasts. With a wide range of customizable lighting effects and colors, you can personalize your gaming experience like never before. Imagine syncing your keyboard and mouse lights to match your game’s atmosphere – it’s a visual spectacle that will draw attention and enhance your gaming environment!
Troubleshooting Razer Synapse 3 on Mac
Resolving Razer Synapse 3 Connection Issues on Mac
Are you struggling to connect your Razer Synapse 3 to your Mac? Fear not! We’ve got you covered. Connection issues can be frustrating, but they’re often easy to resolve. Here are some troubleshooting steps to help you get your Razer Synapse 3 up and running:
- Make sure that your Razer Synapse 3 software is updated to the latest version. Sometimes, connection issues can be resolved by simply updating the software.
- Restart your Mac and Razer Synapse 3 software. A simple reboot can often resolve connectivity issues.
- Check your Razer Synapse 3 USB connection. Ensure that it’s securely plugged into your Mac and try using a different USB port if necessary.
Fixing Razer Synapse 3 Keyboard Not Recognized on Mac
Has your Razer Synapse 3 keyboard stopped working on your Mac? Don’t worry, we’re here to help you resolve this issue. When your keyboard isn’t recognized, it can be frustrating, but it’s often a simple fix. Here are some troubleshooting steps to get your keyboard working again:
- Restart your Razer Synapse 3 software and your Mac. Sometimes, a simple reboot can resolve issues with keyboard recognition.
- Check that your Razer Synapse 3 keyboard is properly plugged into your Mac. Try using a different USB port if necessary.
- Disable and re-enable your Razer Synapse 3 keyboard by going to System Preferences > Keyboard > Keyboard tab and clicking the “Keyboard” dropdown menu.
Updating Razer Synapse 3 on Mac
Staying up-to-date with the latest software updates is essential to ensuring that your Razer Synapse 3 is running smoothly. Here’s how to update Razer Synapse 3 on your Mac:
- Open Razer Synapse 3 on your Mac and sign in with your Razer account.
- Click on the “Settings” icon in the top-right corner of the screen and select “Check for Updates.”
- If an update is available, click “Download and Install” to upgrade your Razer Synapse 3 software.
- Restart your Razer Synapse 3 software after the update to ensure that all changes take effect.
Customizing Razer Synapse 3 Mac Settings
Razer Synapse 3 is not just a tool for controlling your Razer peripheral devices, but also a powerful software that allows you to customize your gaming experience to your liking. In this section, we’ll dive into the various settings that you can tweak to optimize your performance and take your gaming experience to the next level.
Creating Custom Keybinds on Razer Synapse 3 for Mac
One of the most useful features of Razer Synapse 3 is its ability to create custom keybinds. This allows you to assign specific actions to specific keys on your keyboard, giving you more control over your gaming experience. Whether you want to create a complex sequence of actions or simply assign a simple shortcut, custom keybinds can be a game-changer.
You can create custom keybinds by accessing the “Keybinds” tab in the Razer Synapse 3 software. From here, you can assign specific keys on your keyboard to specific actions. You can also create custom keybinds for specific games by using the “Game-specific” tab.
Adjusting Razer Synapse 3 Key Repeat Delay
Have you ever found yourself accidentally hitting a key on your keyboard repeatedly, only to realize that you meant to press it once? If so, you’re not alone. This is a common issue that many gamers face, and it’s one that can be easily fixed by adjusting the key repeat delay in Razer Synapse 3.
To adjust the key repeat delay, simply access the “Keyboard” tab in the Razer Synapse 3 software and look for the “Repeat delay” option. From here, you can adjust the delay to your liking. If you find that you’re still accidentally hitting keys too quickly, you can also adjust the “Repeat rate” option to slow down the rate at which keys are repeated.

Setting Up Razer Synapse 3 Profiles for Mac
One of the most powerful features of Razer Synapse 3 is its ability to create custom profiles for specific games or situations. This allows you to tailor your gaming experience to your specific needs, giving you a competitive edge in your favorite games.
To set up a custom profile, simply access the “Profiles” tab in the Razer Synapse 3 software and click on the “Create new profile” button. From here, you can choose the specific settings that you want to include in your profile, such as keybinds, lighting effects, and more. You can also save your profiles to the cloud, allowing you to access them from any Mac that you use.
