Learn how to connect RCA to XLR and improve your and compatibility options. Discover the benefits of conversion, how to choose the right converter, and how to troubleshoot common issues.
Connecting RCA to XLR: The Basics
===============
If you’re about to embark on a musical adventure, getting your RCA and XLR connectors to talk to each other is a crucial first step. But before we dive into the nitty-gritty of connecting them, it’s essential to understand what these terms even mean.
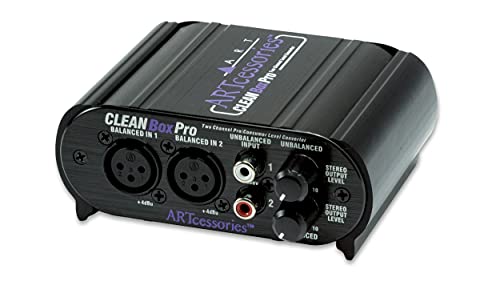
What is RCA and XLR?
A quick glance at the back of your audio equipment might leave you wondering what the heck an RCA and XLR are. RCA is a type of connector used in consumer electronics, think vinyl record players, cassette decks, and CD players. It’s the standard connector for unbalanced audio signals, and you’ll often find it on devices with analog outputs. On the other hand, XLR is a type of connector commonly used in professional audio equipment, such as mixers, preamps, and microphones. It’s designed for balanced audio signals, which offer better noise rejection and longer cable runs.
Understanding the Pinouts
Now that you know what RCA and XLR are, it’s time to get familiar with their pinouts. RCA connectors have three gold pins, while XLR connectors have three or five pins, depending on the model. The pinout for RCA connectors is relatively simple: the center pin carries the hot signal, while the outer pins provide grounding. XLR connectors, on the other hand, use a more complex pinout system. The three-pin XLR has a ground pin, a hot pin, and a cold pin, while the five-pin XLR adds two extra pins for extra functionality. Understanding the pinouts is vital for ensuring a stable and high-quality audio connection.
Benefits of RCA to XLR Conversion
When it comes to music and audio, the devil is in the details. And one crucial detail that can make a world of difference is the type of connectors we use to transmit audio signals. RCA to XLR conversion is a simple yet powerful technique that can unlock a whole new level of audio quality and compatibility. But what exactly does this conversion entail, and why is it so important?
Improved Audio Quality
RCA to XLR conversion is all about guaranteeing a lossless transmission of audio signals. RCA connectors are notorious for their tendency to corrupt audio signals, introducing noise, hum, and distortion that can ruin the listening experience. XLR connectors, on the other hand, are designed to handle high-quality audio signals with ease. By converting your RCA signal to XLR, you can rest assured that your audio will be transmitted with minimal degradation, preserving the clarity, depth, and richness of the original sound.
Wider Compatibility Options
In an audio setup, compatibility is key. A converter that can work seamlessly with a variety of devices, formats, and systems is essential for flexibility and convenience. RCA to XLR conversion offers a level of compatibility that’s hard to match. Whether you’re connecting a mixer, a preamp, a synth, or a reverb unit, an RCA to XLR converter can ensure that your audio signals are transmitted accurately and reliably, regardless of the device or system you’re using. This means you can focus on crafting your music, rather than worrying about compatibility issues.
Choosing the Right RCA to XLR Converter
When it comes to selecting an RCA to XLR converter, there’s a crucial decision to make: active or passive conversion?
Active vs Passive Converters
Active converters are essentially amplified versions of passive converters. They receive a small portion of the input signal and use it to boost the power of the conversion process. This results in a cleaner, stronger output signal that’s less prone to noise and interference. Active converters are ideal for longer cable runs or applications where high signal-to-noise ratios are essential. However, they do consume power and can introduce a slight delay in the audio signal.

On the other hand, passive converters rely solely on the input signal to drive the conversion process. They’re essentially electronic components that don’t add any power to the signal, making them a favorite among audiophiles who want to preserve the original signal integrity. Passive converters are perfect for short cable runs and situations where noise must be kept to a minimum.
| Active Converters | Passive Converters |
|---|---|
| Amplified signal | No amplification |
| Less susceptible to noise | More susceptible to noise |
| Suitable for longer cable runs | Suitable for short cable runs |
Impedance Matching
Another crucial consideration when choosing an RCA to XLR converter is impedance matching. Impedance refers to the opposition to the flow of an alternating current (AC) in an electrical circuit. RCA connectors typically have an impedance of around 150-300 ohms, while XLR connectors have a much higher impedance of around 600-2000 ohms.
When converting an RCA signal to XLR, it’s essential to ensure that the converter’s output impedance matches the input impedance of the XLR equipment. This prevents signal loss, distortion, or even damage to the equipment. Fortunately, most RCA to XLR converters are designed with impedance matching in mind, making it easy to find a converter that suits your specific requirements.
When selecting an RCA to XLR converter, it’s essential to consider both the active-vs-passive debate and the importance of impedance matching. By making informed decisions about these factors, you’ll be well on your way to ensuring high-quality audio signals and a seamless connection experience.
Installing the RCA to XLR Connection
When it comes to connecting your RCA cables to your XLR ports, it’s essential to get the installation right to ensure a seamless audio experience. In this section, we’ll guide you through the process of choosing the right cable and securing the connectors.

Choosing the Right Cable
Before you start connecting, you need to ensure you’re using the right type of cable. It’s like trying to fit a square peg into a round hole – it just won’t work! RCA cables typically have a distinctive shape and size, while XLR cables have a different configuration. Look for cables specifically designed for RCA to XLR conversion, and make sure they’re compatible with your equipment.
Here are some key features to consider when selecting the right cable:
- Length: Choose a cable that’s the right length for your setup. Too short, and you’ll be limited in your placement options; too long, and you’ll be dealing with annoying excess cable.
- Material: Cables made from high-quality materials like copper or aluminum will provide a clean, clear signal. Avoid cheap, flimsy cables that may compromise audio quality.
- Shielding: Look for cables with shielding to minimize electromagnetic interference (EMI) and radio-frequency interference (RFI).
Securing the Connectors
Now that you’ve got the right cable, it’s time to connect it. This is the part where most people get it wrong – Loctite is not necessary, nor is glue! Here are some simple steps to securely connect your RCA to XLR cable:
- Make sure the connectors are clean: Dirt, dust, and corrosion can prevent a solid connection. Clean the connectors with a soft cloth and a mild detergent.
- Align the pins: Carefully align the pins on the RCA and XLR connectors. It’s like fitting a puzzle piece – make sure they’re snug and secure.
- Tighten gently: Tighten the connectors in a star pattern (tightening one a little, then moving to the next one, and so on). This ensures even pressure and prevents damage.
- Check the connection: Give the connection a gentle tug to ensure it’s secure. If it feels loose, tighten the connectors further. If it feels tight, you’re good to go!
Troubleshooting Common Issues
Troubleshooting is an essential part of any technical process, and RCA to XLR conversion is no exception. When things don’t go as planned, it can be frustrating and disheartening. But fear not, dear audio enthusiasts! We’ve got you covered with a comprehensive guide to troubleshooting common issues that may arise during the conversion process.
No Audio Signal
“What’s the deal with no audio signal?” you might ask. Well, let’s dive into some possible causes and solutions.

- Check your cables: Are they securely plugged in and free of any damage? A loose connection or a damaged cable can prevent the audio signal from transferring properly.
- Verify your converter settings: Make sure your RCA to XLR converter is set to the correct input and output levels. A mismatch between the two can result in no audio signal.
- Check your device settings: Ensure that your device (such as a mixer or preamp) is set to the correct input mode and that the volume is turned up.
Distorted Audio
“Ugh, my audio is distorted!” you cry. Don’t worry, we’re here to help you fix this annoying issue. Here are some possible causes and solutions.
- Check your gain levels: Is your signal too hot? Try reducing the gain levels on your converter or device to prevent distortion.
- Verify your impedance matching: Is your converter’s output impedance matched to the input impedance of your device? Mismatched impedance can cause distortion.
- Check your cable quality: Are your cables of high-quality? Using low-quality cables can introduce distortion and other issues. Consider upgrading to a higher-quality cable.
