Understand the basics of subwoofer wiring and how to connect your 2-channel amplifier for optimal sound quality. Follow our wiring diagram and safety precautions to ensure safe and effective installation.
Subwoofer Wiring Basics
When it comes to setting up your subwoofer, understanding the basics of subwoofer wiring is crucial. After all, you want your sub to sound its best and work seamlessly with your other audio equipment. But what exactly does it mean to “wire a subwoofer”? Simply put, wiring a subwoofer involves connecting the sub to your amplifier (or receiver) using speaker cables, and making sure that the wires are properly terminated at both ends.
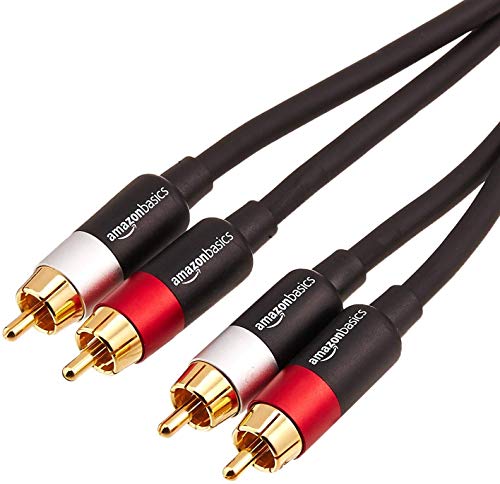
RCA Cable Connection
One of the most common connections you’ll make when wiring your subwoofer is the RCA connection. Most amplifiers and receivers have RCA inputs, which allow you to connect your subwoofer’s RCA output to the amplifier’s RCA inputs. When making this connection, it’s essential to match the red RCA connection to the red RCA input and the white RCA connection to the white RCA input. This ensures that the left and right channels of your audio signal are sent correctly to your subwoofer.
Speaker Terminal Configuration
Another important aspect of subwoofer wiring is the speaker terminal configuration. Most subwoofers have speaker terminals that accommodate different wire sizes and configurations. When connecting your subwoofer, you’ll need to match the wire size and configuration to the terminal configuration on your subwoofer. Some common configurations include bi-wiring, bi-amping, and single-wiring.
Wire Gauge and Size Considerations
Finally, when it comes to wire gauge and size, it’s essential to choose the right wire for your subwoofer. A wire that’s too thin or too thick can cause distortion, noise, or even damage to your equipment. As a general rule, it’s recommended to use 16-gauge or 14-gauge speaker wire for most subwoofers. However, the specific wire gauge and size you need may vary depending on the length of your run, the power output of your amplifier, and the type of subwoofer you’re using. Be sure to consult your subwoofer’s specifications and take into account any limitations or recommendations when choosing the right wire.

2-Channel Amp Wiring
When it comes to amplifying your sound, having the right wiring setup is crucial to ensure optimal performance. Here, we’ll dive into the specifics of 2-channel amp wiring, exploring different configurations and techniques to help you get the most out of your equipment.
Stacking Amplifier Configuration
Stacking Amplifiers: The Power of Synergy
Stacking amplifiers is a popular configuration for those who want to power multiple speakers or need more headroom for their sound system. In this setup, multiple amplifiers are connected in a series, with each amplifier powering a specific set of speakers. Stacking amplifiers offers several benefits, including:
- Increased power output: By combining the power of multiple amplifiers, you can achieve a higher total power output, making it ideal for larger venues or loudspeaker systems.
- Flexibility: Stacking amplifiers allows you to configure your sound system to suit your specific needs, whether it’s powering multiple speakers or handling high-power loads.
- Redundancy: In the event of a power amplifier failure, the stacked configuration ensures that the remaining amplifiers can still operate, minimizing downtime and keeping your system up and running.
Bridging Amplifier Configuration
Bridging Amplifiers: A Stronger Signal
Bridging an amplifier is another popular configuration that’s used to increase the power output of a single amplifier. In this setup, the amplifier is configured to drive a single speaker or a pair of speakers with a combined impedance that matches the amplifier’s output impedance. Bridging amplifiers offers several benefits, including:
- Increased power output: Bridging an amplifier can increase its power output by up to double the amount, making it ideal for powering large, high-impedance speakers.
- Simplified system design: Bridging amplifiers eliminates the need for additional amplifiers or signal processors, simplifying system design and reducing the overall cost.
- Increased flexibility: Bridging amplifiers allows you to power speakers with varying impedances, making it a versatile configuration for a wide range of sound systems.
Channel Mixing and Switching
Mixing and Switching: The Art of Configuration
When working with multiple channels and amplifiers, channel mixing and switching becomes a crucial aspect of sound system design. By configuring your amplifiers to handle multiple channels, you can create a more flexible system that can be easily adapted to different scenarios. Channel mixing and switching offers several benefits, including:
- Increased flexibility: By mixing and switching channels, you can create a system that can handle multiple speaker configurations, making it ideal for live events, installations, or broadcasts.
- Simplified system design: Channel mixing and switching eliminates the need for multiple amplifiers or signal processors, reducing the overall complexity of your system.
- Improved sound quality: By optimizing your channel configuration, you can ensure that each speaker receives the optimal signal, resulting in improved sound quality and a more engaging listening experience.
Subwoofer Amplifier Specifications
Power Output and RMS Ratings
When it comes to understanding the power output and RMS ratings of your subwoofer amplifier, it’s essential to grasp the fundamental concept of wattage. Imagine you’re trying to power a large party with a single speaker. You need a sufficient amount of juice to fill the room with bass, right? That’s where power output comes in. The power output of an amplifier is typically measured in watts (W) and represents the maximum amount of energy the amp can deliver to the subwoofer in a given period.
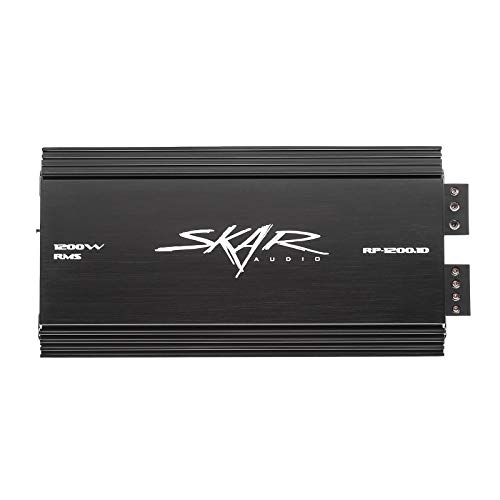 Skar Audio RP-1200.1D Monoblock Class D MOSFET Amplifier with Remote Subwoofer Level Control, 1200W
RMS (Root Mean Square) ratings, on the other hand, are a more accurate representation of an amplifier’s power output. RMS is a measure of the average power output of an amp, taking into account any short-term spikes in power consumption. Think of it like the consistent hum of a bass guitar versus the occasional loud note – RMS measures the overall steady-state power output, while peak power output is measured in watts.
For example, if an amplifier has a power output of 500W and an RMS rating of 250W, it means that the amplifier can consistently deliver 250W to the subwoofer, with the potential to peak at 500W for short bursts.
Frequency Response and Sensitivity
Frequency response and sensitivity are two critical specifications that affect the overall performance of your subwoofer amplifier. Frequency response refers to the range of frequencies that the amplifier can accurately reproduce, typically measured in Hertz (Hz). A wider frequency response means that the amp can handle a broader range of bass notes and nuances, from deep rumble to high-pitched snap.
Sensitivity, on the other hand, measures the amount of input signal required by the amplifier to produce a specific power output. A higher sensitivity rating means that the amp can operate more efficiently, requiring less input signal to produce a certain level of power.
For instance, a subwoofer amplifier with a frequency response of 20 Hz to 200 Hz and a sensitivity of 85 dB could accurately reproduce deep bass notes and respond well to a variety of input signals.

Impedance and Ohm Ratings
Impedance and ohm ratings are essential specifications to consider when selecting a subwoofer amplifier. Impedance, measured in ohms (Ω), refers to the total opposition to the flow of electrical current presented by an amplifier or subwoofer. Think of it like the “tonal character” of the amp – a low impedance amp tends to produce a “warm” or “muscular” sound, while a high impedance amp tends to produce a “bright” or “agile” sound.
Ohm ratings, on the other hand, refer to the load impedance presented by the subwoofer to the amplifier. A subwoofer with a specified ohm rating (e.g., 4 ohms, 8 ohms, or 16 ohms) dictates the maximum power output that the amplifier can safely deliver to the subwoofer without compromising its performance or safety.
For example, if an amplifier is rated to drive 4-ohm loads, it’s designed to deliver maximum power to a subwoofer with an impedance of 4 ohms or less. Always ensure that the amplifier and subwoofer are compatible in terms of impedance to avoid component damage or reduced performance.
Wiring Safety Precautions
When it comes to wiring your subwoofer or amplifier, safety should always be your top priority. Proper wiring can make all the difference between a successful setup and a catastrophic failure. In this section, we’ll explore the importance of voltage and current considerations, common wire damage and safety risks to watch out for, and grounding and shielding best practices to keep your setup running smoothly.
Voltage and Current Considerations
Before connecting any wires, it’s essential to understand the voltage and current ratings of your amplifier and subwoofer. Think of voltage and current as the key and lock, respectively – they need to be compatible for the connection to work seamlessly.
- Ensure the voltage rating of your amplifier matches the DC output voltage specified in the subwoofer manual.
- Check the current rating of your amplifier and subwoofer to avoid exceeding the maximum recommended current.
- If you’re unsure, consult the manufacturer’s documentation or contact their support team for guidance.
Wire Damage and Safety Risks
Wires can be fragile, and damage can occur easily, especially if they’re bent, stretched, or crimped excessively. When this happens, it’s not just a matter of convenience – it’s a safety hazard.
- Avoid touching any electrical components or wires, as this can cause electrical shock or even death.
- If you notice any signs of wire damage, such as fraying, cracking, or cuts, do not attempt to repair the wire. Instead, replace it with a new one.
- Keep your workspace clean and well-lit to reduce the risk of tripping or slipping and causing damage to wires or other components.
Grounding and Shielding Best Practices
Grounding and shielding are crucial for protecting your equipment from electrical noise and interference.
- Connect the ground wire to the same voltage reference point as the positive wire (usually the manufacturer’s recommended grounding point).
- Use shielded cables for longer runs to minimize electromagnetic interference (EMI) and radio-frequency interference (RFI).
- Keep the grounding point secure and avoid loose connections, as these can cause electrical shock or malfunction.
By following these simple guidelines, you’ll be well on your way to a safe and successful wiring setup. Remember, safety should always be your top priority when working with electrical components.
Troubleshooting and Repair
When it comes to troubleshooting and repairing your audio setup, it’s essential to approach the problem with a methodical and systematic approach. Think of it like being a detective trying to solve a mystery! You’ll need to gather clues, piece together the evidence, and eliminate potential culprits until you find the root cause of the issue.
Common Wiring Issues and Faults
So, what are some of the most common wiring issues and faults that can arise? Here are a few to keep an eye out for:

- Loose connections: It’s like the classic game of telephone – if the connection is loose, the signal can become distorted or lost along the way. Make sure those connections are secure!
- Cable damage: Whether it’s a knick in the cable or a frayed end, damage to your cables can cause signal degradation or even loss.
- Incorrect connections: This is where patience and attention to detail come in handy. Double-check those connections to ensure they’re correct and secure.
- Faulty components: Sometimes, it’s not the wiring itself, but rather a faulty component that’s causing the issue. Keep an eye out for signs of wear and tear, and don’t be afraid to replace those components as needed!
Troubleshooting Techniques and Methods
So, you’ve identified some potential issues, but now it’s time to get down to business and start troubleshooting! Here are some techniques and methods to help you track down that pesky problem:
- Isolate the issue: Try to isolate the issue by disconnecting and reconnecting various components. This can help you identify the source of the problem.
- Use a multimeter: A multimeter is a handy tool that can help you measure voltage, current, and resistance. It’s like having a superpower!
- Consult the manual: Sometimes, the solution is right in front of you. Consult the manual for your equipment to see if there are any specific troubleshooting instructions or troubleshooting guides.
- Research online: The internet is a wealth of knowledge! Research online to see if other users have experienced similar issues and what solutions they’ve found.
Repairing and Replacing Wiring Components
Finally, it’s time to put your detective skills to the test and fix that pesky issue! Here are some tips for repairing and replacing wiring components:
- Start with simple repairs: Before diving into more complex repairs, try to address any simple issues first. For example, if a connection is loose, try tightening it rather than replacing the entire component.
- Use the right tools: Make sure you have the right tools for the job. This can include wire strippers, pliers, and other specialized tools.
- Consult a professional: If you’re not comfortable with DIY repairs, it’s always best to consult a professional. They can help you diagnose the issue and provide the necessary repairs.
- Keep a parts inventory: Keep a parts inventory to ensure that you have the necessary components on hand. This can save you time and frustration in the long run!
