Want to know which AirPod has the mic and how to use it for voice calls and audio recordings? Learn about the mic placement, functions, and settings on both standard AirPods and AirPods Pro, and improve your audio experience with Apple’s innovative features.
Are Both AirPods Mics Built-In?
When it comes to AirPods, many users wonder if both earbuds have built-in microphones. The answer is yes, but let’s dive deeper to understand the specifics. AirPods Pro, as well as the standard AirPods, come equipped with microphones. However, are they identical in both earbuds? We’ll explore that in this section.
Mic Placement on AirPods Pro and Standard AirPods
The placement of the microphones on AirPods Pro and standard AirPods is slightly different. On the AirPods Pro, the microphones are positioned at the stem of the earbuds, which helps to block out background noise and improve call quality. In contrast, the standard AirPods have the microphones situated at the top of the earbuds, near the speaker grille. This difference in placement can result in slight variations in audio quality and noise cancellation.
Differences in Audio Quality between Mics
Given the distinct microphone placements on AirPods Pro and standard AirPods, it’s natural to wonder if there are differences in audio quality between the two. The honest answer is, yes, there can be a noticeable difference. AirPods Pro’s microphones are designed to excel in noisy environments, providing improved noise cancellation and voice clarity. Standard AirPods, on the other hand, may struggle a bit more in loud environments, although they still deliver good overall audio quality. These differences are more noticeable during voice calls, especially when trying to communicate in crowded areas or with background noise.
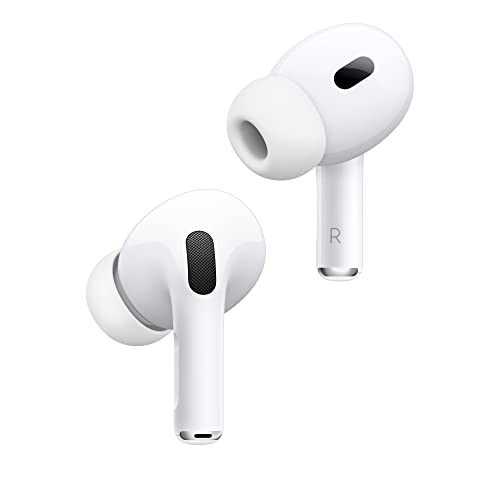
Left or Right AirPod: Which Has the Mic?
When it comes to finding the microphone on your AirPods, it’s natural to wonder which one has it – the left or the right earbud. The good news is that both AirPods have built-in microphones, so you don’t have to worry about missing out on voice calls or recordings.
Identifying Mic Location on Each Earmuff
To identify the microphone on each earmuff, simply look for the tiny grille next to the speakers. On both AirPods, the microphone is located on the bottom rim of the earmuff, near the speaker. If you’re still unsure, you can perform a simple test: make a loud noise and hold the microphone close to your mouth. The other person on the call should be able to hear you clearly.
Why Mic Placement Matters for Voice Calls
So, why does the mic placement matter for voice calls? Think of it like this: the microphone is like a pair of ears, listening to your voice and translating it into audio signals sent to the other person. If the microphone is too close to your mouth, your voice might sound muffled or distorted. On the other hand, if it’s too far away, your voice might sound distant or quiet. By placing the microphone on the bottom rim of the earmuff, AirPods optimize the sound quality for clearer voice calls and recordings.
Mic Functions: Recording, Noise Cancellation, and More
Recording high-quality audio is crucial for various purposes, such as meetings, interviews, or even creating educational content. Fortunately, AirPods have impressively advanced mic functions that can help you achieve crystal-clear audio. In this section, we’ll dive into the capabilities of AirPods mics and explore the features that make them so effective.
Capturing Clear Audio for Meetings and Recordings
When it comes to recording audio for meetings, podcasts, or lectures, the AirPods mic is designed to capture even the faintest whispers. But how does it do it? The mic is able to pick up audio signals with remarkable precision thanks to its high-fidelity audio processing technology. This means that it can detect even the slightest variations in sound pressure and translate them into clear, crisp audio.
Imagine you’re in a quiet room, and you’re talking to someone who is standing on the other side of the table. You’ll want to be heard, right? The AirPods mic will pick up your voice with precision, eliminating any background noise and ensuring that your message gets across clearly. It works the same way when recording audio for content creation – whether you’re a podcaster, YouTuber, or online educator, the AirPods mic is designed to capture your voice with exceptional clarity.

Enhancing Voice Calls with Noise Cancellation Technology
Another impressive feature of the AirPods mic is its advanced noise cancellation technology. This technology uses advanced algorithms to detect and eliminate background noise, ensuring that your voice comes through loud and clear. Whether you’re on a call in a noisy coffee shop or a crowded elevator, the AirPods mic will adapt to the environment and focus on your voice alone.
This technology is especially useful for those who work remotely or need to participate in video meetings from noisy environments. With the AirPods mic, you can rest assured that your voice will be heard loud and clear, without any distractions. And if you’re concerned about your own background noise, don’t worry – the AirPods mic has got you covered too. Its advanced noise-reduction technology can eliminate even the most annoying sounds, like keyboard typing or paper rustling, ensuring that your audio is always professional and polished.
By combining advanced audio processing technology with noise cancellation, the AirPods mic has set a new standard for voice quality. Whether you’re recording audio for content creation or participating in voice calls, the AirPods mic is designed to deliver exceptional results.
Switching Audio Output with a Different Microphone
Are you ready to experience the world of AirPods like never before? In this section, we’ll dive into the exciting world of switching audio output with a different microphone. Whether you’re a music enthusiast, a gamer, or a busy professional, you’ll love the flexibility this feature offers.
Enabling Transparency Mode for Outdoor Use
Imagine being able to take calls outside on a windy day, without worrying about background noise disrupting your conversation. That’s what Transparency Mode is all about. This feature allows you to hear the world around you while still taking calls, making it perfect for outdoor use. By enabling Transparency Mode, you can focus on your conversation and ignore distractions.
To enable Transparency Mode, simply open the Settings app on your iPhone, navigate to AirPods & Headphones, and toggle the switch next to Transparency Mode. You can also adjust the level of transparency to your liking, depending on your environment.
Improving Voice Calls with Double-Tap Gestures
Double-tap gestures are a game-changer when it comes to voice calls. With a simple tap, you can switch between two microphones, ensuring crystal-clear audio every time. This feature is especially useful for voice calls in noisy environments or when you’re sharing space with others. By switching between microphones, you can minimize background noise and focus on your conversation.
To use double-tap gestures, simply put your AirPods in your ears, and double-tap either the left or right side of the earbuds to switch between the two microphones. This feature is customizable, so you can adjust it to your liking in the Settings app.
Advanced Mic Features and Settings
In this final section, we’ll dive into the advanced settings and features that allow you to fine-tune your AirPods mic performance.
Customizing Mic Sensitivity for Noise Reduction
When it comes to noise reduction, it’s all about striking the perfect balance. If the mic is too sensitive, it’ll pick up every little sound, including background noise. On the other hand, if it’s not sensitive enough, you might miss a crucial detail in the conversation. To adjust your mic sensitivity, follow these simple steps:

- Open the Settings app on your iOS device.
- Scroll down to the “Sounds and Haptics” section.
- Tap on “Microphone”.
- Adjust the sensitivity slider to your liking.
Remember, it’s not an exact science. You’ll need to experiment to find the perfect setting for your specific environment. Think of it like adjusting the treble and bass levels on your favorite music playlist – it’s all about finding the perfect harmony.
Adjusting Microphone Volume for Perfect Audio Balance
Another crucial aspect of mic settings is volume. You want to make sure your voice comes through loud and clear, without overpowering the other person. Here’s how to adjust the microphone volume on your AirPods:
- Open the Settings app on your iOS device.
- Scroll down to the “Sounds and Haptics” section.
- Tap on “Microphone”.
- Adjust the volume slider to your liking.
Remember, you can also use the “Volume Control” feature to adjust your mic volume on the fly. Simply swipe up from the bottom of your screen to open the control center, then tap on the volume icon and slide the volume slider to the level you prefer.
By fine-tuning these advanced settings, you’ll be able to enjoy crystal-clear audio and seamless voice calls with your AirPods. Happy conferencing!
