Explore the design, sound quality, and noise cancellation of Beats Studio 3 on head. Troubleshoot common issues, maintain your headphones, compare with other models, and find accessories for the best experience.
Overview of Beats Studio 3 on Head
The Beats Studio 3 on Head headphones offer an exceptional audio experience, combining cutting-edge technology with sleek design and superior comfort. In this section, we will delve into the key aspects that make these headphones stand out from the crowd – Design and Comfort, Sound Quality, and Noise Cancellation.
Design and Comfort
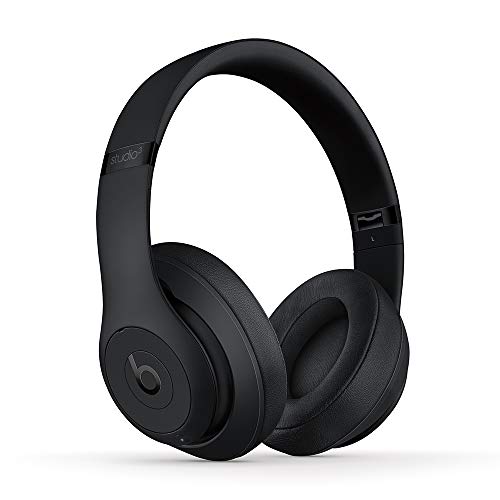
When it comes to design, Beats Studio 3 on Head headphones exude a premium and fashionable appeal. The sleek and modern aesthetic makes a bold statement, while the attention to detail is evident in every aspect. The headband is adjustable, allowing for a personalized fit, and the soft ear cushions provide long-lasting comfort, even during extended listening sessions.
Whether you’re wearing the headphones for a quick workout or a long flight, the lightweight construction ensures that you can enjoy your music without any discomfort. The ergonomic also helps in minimizing fatigue, making these headphones suitable for all-day wear.
Sound Quality
One of the standout features of the Beats Studio 3 on Head headphones is their exceptional sound quality. Powered by Beats’ proprietary Pure Adaptive Noise Cancelling (ANC) technology, these headphones deliver immersive audio that brings your music to life. The ANC feature actively blocks out external noise, allowing you to enjoy your favorite tracks without any distractions.

The sound signature of the Beats Studio 3 on Head is characterized by deep bass, rich midrange, and crisp highs. Whether you’re a fan of hip-hop, rock, or classical music, these headphones offer a balanced audio experience that caters to a wide range of genres. The soundstage is expansive, creating a sense of depth and dimensionality that enhances your overall listening experience.
Noise Cancellation
With the Beats Studio 3 on Head headphones, you can immerse yourself in your music like never before, thanks to their advanced technology. The Pure Adaptive Noise Cancelling (ANC) feature continuously monitors the ambient sound and adjusts the level of noise cancellation accordingly. This ensures that you can enjoy your music in peace, no matter where you are.
Whether you’re traveling on a noisy train or working in a bustling coffee shop, the Beats Studio 3 on Head headphones effectively block out external noise, allowing you to focus on your music or simply enjoy a moment of tranquility. The ANC feature also comes in handy during phone calls, as it eliminates background noise, ensuring crystal-clear conversations.
Features of Beats Studio 3 on Head
When it comes to the Beats Studio 3 on Head, there are several standout that make these headphones a popular choice among music lovers and audiophiles. Let’s take a closer look at the wireless connectivity, battery life, and Siri and voice control capabilities that set these headphones apart from the competition.
Wireless Connectivity
One of the key features of the Beats Studio 3 on Head is its seamless wireless connectivity. These headphones utilize Bluetooth technology to connect to your devices, allowing you to enjoy your favorite music without the hassle of tangled wires. With a range of up to 30 feet, you can move freely around your home or office while still staying connected to your music.
Not only does the wireless connectivity provide convenience, but it also ensures high-quality audio transmission. The Beats Studio 3 on Head uses the Apple W1 chip, which enhances the wireless connection and improves overall performance. This means you can expect a stable and reliable connection, with minimal interruptions or audio dropouts.
Battery Life
Battery life is always a concern when it comes to wireless headphones, but the Beats Studio 3 on Head delivers impressive performance in this area. With up to 22 hours of playback time, you can enjoy your music for extended periods without needing to recharge. Whether you’re on a long flight, commuting to work, or simply relaxing at home, these headphones will keep you immersed in your favorite tunes for hours on end.
In addition to the long playback time, the Beats Studio 3 on Head also Fast Fuel technology. This means that just a quick 10-minute charge can provide you with up to 3 hours of playback time. So even if you’re running low on battery, a short charging session will get you back to enjoying your music in no time.
Siri and Voice Control
To add another layer of convenience, the Beats Studio 3 on Head offers Siri and voice control integration. With the push of a button, you can activate Siri or your preferred voice assistant and perform various tasks without reaching for your phone. Whether you want to change the track, adjust the volume, or make a phone call, you can do it all with just your voice.
This hands-free control feature is particularly useful when you’re on the go or engaged in other activities. Instead of fumbling with buttons or pulling out your phone, you can simply use your voice to navigate through your music library, manage calls, or access other smartphone functions. It’s like having a personal assistant right in your headphones.
- Are you tired of dealing with tangled headphone wires? With the Beats Studio 3 on Head, you can enjoy wireless connectivity and move freely while staying connected to your music.
- The Beats Studio 3 on Head boasts an impressive battery life of up to 22 hours, ensuring that you can enjoy your music for extended periods without needing to recharge.
- Thanks to Siri and voice control integration, you can control your music and phone functions with just your voice, adding an extra layer of convenience to your listening experience.
Adjusting Beats Studio 3 on Head
When it comes to getting the perfect fit and comfort with your Beats Studio 3 headphones, there are a few adjustments you can make to ensure they sit just right on your head. Let’s take a look at the different ways you can adjust your Beats Studio 3 for optimal comfort.
Headband Adjustment
The headband of the Beats Studio 3 headphones is designed to be adjustable so that it can fit comfortably on heads of different sizes. To adjust the headband, follow these simple steps:
- Start by holding the headphones with one hand and placing the headband on top of your head.
- Use your other hand to gently pull the headband upwards or downwards to adjust the size.
- Once you have found the right fit, release the headband and let it sit comfortably on your head.
The headband adjustment feature allows you to find the perfect balance between a snug fit and avoiding any discomfort or pressure on your head. It ensures that the headphones stay securely in place, even during active movements or prolonged use.
Earcup Rotation
Another important adjustment feature of the Beats Studio 3 headphones is the ability to rotate the earcups. This is particularly useful for those who wear their headphones for extended periods or prefer different listening positions.
To rotate the earcups, follow these steps:

- Hold the headphones with one hand and place the earcups over your ears.
- With your other hand, gently rotate the earcups either inwards or outwards to find the most comfortable position.
- Experiment with different angles until you find the one that provides the best fit and sound experience.
The earcup rotation feature allows you to customize the fit of the headphones to match your personal preference and ensure maximum comfort during long listening sessions.
Ear Cushion Replacement
Over time, the ear cushions of your Beats Studio 3 headphones may wear out or become less comfortable. Fortunately, Beats offers replacement ear cushions that you can easily install yourself. Here’s how to replace the ear cushions:
- Start by locating the small groove or notch on the edge of the ear cushion.
- Use your fingers to grip the edge of the ear cushion near the notch and gently pull it away from the earcup.
- Continue to pull the ear cushion until it detaches completely from the earcup.
- Take the replacement ear cushion and align it with the earcup, making sure the groove or notch matches up.
- Press the new ear cushion firmly onto the earcup until it snaps into place.
Replacing the ear cushions not only improves comfort but also helps maintain the overall sound quality of your Beats Studio 3 headphones. It is recommended to replace the ear cushions periodically to ensure optimal performance.
In summary, the Beats Studio 3 headphones offer several adjustment features to customize the fit and comfort according to your preferences. The adjustable headband allows for a secure and comfortable fit on different head sizes. The earcup rotation feature enables you to find the perfect listening position, and the option to replace the ear cushions ensures long-lasting comfort and audio quality. By taking advantage of these adjustment options, you can enhance your overall listening experience with the Beats Studio 3 headphones.
Troubleshooting Beats Studio 3 on Head
Beats Studio 3 is renowned for its exceptional sound quality and advanced features. However, like any other electronic device, it may encounter certain issues from time to time. In this section, we will discuss some common tips to help you resolve any problems you may face with your Beats Studio 3 headphones. Whether you are experiencing connection issues, audio problems, or charging problems, we’ve got you covered.

Connection Issues
(*)
– Ensure that your Beats Studio 3 headphones are properly charged. A low battery can sometimes cause connectivity problems. If the battery level is low, charge the headphones and try connecting again.
– Check if the Bluetooth on your audio source device is turned on and in pairing mode. Make sure that the Bluetooth settings on your device are not set to “hidden” or “invisible.”
– Move closer to the audio source device to eliminate any potential signal interference. Walls, furniture, and other obstacles can weaken the Bluetooth signal.
– Try turning off other Bluetooth devices in the vicinity that may be causing interference. Sometimes, multiple active Bluetooth connections can disrupt the pairing process.
– Restart both your Beats Studio 3 headphones and the audio source device. This can help reset any temporary glitches in the connection.
– Update the firmware of your Beats Studio 3 headphones. Manufacturers often release firmware updates to improve connectivity and fix bugs. Check the Beats website or the manufacturer’s app for any available updates.
Audio Problems
(*)
– Ensure that the audio source device is not on mute or set to a very low volume. Sometimes, the issue may lie with the device itself rather than the headphones.
– Check if the audio cable is properly connected to both the headphones and the audio source. A loose connection can result in distorted or no sound.
– Clean the audio port on your Beats Studio 3 headphones. Dust or debris may accumulate over time, leading to audio issues. Use a soft, dry cloth or a can of compressed air to gently clean the port.
– Test your headphones with a different audio source to determine if the problem persists. This will help identify whether the issue lies with the headphones or the audio source device.
– If none of the above steps resolve the audio problems, contact the Beats customer support team or visit an authorized service center for further assistance.
Charging Problems
(*)
– Ensure that you are using the original charging cable and power adapter that came with your Beats Studio 3 headphones. Using third-party accessories may not provide optimal charging performance.
– Check if the charging cable is securely connected to both the headphones and the power source. A loose connection can interrupt the charging process.
– Clean the charging port on your Beats Studio 3 headphones. Dust or debris may accumulate over time, obstructing the charging connection. Use a soft, dry cloth or a can of compressed air to gently clean the port.
– Try charging your headphones using a different power source, such as a different USB port or wall adapter. This will help determine if the issue is with the power source or the headphones.
– If the charging problems persist, consider resetting your Beats Studio 3 headphones. Refer to the user manual or the manufacturer’s website for instructions on how to perform a reset.
– If none of the above steps resolve the charging problems, contact the Beats customer support team or visit an authorized service center for further assistance.
Cleaning and Maintenance of Beats Studio 3 on Head
Taking care of your Beats Studio 3 headphones is essential to ensure their longevity and optimal performance. Regular cleaning and proper storage are key to maintaining the quality of both the headband and earcups. In this section, we will guide you through the cleaning process for the headband and earcups, as well as provide tips on storing your headphones.
Cleaning the Headband
The headband of your Beats Studio 3 headphones is where most of the contact with your head occurs. Over time, sweat, oils, and dirt can accumulate, affecting both the appearance and comfort of the headband. To keep it clean, follow these simple steps:
- Start by wiping the headband with a soft, lint-free cloth to remove any loose dirt or debris.
- Dampen a cloth with a mild detergent diluted in water. Be sure to wring out any excess liquid to avoid excessive moisture.
- Gently wipe the headband with the damp cloth, paying attention to areas with visible stains or dirt.
- Use a dry cloth to remove any remaining moisture from the headband.
- Allow the headband to air dry completely before using or storing your headphones.
Remember to avoid using harsh chemicals or abrasive materials when cleaning the headband, as this can damage the material.
Cleaning the Earcups
The earcups of your Beats Studio 3 headphones are in constant contact with your ears and can accumulate dirt, oils, and earwax over time. Regular cleaning of the earcups is crucial to maintain hygiene and ensure optimal . Follow these steps to clean the earcups effectively:
- Start by removing the ear cushions from the earcups. Refer to the “Earcup Rotation” section in the “Adjusting Beats Studio 3 on Head” category for instructions on how to do this.
- Once the ear cushions are removed, use a soft, lint-free cloth to wipe away any visible dirt or debris from the earcups.
- If there are stubborn stains or dirt, dampen a cloth with a mild detergent diluted in water, making sure to wring out any excess liquid.
- Gently wipe the earcups with the damp cloth, taking care not to apply excessive pressure.
- Use a dry cloth to remove any remaining moisture from the earcups.
- Allow the earcups to air dry completely before reattaching the ear cushions.
It’s important to note that the ear cushions themselves should not be submerged in water or cleaned with liquid. Instead, gently wipe them with a dry cloth to remove any surface dirt or oils.
Storing the Headphones
Proper storage of your Beats Studio 3 headphones can help prevent damage and prolong their lifespan. Here are some tips for storing your headphones:
- Always store your headphones in a clean and dry environment. Avoid exposing them to extreme temperatures or humidity, as this can affect their performance.
- When not in use, it’s best to store your headphones in the included carrying case or a suitable protective case. This helps protect them from dust, scratches, and accidental damage.
- Before storing, make sure to detach any audio cables or accessories from the headphones. This prevents tangling and minimizes the risk of damage.
- Avoid hanging your headphones by the headband, as this can strain the structure and lead to deformation over time. Instead, lay them flat or store them in an upright position.
- If you’re traveling with your headphones, consider investing in a travel case or pouch specifically designed for headphones. These provide additional protection and make it easier to transport your headphones safely.
By following these cleaning and storage tips, you can keep your Beats Studio 3 headphones looking and performing their best for years to come.
Note: It’s important to refer to the user manual or official Beats support for specific cleaning instructions and recommendations for your headphones model.
Comparison of Beats Studio 3 on Head with Other Headphones
When it comes to choosing the perfect pair of headphones, there are various factors to consider, such as , comfort, and features. In this section, we will compare the Beats Studio 3 with three other popular headphone models: the Bose QuietComfort 35 II, the Sony WH-1000XM4, and the Sennheiser Momentum 3. Let’s dive into the details and see how the Beats Studio 3 stacks up against its competitors.
Beats Studio 3 vs. Bose QuietComfort 35 II
The Beats Studio 3 and the Bose QuietComfort 35 II are both highly regarded noise-canceling headphones, but they have some key differences. Starting with design and comfort, the Beats Studio 3 offers a sleek and modern look with a comfortable over-ear fit. The headband is adjustable, allowing for a customized fit, and the ear cushions provide excellent padding for long listening sessions. On the other hand, the Bose QuietComfort 35 II also features a comfortable over-ear with plush ear cushions that provide a snug fit. However, some users prefer the lightweight feel of the Beats Studio 3, making it a great choice for those who prioritize comfort.
In terms of sound quality, both headphones deliver exceptional audio performance. The Beats Studio 3 boasts a powerful and dynamic sound signature, with a focus on deep bass and clear mids and highs. It’s perfect for bass enthusiasts and those who enjoy a more energetic sound. On the other hand, the Bose QuietComfort 35 II offers a more balanced sound profile, with accurate reproduction of instruments and vocals. It’s an excellent choice for audiophiles who prefer a more neutral sound.
When it comes to , the Beats Studio 3 utilizes Pure Adaptive Noise Canceling (ANC) technology, which actively blocks out external noise and adjusts to your surroundings. This ensures an immersive listening experience, especially in noisy environments. The Bose QuietComfort 35 II, on the other hand, features excellent noise cancellation that effectively reduces ambient sounds. It’s worth noting that both headphones excel in this department, but the Beats Studio 3’s adaptive ANC gives it a slight edge.
In terms of wireless connectivity, both the Beats Studio 3 and the Bose QuietComfort 35 II offer Bluetooth functionality for seamless pairing with your devices. They also both feature built-in microphones for hands-free calling. However, the Beats Studio 3 takes it a step further with the integration of the Apple W1 chip, which allows for a more stable and efficient wireless connection, especially when used with Apple devices.
Beats Studio 3 vs. Sony WH-1000XM4
Next up, let’s compare the Beats Studio 3 with the Sony WH-1000XM4. Both headphones are popular choices in the premium noise-canceling market, but they have distinct features that set them apart.
Starting with design and comfort, the Beats Studio 3 features a sleek and stylish design, with an adjustable headband and cushioned ear cups that provide a comfortable fit. The Sony WH-1000XM4 also boasts a modern design and offers a similar level of comfort. However, some users find the Beats Studio 3 to be more lightweight and less clamping, making it a preferable choice for extended listening sessions.
When it comes to sound quality, the Beats Studio 3 and the Sony WH-1000XM4 deliver impressive audio performance. The Beats Studio 3 offers a powerful sound signature, with emphasis on bass and energetic sound reproduction. It’s perfect for those who enjoy genres like hip-hop and electronic music. The Sony WH-1000XM4, on the other hand, provides a more balanced sound profile, with detailed highs, mids, and controlled bass. It’s a great choice for audiophiles who appreciate accuracy in sound reproduction.
In terms of noise cancellation, both headphones excel in blocking out external noise. The Beats Studio 3’s Pure Adaptive Noise Canceling technology ensures an immersive listening experience by adjusting to your environment. The Sony WH-1000XM4 features industry-leading noise cancellation, with multiple microphones and advanced algorithms that effectively isolate you from the outside world. It’s worth noting that the Sony WH-1000XM4’s noise cancellation is highly praised and often considered one of the best in the market.
When it comes to wireless connectivity, both the Beats Studio 3 and the Sony WH-1000XM4 offer Bluetooth functionality for seamless pairing. They also both support high-quality audio codecs, such as AAC and LDAC, for an enhanced wireless listening experience. However, the Sony WH-1000XM4 takes it a step further with the inclusion of multipoint Bluetooth connectivity, allowing you to connect to multiple devices simultaneously.
Beats Studio 3 vs. Sennheiser Momentum 3
Lastly, let’s compare the Beats Studio 3 with the Sennheiser Momentum 3. Both headphones are known for their premium build quality and exceptional sound performance, but they have distinct features that cater to different preferences.
Starting with and comfort, the Beats Studio 3 boasts a sleek and modern look, with an adjustable headband and comfortable ear cushions. The Sennheiser Momentum 3, on the other hand, offers a more classic and elegant design, with a comfortable over-ear fit and soft leatherette earpads. Both headphones provide excellent comfort for long listening sessions, but the choice ultimately comes down to personal preference.
In terms of sound quality, the Beats Studio 3 offers a powerful and energetic sound signature, with emphasis on bass and clear mids and highs. It’s perfect for those who enjoy genres like hip-hop and rock. The Sennheiser Momentum 3, on the other hand, delivers a more balanced sound profile, with detailed and accurate reproduction of instruments and vocals. It’s a great choice for audiophiles who appreciate a more neutral sound.
When it comes to noise cancellation, both headphones provide effective noise isolation. The Beats Studio 3’s Pure Adaptive Noise Canceling technology adjusts to your surroundings, ensuring an immersive listening experience. The Sennheiser Momentum 3 features active noise cancellation that effectively reduces ambient sounds. While both headphones perform well in this aspect, the Beats Studio 3’s adaptive ANC gives it an edge in terms of adaptability.
In terms of wireless connectivity, both the Beats Studio 3 and the Sennheiser Momentum 3 offer Bluetooth functionality for wireless pairing with your devices. They also both support high-quality audio codecs to ensure a superior wireless listening experience. However, the Beats Studio 3 takes it a step further with the integration of the Apple W1 chip, which provides a more stable and efficient wireless connection, especially when used with Apple devices.
Accessories for Beats Studio 3 on Head
Carrying Case Options
When it comes to accessories for the Beats Studio 3 on Head headphones, one of the most important considerations is the carrying case. A good carrying case not only protects your headphones from scratches and damage but also makes it convenient to transport them wherever you go. Beats offers a range of carrying case options that cater to different needs and preferences.
One popular carrying case option for the Beats Studio 3 on Head headphones is the Beats Hard Shell Case. This case is made of durable materials that provide excellent protection for your headphones. It features a hard exterior shell that shields your headphones from impacts and a soft interior lining that prevents scratches. The case also has a zippered closure, ensuring that your headphones stay securely in place. With its compact size, it easily fits into your bag or backpack, making it ideal for travel.
Another carrying case option is the Beats Studio 3 Wireless Carrying Case. This case is specifically designed for the wireless version of the Beats Studio 3 headphones. It offers the same level of protection as the hard shell case but also includes a built-in pocket for storing the headphone cable and other accessories. This feature is particularly useful for keeping all your headphone essentials in one place, so you don’t have to worry about losing or misplacing them.
If you prefer a more stylish and fashion-forward carrying case, Beats also offers the Beats Studio 3 Leather Carrying Case. This case is made of premium leather, giving it a luxurious look and feel. It not only provides excellent protection for your headphones but also adds a touch of elegance to your overall style. The leather carrying case features a magnetic closure, ensuring easy access to your headphones while keeping them secure. It also includes a detachable shoulder strap, allowing you to carry your headphones with ease.
Replacement Parts Availability
Inevitably, there may come a time when you need to replace certain parts of your Beats Studio 3 on Head headphones. Whether it’s due to wear and tear or accidental damage, having access to replacement parts is crucial to prolonging the lifespan of your headphones. Beats understands this need and offers a range of replacement parts for the Studio 3 headphones.
One common replacement part is the ear cushions. Over time, the ear cushions can wear out or become damaged, affecting both the comfort and of your headphones. Fortunately, Beats provides replacement ear cushions that are easy to install. These cushions are made of high-quality materials that are designed to be durable and provide the same level of comfort as the original cushions.
Another important replacement part is the headphone cable. The cable is an essential component of the Beats Studio 3 on Head headphones, as it allows you to connect your headphones to various devices. If your cable becomes frayed or stops working, Beats offers replacement cables that are compatible with the Studio 3 headphones. These cables are designed to deliver high-quality audio and are available in different lengths to suit your needs.
Additional Audio Cables
In addition to the standard headphone cable that comes with the Beats Studio 3 on Head headphones, there are also additional audio cables available for those who want more versatility in their listening experience. These additional cables allow you to connect your headphones to different devices or use them in specific situations.
One popular additional audio cable is the Beats Lightning to 3.5mm Audio Cable. This cable is designed for Apple devices that have a Lightning port instead of a traditional headphone jack. It enables you to connect your Beats Studio 3 headphones to your iPhone, iPad, or iPod with ease. The Lightning to 3.5mm Audio Cable ensures a high-quality audio experience, allowing you to enjoy your music, movies, and games with exceptional sound clarity.
Another option is the Beats RemoteTalk Cable. This cable features an in-line remote and microphone, allowing you to control your music and take calls without having to reach for your device. The RemoteTalk Cable is compatible with a wide range of devices, including smartphones, tablets, and laptops. It provides convenient functionality, making it easier to manage your audio experience while on the go.
Tips for Getting the Most Out of Beats Studio 3 on Head
With the Beats Studio 3 on Head, you have a powerful pair of headphones that can enhance your audio experience. To truly maximize the potential of these headphones, here are some tips and tricks to help you customize the sound settings, optimize noise cancellation, and utilize the Apple W1 chip integration.
Customizing Sound Settings
When it comes to sound, everyone has their own preferences. With the Beats Studio 3 on Head, you have the ability to customize the sound settings to suit your personal taste. Here’s how you can do it:
- Equalizer Settings: The Beats Studio 3 on Head allows you to adjust the equalizer settings to enhance specific frequencies. Whether you prefer more bass or a balanced sound, you can tweak the settings to match your preferences.
- Music Apps: Many music apps have their own built-in equalizer settings. Take advantage of these settings to further customize the sound output of your Beats Studio 3 on Head. Experiment with different presets or create your own custom equalizer settings to find the perfect sound for your favorite tracks.
- Audio Enhancement Apps: There are also third-party audio enhancement apps available that can further enhance the sound quality of your Beats Studio 3 on Head. These apps often offer features like surround sound, virtualizers, and more. Explore these apps to find additional ways to improve your audio experience.
Optimizing Noise Cancellation
One of the standout features of the Beats Studio 3 on Head is its active noise cancellation technology. To make the most of this feature and enjoy a truly immersive listening experience, follow these tips:
- Proper Fit: Ensure that the headphones are properly fitted on your head. A snug fit helps to create an effective seal, blocking out external noise and optimizing the noise cancellation feature.
- Noise Cancelling Modes: The Beats Studio 3 on Head offers different noise cancelling modes. Experiment with these modes to find the one that suits your environment. For example, the “Pure Adaptive Noise Canceling” mode is ideal for loud and busy environments, while the “Transparency” mode allows you to hear your surroundings without removing the headphones.
- Noise Control Settings: Take advantage of the noise control settings available on the Beats Studio 3 on Head. These settings allow you to adjust the level of noise cancellation based on your preference. Find the right balance between blocking out external noise and maintaining awareness of your surroundings.
Using Apple W1 Chip Integration
The Beats Studio 3 on Head Apple’s W1 chip, which provides seamless integration with Apple devices. Here are some ways you can make the most of this integration:
- Easy Device Switching: With the W1 chip, you can effortlessly switch between your Apple devices. Whether you’re listening to music on your iPhone, watching a movie on your iPad, or taking a call on your MacBook, the Beats Studio 3 on Head will automatically connect to the device you’re using.
- Hands-free Siri: Activate Siri hands-free with the Beats Studio 3 on Head. Simply say “Hey Siri” and ask your questions or give commands without having to reach for your device. This feature adds convenience and allows you to stay focused on your tasks while using the headphones.
- Extended Battery Life: The W1 chip also helps to optimize battery life. With the Beats Studio 3 on Head, you can enjoy up to 22 hours of listening time with noise cancellation enabled. The efficient power management of the W1 chip ensures that you can enjoy your music for extended periods without worrying about running out of battery.
In conclusion, by customizing the sound settings, optimizing noise cancellation, and utilizing the Apple W1 chip integration, you can truly enhance your experience with the Beats Studio 3 on Head. Experiment with different settings and modes to find the perfect sound and make the most of this powerful pair of headphones. Whether you’re a music enthusiast, a frequent traveler, or someone who simply enjoys high-quality audio, the Beats Studio 3 on Head has the features and flexibility to elevate your listening experience to new heights.
