Learn how to record audio on your iPhone using the Voice Memos app, third-party recording apps, or the Camera app’s audio recording feature. Adjust audio settings, troubleshoot issues like low volume or distorted audio, and save and share your recordings effortlessly.
Methods for Recording Audio on an iPhone
Recording audio on an iPhone has become a convenient and versatile tool for many users. Whether you want to capture a memorable conversation, record a lecture, or create a podcast, the iPhone offers several to accomplish this task. In this section, we will explore three different ways to record audio on an iPhone: using the Voice Memos app, utilizing a third-party recording app, and taking advantage of the Camera app’s audio recording feature.
Using the Voice Memos App
One of the most straightforward to record audio on an iPhone is by using the built-in Voice Memos app. This app comes pre-installed on all iPhones and offers a user-friendly interface for capturing high-quality audio.
To start recording with the Voice Memos app, simply follow these steps:
- Locate the Voice Memos app on your iPhone’s home screen and tap to open it.
- Once the app is open, you will see a large red button at the bottom center of the screen. Tap on this button to begin recording.
- While recording, you will see a timer indicating the duration of your recording. You can pause and resume the recording by tapping the red button again.
- Once you have finished recording, tap the stop button (square icon) to end the recording.
The Voice Memos app allows you to name and save your recordings for easy access later. To do this, follow these additional steps:
- After stopping the recording, you will see a screen displaying the audio waveform of your recording. Tap on the “Done” button at the top left corner of the screen.
- You will be prompted to give your recording a name. Enter a descriptive title that will help you identify the recording later.
- Tap the “Save” button to save the recording to your iPhone.
The Voice Memos app also offers some basic editing features to trim the beginning or end of your recordings. To utilize these features, simply select the recording you wish to edit and tap on the ellipsis (…) button. From there, you can choose the “Edit Recording” option and make any necessary adjustments.
Using a Third-Party Recording App
While the Voice Memos app provides a convenient option for audio recording, some users may prefer additional features or customization options. In such cases, utilizing a third-party recording app can be a great alternative.
There are numerous third-party recording apps available on the App Store, each offering unique features and functionalities. Some popular options include “Voice Recorder & Audio Editor” by TapMedia Ltd, “Voice Record Pro” by Dayana Networks Ltd., and “Just Press Record” by Open Planet Software.
To use a third-party recording app, follow these general steps:
- Open the App Store on your iPhone and search for a recording app of your choice.
- Once you have found a suitable app, tap the “Get” or “Install” button to download and install it on your device.
- Launch the app and familiarize yourself with its interface and features.
- Depending on the app, you may need to grant permission to access your microphone and storage. Make sure to enable these permissions to ensure seamless recording and saving of audio files.
Each third-party recording app may have its own set of instructions and features, so it’s essential to refer to the app’s documentation or help section for specific details. Many of these apps offer advanced editing capabilities, file organization options, and even cloud storage integration for easy access to your recordings across multiple devices.

Using the Camera App’s Audio Recording Feature
In addition to dedicated voice recording apps, the iPhone’s Camera app also provides a convenient audio recording feature. This feature allows you to capture audio while taking a video or even when capturing a photo.
To use the Camera app’s audio recording feature, follow these steps:
- Open the Camera app on your iPhone.
- Depending on your iPhone model and iOS version, you may need to switch to the video recording mode or select the “Live Photo” option.
- Once you are in the desired mode, look for a microphone icon or an audio recording option. This icon is usually located near the shutter button or in the camera menu.
- Tap on the microphone icon to start recording audio.
- Begin capturing your video or taking a photo while the audio recording is in progress.
- To stop recording audio, tap on the microphone icon again.
It’s worth noting that the audio recorded using the Camera app will be synchronized with the video or photo you capture. This feature can be particularly useful when you want to capture audio in conjunction with visual content, such as interviews, presentations, or live performances.
Adjusting Audio Settings on an iPhone
When it comes to recording audio on your iPhone, it’s important to have the right settings in place to ensure the best possible sound quality. In this section, we will explore three key aspects of adjusting audio settings on an iPhone: changing the microphone input, adjusting the recording quality, and enabling background noise reduction.
Changing the Microphone Input
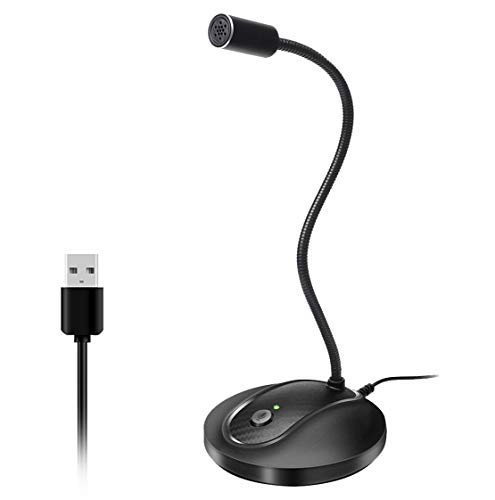
The microphone input on your iPhone plays a crucial role in capturing clear and crisp audio. By default, the iPhone uses its built-in microphone for recording, but there are times when you may want to switch to an external microphone for better sound quality.
To change the microphone input on your iPhone, follow these steps:
- Connect your external microphone to the iPhone using the appropriate adapter or cable.
- Open the recording app of your choice.
- Look for the microphone input within the app. This can usually be found in the app’s settings menu or preferences.
- Select the external microphone as the input source.
- Start recording and notice the improved audio quality captured by the external microphone.
By changing the microphone input, you can take advantage of higher-quality external microphones for professional-grade audio recordings.
Adjusting the Recording Quality
The recording quality of your audio can greatly impact the overall listening experience. Whether you’re recording a podcast, an interview, or a voiceover, it’s important to adjust the recording quality settings to meet your specific needs.
To adjust the recording quality on your iPhone, follow these steps:
- Open the Settings app on your iPhone.
- Scroll down and tap on “Camera” or “Photos & Camera,” depending on your iOS version.
- Look for the “Record Video” or “Record Audio” section.
- Tap on the desired recording quality option. The available options may vary depending on your iPhone model and iOS version.
- Choose a higher recording quality for professional recordings or a lower quality for smaller file sizes and easier .
Remember that higher recording quality settings may result in larger file sizes, so make sure you have enough storage space available on your device.

Enabling Background Noise Reduction
Background noise can be a major distraction in audio recordings, especially if you’re in a noisy environment. Fortunately, iPhones offer a built-in feature that helps reduce background noise during recording.
To enable background noise reduction on your iPhone, follow these steps:
- Open the Settings app on your iPhone.
- Scroll down and tap on “Accessibility.”
- Tap on “Audio/Visual.”
- Under the “Audio” section, toggle on the “Phone Noise Cancellation” option.
Enabling this feature will enhance the clarity of your recordings by minimizing background noise. It’s particularly useful when recording in crowded areas, outdoors, or anywhere with a lot of ambient noise.
Troubleshooting Audio Recording Issues on an iPhone
No Sound or Low Volume During Recording
Are you experiencing issues with no sound or low volume during audio recording on your iPhone? Don’t worry, we’ve got you covered. There are a few steps you can take to resolve this problem and get back to recording crystal-clear audio.
- Check the volume settings: Start by checking the volume on your iPhone. Make sure the volume is turned up and not muted. You can do this by pressing the volume up button on the side of your device or by going to the Control Center and adjusting the volume slider.
- Clean the microphone: Dust or debris on the microphone can sometimes interfere with the audio recording. Take a soft, lint-free cloth or a small brush and gently clean the microphone on your iPhone. Be careful not to apply too much pressure or use any liquids that could damage the device.
- Disable Bluetooth: If you have a Bluetooth device connected to your iPhone, such as headphones or a speaker, it’s possible that the audio is being routed to that device instead of the internal microphone. To check this, go to the Control Center and make sure Bluetooth is turned off.
- Restart your iPhone: Sometimes, a simple restart can fix various issues on your iPhone, including audio recording problems. Press and hold the power button until the “slide to power off” option appears, then slide it to turn off your device. Wait a few seconds, then press and hold the power button again to turn it back on.
- Check for software updates: Outdated software can sometimes cause audio recording issues. Make sure your iPhone is running the latest version of iOS by going to Settings > General > Software Update. If an update is available, follow the on-screen instructions to download and install it.
Distorted or Muffled Audio Quality
Is your audio recording sounding distorted or muffled on your iPhone? This can be frustrating, especially if you’re trying to capture important moments or create professional content. Let’s explore some steps to improve the audio quality.

- Check the microphone placement: Ensure that your finger or any object is not covering the microphone while recording. The microphone on your iPhone is usually located at the bottom of the device or near the rear camera. Make sure it is not obstructed by your hand or any other object.
- Reduce background noise: Background noise can interfere with the clarity of your audio recordings. Try to find a quiet location or use a noise-canceling feature if available on your recording app. This will help minimize unwanted noise and improve the overall quality of your recordings.
- Adjust microphone sensitivity: Some recording apps or settings allow you to adjust the microphone sensitivity. Experiment with different levels to find the optimal setting for your recording environment. Increasing the sensitivity can help capture softer sounds, while decreasing it can reduce the chances of distortion.
- Use an external microphone: If you’re consistently experiencing distorted or muffled audio quality, consider using an external microphone. There are various options available, including clip-on microphones or lightning connector microphones. These external microphones can provide better audio quality and reduce interference.
- Test with a different recording app: If the issue persists, try using a different recording app. Sometimes, certain apps may not work well with your iPhone’s hardware or software configuration. Test a few different recording apps to see if the audio quality improves.
Recording Stops Unexpectedly
Have you ever encountered a situation where your audio recording stops unexpectedly on your iPhone? This can be frustrating, especially if you’re in the middle of an important recording. Let’s explore some troubleshooting steps to address this issue.
- Check available storage: Insufficient storage space on your iPhone can cause recording to stop abruptly. Go to Settings > General > iPhone Storage to check how much storage is available. If it’s running low, consider deleting unnecessary files, apps, or transferring them to cloud storage services to free up space.
- Restart your iPhone: Similar to other audio recording issues, a simple restart can often resolve unexpected recording stops. Press and hold the power button until the “slide to power off” option appears, then slide it to turn off your device. Wait a few seconds, then press and hold the power button again to turn it back on.
- Update recording app: If you’re using a third-party recording app, make sure it’s up to date. Developers often release updates to address bugs and improve the app’s performance. Go to the App Store and check for any available updates for your recording app. If an update is available, install it and see if the issue persists.
- Reset : If none of the above steps solve the problem, you can try resetting your iPhone’s settings. Go to Settings > General > Reset > Reset All Settings. Keep in mind that this will reset all your personalized , but it may resolve any software-related issues causing the recording to stop unexpectedly.
- Contact Apple Support: If the issue continues to persist even after trying these steps, it’s recommended to reach out to Apple Support for further assistance. They can provide more specific guidance based on your device model and software version.
Remember, troubleshooting audio recording issues on an iPhone can be a trial-and-error process. It’s essential to follow these steps systematically and test the recording after each troubleshooting action to determine if the issue has been resolved.
Saving and Sharing Audio Recordings on an iPhone
Have you ever recorded an important conversation or a memorable moment on your iPhone and wondered how to save and share it? In this section, we will explore different for saving and sharing audio recordings on your iPhone. Whether you want to save your recordings to the Voice Memos app, share them via messages or email, or upload them to cloud storage services, we’ve got you covered!
Saving Recordings to the Voice Memos App
The Voice Memos app is a built-in feature on your iPhone that allows you to record audio with ease. To save your audio recordings using this app, simply follow these steps:
- Open the Voice Memos app on your iPhone.
- Tap on the “Record” button to start a new recording.
- Once you are done recording, tap on the “Stop” button.
- Give your recording a title by tapping on the “Name” field.
- Tap on the “Save” button to save your recording.
By saving your recordings to the Voice Memos app, you can easily access them later and even organize them into different folders. This makes it convenient to find a specific recording when you need it the most.
Sharing Recordings via Messages or Email
Sharing your audio recordings with friends, family, or colleagues is a breeze on an iPhone. You can easily send your recordings via messages or email. Here’s how:
- Open the Voice Memos app on your iPhone.
- Locate the recording you wish to share.
- Tap on the recording to open it.
- Look for the share icon (usually represented by an arrow pointing upwards) and tap on it.
- Choose the “Messages” or “Mail” option from the sharing menu.
- Enter the recipient’s contact information and hit send.
You can also choose to share your recordings on other messaging apps or social media platforms if you have them installed on your iPhone. Sharing your audio recordings allows you to relive special moments or share important information with others conveniently.
Uploading Recordings to Cloud Storage Services
If you want to keep your audio recordings safe and accessible from anywhere, uploading them to cloud storage services is a great option. Cloud storage services like iCloud, Google Drive, or Dropbox offer secure storage for your recordings. Follow these steps to upload your recordings to a cloud storage service:
- Open the cloud storage app on your iPhone (e.g., iCloud, Google Drive, Dropbox).
- Create a new folder or locate an existing folder where you want to save your recordings.
- Tap on the “Upload” or “Add” button to select your recordings from the Voice Memos app or your iPhone’s storage.
- Choose the recordings you want to upload and confirm the upload.
By uploading your recordings to a cloud storage service, you can access them from any device with an internet connection. This ensures that your precious recordings are safely backed up and can be retrieved whenever you need them.
In conclusion, saving and audio recordings on your iPhone is a simple and convenient process. Whether you prefer to save them to the Voice Memos app, share them via messages or email, or upload them to cloud storage services, the choice is yours. Choose the method that suits your needs best and enjoy the flexibility of accessing your recordings whenever you want.
