Interested in making your own drum? Follow our guide on how to make a drum from start to finish. Learn about the materials needed, selecting the perfect drum shell, attaching drumheads, installing hardware, and even making your own drumsticks.
Materials Needed for Making a Drum
When it comes to making your own drum, there are several materials that you will need to gather before you can get started. These materials are essential for each stage of the drum making process, from constructing the drum shell to attaching the drumheads and hardware. Let’s take a closer look at the key materials required for each component of the drum.
Drum Shell
The drum shell is the foundation of the drum and is responsible for producing the resonant sound that we all love. To create a drum shell, you will need the following materials:
- Wood: Selecting the right type of wood is crucial for achieving the desired sound and durability of your drum. Popular choices include maple, birch, and mahogany, each offering unique characteristics in terms of tonal qualities and strength. Consider the specific sound you want to achieve when choosing your wood.
- Shell Size and Depth: The size and depth of the drum shell will greatly impact the overall sound and playability of the drum. Measure and cut the wood according to your desired drum size and depth, keeping in mind the style of drumming you’ll be doing.
- Bearing Edges: The bearing edges of the drum shell play a vital role in how the drumhead makes contact with the shell, affecting the tone and response of the drum. Use a router or sandpaper to shape smooth and even bearing edges, ensuring optimal resonance and tuning capabilities.
Drumheads
Drumheads are another crucial component of the drum, as they directly influence the sound produced. Here are the materials needed for drumheads:
- Drumhead material: Drumheads can be made from various materials, including coated or clear plastic, animal skin, or synthetic materials such as Mylar. Each material offers a different tone and feel, so consider your preferences and the desired sound when choosing the drumhead material.
- Drumhead size: The size of the drumhead should match the size of your drum shell. Measure the diameter of the drum shell accurately to ensure a proper fit and optimal sound projection.
- Drumhead tuning tools: To achieve the desired pitch and tone, you’ll need drumhead tuning tools such as a drum key or tension rods. These tools allow you to adjust the tension of the drumhead, affecting the pitch and overall sound of the drum.
Drum Hardware
Drum hardware refers to the various components that hold the drum together and provide functionality. Here are the materials needed for drum hardware:
- Mounting lugs: Mounting lugs are used to secure the drumheads to the drum shell. These lugs are usually made of metal and come in various sizes and styles. Choose lugs that match the overall aesthetic of your drum and provide secure attachment of the drumheads.
- Drum hoops: Drum hoops are metal rings that sit on top and bottom of the drum shell, providing stability and tension for the drumheads. They are available in different sizes and materials such as steel or die-cast. Consider the style and sound you want to achieve when selecting drum hoops.
- Snare wires (if applicable): If you are making a snare drum, you will need snare wires to create the distinctive snare sound. Snare wires are made of metal strands and are attached to the bottom drumhead. Choose snare wires that match the size and style of your drum for optimal snare response.
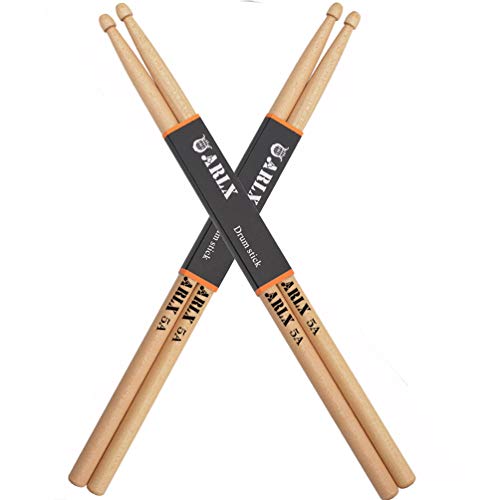
Drumsticks
Drumsticks are the tools that bring the drum to life, and they play a significant role in the sound and feel of the instrument. Here are the materials needed for making drumsticks:
- Wood selection: The type of wood used for drumsticks greatly impacts their weight, durability, and tone. Popular choices include hickory, maple, and oak, each offering different characteristics in terms of weight, balance, and responsiveness. Experiment with different wood types to find the drumsticks that feel comfortable and produce the desired sound.
- Shaping drumsticks: To shape drumsticks, you will need a lathe or sandpaper to create the desired thickness, length, and taper. Take into account your playing style and preferences when shaping the drumsticks, ensuring they feel comfortable and balanced in your hands.
- Finishing drumsticks: Applying a finish to the drumsticks not only enhances their appearance but also protects the wood from wear and tear. Consider using lacquer or varnish to seal the drumsticks, providing a smooth and durable surface.
By gathering these materials, you will have everything you need to begin the drum-making process. Whether you are a seasoned drummer or just starting out, the satisfaction of crafting your own drum and customizing its sound is truly rewarding. So, let’s dive into the exciting world of drum making and create your very own unique instrument.
Choosing the Drum Shell
Wood Selection
When it comes to choosing the drum shell, one of the most important decisions you’ll make is the type of wood you use. Different woods can produce different tones and characteristics, so it’s essential to select the right one for your desired sound.
One popular choice for drum shells is maple. Maple wood offers a warm and balanced sound, with a slightly pronounced low end and a smooth midrange. It is versatile and works well for a wide range of music genres. Another option is birch, which provides a brighter and more focused sound. Birch shells are known for their quick attack and clear projection, making them a great choice for drummers who want their drums to cut through the mix.
For those looking for a more vintage sound, mahogany is an excellent option. Mahogany shells offer a rich, warm tone with a strong low end and a smooth sustain. They are often favored by jazz and blues drummers who want a deep, resonant sound.

Other types of wood, such as oak, cherry, and walnut, can also be used for drum shells, each offering its own unique tonal characteristics. Experimenting with different woods can help you find the perfect sound for your drum kit.
Shell Size and Depth
In addition to wood selection, the size and depth of the drum shell also play a significant role in determining the overall sound of the drum. Different sizes and depths can produce different levels of volume, tone, and resonance.
When it comes to shell sizes, the most common configuration is a 14-inch diameter for the snare drum, 12-inch and 13-inch diameters for rack toms, and a 16-inch diameter for the floor tom. However, drummers often experiment with different sizes to achieve their desired sound.
The depth of the drum shell also affects its sound. Shallower shells tend to produce a brighter, more focused sound, while deeper shells offer a richer, fuller tone with increased resonance. Again, personal preference and the style of music you play should guide your decision.
Bearing Edges
The bearing edges of the drum shell also contribute to the overall sound quality and playability of the drum. The bearing edges are the points where the drumhead comes into contact with the shell. The shape and angle of these edges can greatly affect the tone and response of the drum.

Common types of bearing edges include round-over, 45-degree, and double 45-degree edges. Round-over edges provide a warm, vintage sound with increased sustain. They are often found on drums used in jazz and blues music.
On the other hand, 45-degree edges offer a more focused and defined sound, with a shorter sustain. They are commonly used in rock and pop music, where a clear attack and projection are desired.
Double 45-degree edges, as the name suggests, feature two 45-degree angles, creating a sharper edge. This type of edge provides a balanced sound with a mix of warmth and attack.
Choosing the right bearing edges for your drum shells will depend on the sound you want to achieve and the style of music you play. Experimenting with different edges can help you fine-tune your drum’s sound to your liking.
Preparing the Drum Shell
Sanding the Shell
When it comes to making a drum, one of the first steps in preparing the drum shell is sanding. Sanding the shell helps to create a smooth and even surface, ensuring that the finish adheres properly and gives the drum a professional look.

To start the sanding process, you’ll need a few materials. First, you’ll need sandpaper. It’s recommended to use a variety of grits, starting with a coarser grit to remove any rough spots or imperfections, and then moving to a finer grit to achieve a smooth finish. Additionally, you’ll need a sanding block or a power sander to make the process easier and more efficient.
Begin by securing the drum shell in a stable position, either by using clamps or a drum shell holder. This will allow you to have better control and stability while sanding. Start with the coarser grit sandpaper and work your way around the drum shell in a circular motion. Be sure to apply even pressure to avoid uneven sanding.
Once you have completed the initial sanding with the coarse grit sandpaper, switch to a finer grit sandpaper to further refine the surface. Repeat the circular motion, focusing on smoothing out any remaining rough spots or scratches. Take your time and be patient during this process, as it is essential to achieve a high-quality result.
After you have finished sanding the drum shell, use a clean cloth or brush to remove any dust or debris. This will ensure that the surface is clean and ready for the next step in the drum-making process.
Applying Finish
Applying a finish to the drum shell is an important step that not only enhances the overall appearance of the drum but also protects the wood from moisture and wear. There are various options when it comes to choosing a finish, including paint, stain, or natural oils.

Before applying any finish, it is crucial to prepare the drum shell properly. Ensure that the surface is clean and free from any dust or debris. If necessary, you can wipe the drum shell with a damp cloth to remove any remaining particles.
If you choose to paint the drum shell, start by applying a primer to create a smooth and even base. Once the primer is dry, you can apply the paint color of your choice. Apply thin, even coats, allowing each coat to dry before applying the next. This will help to prevent drips or unevenness in the finish.
If you prefer a more natural look, you can use a wood stain to enhance the natural grain of the drum shell. Apply the stain with a brush or a cloth, following the manufacturer’s instructions. It’s essential to work in small sections and wipe off any excess stain to achieve an even color.
Another option is to use natural oils, such as tung oil or linseed oil, to protect and enhance the wood. Apply the oil with a clean cloth, working it into the surface of the drum shell. Allow the oil to penetrate the wood and then wipe off any excess.
Regardless of the finish you choose, it’s essential to allow sufficient drying time between coats and before moving on to the next step in the drum-making process. This will ensure that the finish is fully cured and ready for use.
Drilling Holes for Hardware
Drilling holes for hardware is a critical step in preparing the drum shell for assembly. The placement and size of the holes will depend on the specific hardware you plan to use, such as lugs, drum hoops, and snare wires.
Before drilling any holes, it’s important to plan out the placement carefully. Consider the overall design and functionality of the drum, as well as the specific instructions provided by the hardware manufacturer. Mark the desired locations using a pencil or a marker, ensuring accuracy and precision.
Once you have marked the hole locations, secure the drum shell in a stable position, either by using clamps or a drum shell holder. This will prevent any movement or shifting during the drilling process.
Using an appropriate drill bit for the size of the holes needed, carefully drill through the marked locations. Start with a smaller drill bit and gradually increase the size if necessary. It’s important to drill straight and evenly to avoid any damage to the drum shell.
After drilling the holes, you can use sandpaper to smooth out any rough edges or splinters. This will help to ensure a clean and professional finish.
Remember to refer to the specific instructions provided by the hardware manufacturer for any additional steps or considerations when drilling holes for their products. Following these instructions will ensure that the hardware fits securely and functions properly on the drum shell.
Attaching the Drumheads
When it comes to attaching the drumheads, there are a few important steps to follow in order to achieve the best sound and performance from your drum. In this section, we will cover selecting the drumheads, applying them properly, and tuning them to perfection.
Selecting the Drumheads
Selecting the right drumheads is crucial for achieving the desired sound. There are various types of drumheads available, each with its own unique characteristics. It’s important to consider the style of music you will be playing and the sound you want to achieve.
One popular choice for drumheads is the Remo Ambassador series. These drumheads are known for their versatility and balanced tone. They offer a warm sound with a good amount of sustain, making them suitable for a wide range of musical genres.
Another option to consider is the Evans G2 series. These drumheads are known for their durability and excellent tone. They provide a bright and focused sound, which makes them ideal for live performances where projection is important.
When selecting drumheads, it’s also important to consider the thickness or ply. Thicker drumheads produce a deeper and more focused sound, while thinner drumheads offer a brighter and more responsive tone. Experimenting with different thicknesses can help you find the perfect sound for your drum.
Applying the Drumheads
Once you have selected the drumheads that best suit your needs, it’s time to apply them to the drum shell. Start by placing the drumhead on the drum shell, ensuring it is centered properly. Use your hands to press down on the drumhead, starting at the center and working your way outwards.
To ensure a secure fit, use a drumhead tension rod to tighten the drumhead onto the drum shell. Begin by tightening the rod closest to you, then move to the one directly opposite it. Continue this pattern, working your way around the drumhead until all the tension rods are tightened evenly.
It’s important to note that drumheads need to be tightened evenly to achieve optimal sound and prevent any unwanted buzzing or rattling. Take your time and make sure each tension rod is tightened to a similar tension.
Tuning the Drumheads
Tuning the drumheads is the final step in achieving the perfect sound. Proper tuning ensures that each drumhead produces the desired pitch and tone, as well as maintaining consistency across all drums in a drum set.
Start by tapping the drumhead near each tension rod with a drumstick. Listen carefully to the pitch produced by each rod and adjust accordingly. If a tension rod produces a higher pitch than desired, use a drum key to loosen it slightly. Conversely, if a tension rod produces a lower pitch, tighten it slightly.
To achieve a balanced sound, it’s important to tune each tension rod to a similar pitch. This can be done by using your ears or using a drum tuner, which measures the pitch of each tension rod and provides guidance on adjustments.
Remember, tuning is a personal preference, and there is no right or wrong way to do it. Experiment with different tensions and pitches to find the sound that best suits your style of playing and the music you will be performing.
Installing Drum Hardware
Installing drum hardware is an essential step in the drum-making process. It involves mounting lugs, attaching drum hoops, and, if applicable, installing snare wires. Each of these components plays a crucial role in the overall sound and functionality of the drum. In this section, we will guide you through the process of installing drum hardware, ensuring that your drum is not only visually appealing but also produces a rich and resonant sound.
Mounting Lugs
Mounting lugs are the hardware pieces that hold the tension rods in place, allowing you to tune the drum. They are typically made of metal and are attached to the drum shell. When positioning the lugs, it is important to ensure that they are evenly spaced around the drum to maintain balance and prevent any unwanted vibrations.
To mount the lugs, follow these steps:
- Measure and mark: Start by measuring the drum’s circumference and divide it by the number of lugs you want to install. This will give you the spacing between each lug. Mark these points on the drum shell using a pencil or masking tape.
- Drill holes: Use an appropriate-sized drill bit to create holes at the marked points. Make sure the holes are slightly smaller than the lug screws to ensure a secure fit.
- Attach the lugs: Insert the lug screws through the holes from the inside of the drum shell. On the outside, place the lugs over the screws and tighten them using a drum key or a screwdriver. Ensure that the lugs are aligned properly.
- Tighten evenly: Once all the lugs are attached, use the drum key to tighten the lug screws evenly. Start with a loose tension and gradually increase it until the drumhead is securely in place. Be careful not to overtighten, as it can affect the drum’s overall sound.
Attaching Drum Hoops
Drum hoops are the metal rims that hold the drumheads in place and provide a surface for the tension rods to apply pressure. They come in various sizes and materials, such as steel or die-cast, each offering a unique tonal quality. Attaching drum hoops requires careful alignment and attention to detail.
Follow these steps to attach the drum hoops:
- Place the drumhead: Start by placing the drumhead onto the drum shell, making sure it is centered and aligned properly.
- Position the hoop: Position the hoop over the drumhead, ensuring that it is evenly aligned with the drum shell. The hoop should rest on the bearing edge of the drum shell.
- Insert tension rods: Insert the tension rods through the holes in the hoop and drumhead, starting with one rod and moving in a star pattern to the opposite side. This ensures even tension distribution.
- Tighten the tension rods: Using a drum key, tighten the tension rods evenly, gradually working your way around the drum in a star pattern. This helps to maintain an even tension across the drumhead, resulting in a balanced and resonant sound.
Installing Snare Wires (if applicable)
If you are building a snare drum, the final step in installing drum hardware is attaching the snare wires. Snare wires are the metal strands that vibrate against the bottom drumhead, creating the distinct snare drum sound. The installation process requires precision to ensure optimal snare response.
To install snare wires, follow these steps:
- Prepare the snare bed: The snare bed is a shallow groove on the bottom drumhead where the snare wires rest. Use a snare bed tool or a flathead screwdriver to create a slight depression in the drumhead. The snare bed should be approximately the width of the snare wires.
- Attach the snare wires: Place the snare wires onto the snare bed, ensuring that they are centered and aligned with the drumhead. The wires should extend evenly across the snare bed without any gaps or overlaps.
- Secure the snare wires: Use the snare strainer and butt plate to secure the snare wires. The snare strainer is typically located on the side of the drum and allows you to engage or disengage the snare wires. The butt plate is located on the opposite side and provides additional tension.
- Tune the snare wires: Use the snare strainer to adjust the tension of the snare wires. Experiment with different levels of tension to find the desired snare response. A tighter tension will produce a crisp and sensitive snare sound, while a looser tension will result in a more relaxed and subtle snare sound.
Making Drumsticks
Choosing Wood for Drumsticks
When it comes to making drumsticks, one of the most important decisions you’ll need to make is choosing the right wood. The type of wood you select will greatly impact the sound and feel of the drumsticks. There are several popular options to consider, each with its own unique qualities.
- Hickory: Hickory is a popular choice for drumsticks due to its durability and responsiveness. It offers a balanced feel and is known for its versatility across different musical genres. Whether you’re playing jazz, rock, or anything in between, hickory drumsticks are a reliable choice.
- Maple: Maple drumsticks are favored for their lightweight nature, making them ideal for fast and intricate drumming techniques. They offer a softer feel and produce a bright and articulate sound. Maple sticks are commonly used in genres like pop and fusion.
- Oak: Oak drumsticks are known for their dense and heavy nature, providing a powerful and full-bodied sound. They are highly durable and suitable for drummers who prefer a more aggressive playing style. Oak sticks are often used in genres such as metal and hard rock.
- Ash: Ash drumsticks offer a balanced combination of durability and flexibility. They provide a bright and clear tone and are popular among drummers who prioritize speed and precision. Ash sticks are commonly used in various musical styles, including funk and R&B.
Shaping Drumsticks
Once you have chosen the right wood for your drumsticks, the next step is shaping them to your desired specifications. The shape of the drumstick can greatly affect its playability and sound, so it’s important to pay attention to this step.
- Tip Shape: The tip of the drumstick can be shaped in different ways, each offering its own unique sound and feel. A round tip provides a full and balanced sound, making it suitable for a wide range of musical styles. A pointed tip offers increased articulation and is favored by drummers who play genres that require precision and clarity.
- Taper: The taper refers to the gradual decrease in diameter from the shoulder to the tip of the drumstick. Different tapers can affect the balance and weight distribution of the stick. A long taper offers a lighter feel and increased rebound, making it ideal for faster playing. A short taper provides more power and control, making it suitable for heavier playing styles.
- Length and Diameter: The length and diameter of the drumstick can also impact its playability. Longer sticks offer extended reach and can provide a greater dynamic range. Shorter sticks offer a more compact feel and are often preferred by drummers who prioritize speed and agility. The diameter of the stick can affect its weight and overall feel in the hand. Thicker sticks offer more power and durability, while thinner sticks provide increased finesse and control.
Finishing Drumsticks
To ensure the longevity and playability of your drumsticks, it’s important to properly finish them. The finish not only protects the wood but also affects the grip and feel of the sticks. Here are some common finishing options to consider:
- Lacquer: Applying a lacquer finish to your drumsticks provides a smooth and glossy surface. This finish offers excellent durability and protects the wood from moisture and wear. Lacquered drumsticks can provide a comfortable grip and reduce the risk of slippage during intense drumming sessions.
- Wax: Wax finishes provide a more natural and matte appearance to the drumsticks. This finish allows the wood to breathe and provides a tactile grip. Wax finishes are often favored by drummers who prefer a more organic and traditional feel.
- Grip Coating: Some drumsticks come with a specialized grip coating applied to the handle. These coatings can enhance grip and reduce hand fatigue during long drumming sessions. There are various types of grip coatings available, each offering a different level of tackiness and texture.
In conclusion, making drumsticks involves carefully selecting the right wood, shaping them to your desired specifications, and finishing them to ensure durability and playability. By choosing the appropriate wood, shaping the drumsticks to your preference, and applying a suitable finish, you can create drumsticks that not only feel comfortable in your hands but also produce the desired sound for your drumming style. Remember to experiment with different options to find the perfect drumsticks that suit your needs and enhance your drumming experience.
