Discover the on how to clean a guitar fretboard. From removing dirt and grime to conditioning and finishing touches, learn the essential tips for maintaining your instrument.
Tools and Materials Needed
Soft cloth
To properly clean and maintain your guitar, you’ll need a soft cloth. This will help you remove dirt, grime, and fingerprints from the surface of the instrument without scratching or damaging it. Choose a cloth made of microfiber or cotton to ensure a gentle yet effective cleaning process.
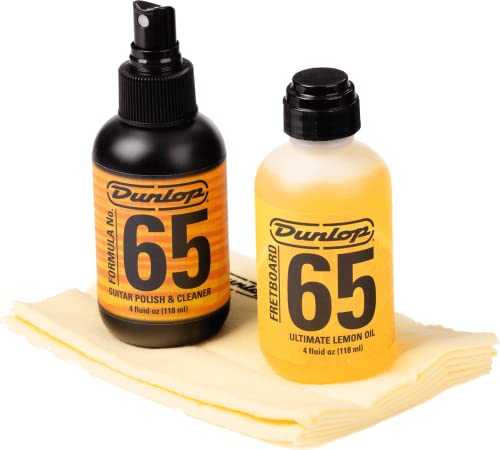
Guitar cleaner or lemon oil
To keep your guitar looking and sounding its best, you’ll need a guitar cleaner or lemon oil. These products are specifically designed to clean and condition the wood of the fretboard, providing it with necessary moisture and protection. Guitar cleaner is ideal for regular maintenance, while lemon oil is recommended for deeper conditioning.
Small brush or toothbrush
A small brush or toothbrush can be handy for reaching into the nooks and crannies of your guitar. Use it to gently remove dust and debris from hard-to-reach areas such as the bridge, saddle, and tuning pegs. Make sure the brush has soft bristles to avoid scratching the guitar’s surface.
Microfiber cloth
In addition to a soft cloth, it’s also helpful to have a microfiber cloth on hand. These cloths are made of fine synthetic fibers that are highly effective at trapping and removing dirt particles. They are perfect for wiping down the entire guitar body, including the finish, to restore its shine and luster.

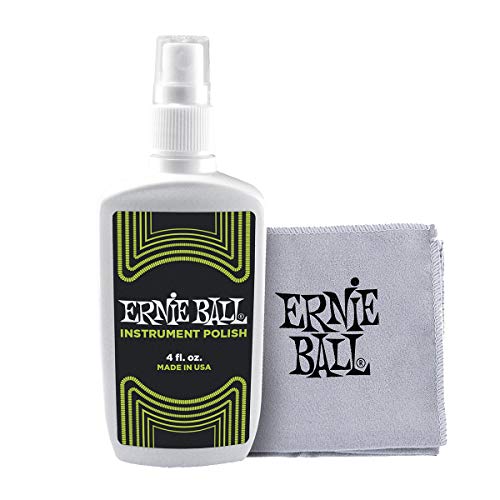
Guitar polish
To give your guitar that extra shine and protection, you’ll want to have guitar polish in your toolkit. Guitar polish is formulated to remove fingerprints, smudges, and light scratches from the guitar’s surface. It also leaves a thin protective layer that helps repel dirt and moisture.
Now that you have gathered all the necessary tools and materials, you’re ready to start taking care of your guitar. But before you dive into the cleaning process, it’s important to prepare the fretboard properly to avoid any potential damage. Let’s move on to the next section to learn how to do that.
Preparing the Fretboard
Removing the strings
Before cleaning the fretboard, it’s essential to remove the strings from your guitar. This step allows you to have better access to the entire fretboard without any obstructions. Loosen the strings by turning the tuning pegs, and then carefully unwind them from the pegs and bridge. Once the strings are completely removed, you can proceed with the cleaning process.
Covering the pickups
To protect the pickups from any cleaning agents or debris, it’s advisable to cover them before proceeding. The pickups are sensitive electronic components that can be damaged if exposed to liquids or excessive dust. Use masking tape or a specialized pickup cover to shield them during the cleaning process. This simple step will help ensure the longevity and performance of your guitar’s pickups.
Securing the guitar neck
To make the cleaning process more convenient, it’s beneficial to secure the guitar neck in a stable position. You can use a neck support or a guitar stand to keep the instrument steady and prevent any accidental movement. This will allow you to focus on cleaning the fretboard without worrying about your guitar slipping or falling.

With the fretboard properly prepared, you’re now ready to tackle the task of removing dirt and grime. Let’s move on to the next section to learn the best techniques for achieving a clean and well-maintained fretboard.
Preparing the Fretboard
Removing the strings
Before you begin cleaning and conditioning your guitar’s fretboard, it’s essential to remove the strings. This will give you unrestricted access to the fretboard and ensure that you can clean every nook and cranny effectively. Start by loosening the tension of each string by turning the tuning pegs counterclockwise. Once the strings are loose, you can use a string winder or simply unwind them by hand. Carefully remove each string from the bridge and the tuning pegs, making sure not to scratch the guitar’s body.
Covering the pickups
To protect your guitar’s pickups from any accidental damage while cleaning, it’s a good idea to cover them. The pickups are sensitive electronic components that can be easily damaged by excess moisture or cleaning solutions. You can use small pieces of masking tape or specialized pickup covers to shield them from any potential harm. By covering the pickups, you can clean the fretboard without worrying about any cleaning agents seeping into the delicate electrical parts.
Securing the guitar neck
Once the strings are removed and the pickups are covered, it’s important to secure the guitar neck before proceeding with the cleaning process. This step is crucial to prevent any accidental damage to the neck or body of the guitar. You can use a guitar neck support or a soft cloth to prop up the neck and keep it stable during the cleaning process. This will ensure that you have both hands free to clean the fretboard thoroughly without any risk of the guitar slipping or falling.
Now that you have successfully prepared the fretboard by removing the strings, covering the pickups, and securing the guitar neck, you are ready to move on to the next step: removing dirt and grime.
Removing Dirt and Grime
Wiping the fretboard
When it comes to maintaining your guitar, one of the most important steps is keeping the fretboard clean. Over time, dirt, sweat, and grime can build up on the fretboard, affecting both the playability and the overall sound of your instrument. To start, you’ll need a soft cloth, preferably a microfiber cloth, to gently wipe down the fretboard. Make sure the cloth is clean and free of any abrasive materials that could scratch the wood. Using a gentle touch, wipe the fretboard in small circular motions, paying close attention to the areas where your fingers come into contact with the strings. This will help remove any dirt or oils that have accumulated.
Cleaning hard-to-reach areas
While wiping the fretboard is a good first step, there are often hard-to-reach areas that require a little extra attention. This is where a small brush or toothbrush can come in handy. Dip the brush in some guitar cleaner or lemon oil and gently scrub the fretboard, focusing on the areas between the frets. The bristles of the brush will help to dislodge any stubborn dirt or grime that may have accumulated in these tight spaces. Be sure to use a light touch and avoid pressing too hard, as you don’t want to damage the wood or the frets.
Removing stubborn stains
Sometimes, despite your best efforts, you may encounter stubborn stains on your fretboard. These can be caused by anything from spilled drinks to years of neglect. In these cases, it may be necessary to take a more targeted approach to cleaning. One option is to use a specialized guitar cleaner designed to remove tough stains. Apply a small amount of the cleaner to a soft cloth and gently rub the affected area. Allow the cleaner to sit for a few minutes to penetrate the stain, then wipe it away. If the stain persists, you may need to repeat this process or try using a slightly more abrasive cleaner. However, be cautious when using abrasive cleaners, as they can potentially damage the finish of your guitar.
Remember, taking care of your guitar’s fretboard is an essential part of keeping your instrument in top playing condition. Regularly wiping down the fretboard, cleaning hard-to-reach areas, and addressing stubborn stains will help to prolong the life of your guitar and ensure that it continues to sound its best. By following these steps and incorporating them into your regular maintenance routine, you’ll be able to enjoy your guitar for years to come.
Conditioning the Fretboard
Applying guitar cleaner or lemon oil
When it comes to conditioning your guitar’s fretboard, one of the first steps is to apply a guitar cleaner or lemon oil. These products are specifically designed to nourish and protect the wood, ensuring its longevity and enhancing its appearance. You can find a wide variety of guitar cleaners and lemon oils on the market, so make sure to choose one that is suitable for your specific type of wood.
To apply the guitar cleaner or lemon oil, start by placing a small amount on a soft cloth. Gently rub the cloth onto the fretboard, making sure to cover the entire surface. Pay extra attention to any areas that may be particularly dirty or worn. The cleaner or oil will help to remove any dirt, grime, or residue that has built up over time, leaving your fretboard looking clean and revitalized.
Massaging the oil into the wood
Once you have applied the guitar cleaner or lemon oil, it’s important to massage it into the wood. This will help the oil penetrate deep into the pores of the wood, nourishing it from within. Using your fingers or a clean cloth, gently massage the oil into the fretboard, making circular motions. Take your time and ensure that the oil is evenly distributed across the entire surface.
As you massage the oil into the wood, you will start to notice the fretboard absorbing it. This is a good sign, as it means that the wood is soaking up the moisture and nutrients it needs to stay healthy. The massaging action also helps to improve circulation within the wood, promoting its overall well-being.
Letting the oil sit and absorb
After you have applied and massaged the guitar cleaner or lemon oil into the fretboard, it’s important to let it sit and absorb. This allows the wood to fully benefit from the conditioning properties of the oil. Depending on the specific product you are using, it’s recommended to let the oil sit for a certain amount of time, typically around 10 to 15 minutes.
During this waiting period, you can take the opportunity to clean other parts of your guitar or engage in a different activity. The oil will continue to work its magic, deeply nourishing and moisturizing the wood. Once the recommended time has passed, you can proceed to the next steps of the fretboard care process.

By conditioning your guitar’s fretboard with a suitable cleaner or lemon oil, you are not only enhancing its appearance but also prolonging its lifespan. The nourishing properties of these products help to prevent the wood from drying out, cracking, or warping. Additionally, a well-conditioned fretboard contributes to better playability and tone, allowing you to fully enjoy your instrument.
Remember to always follow the instructions provided by the manufacturer of the guitar cleaner or lemon oil you choose. Each product may have specific guidelines and recommendations for application. Taking proper care of your guitar’s fretboard will ensure that it remains in excellent condition for years to come.
Polishing and Finishing Touches
Removing Excess Oil
When it comes to conditioning the fretboard, applying guitar cleaner or lemon oil is essential for maintaining its beauty and longevity. However, it’s important to remove any excess oil after the conditioning process to prevent a buildup that may attract dirt and grime. To do this, take a soft cloth and gently wipe the fretboard, making sure to remove any visible residue. By removing excess oil, you not only keep your fretboard looking clean, but also ensure that it remains in optimal playing condition.
Buffing the Fretboard
After removing excess oil, the next step in the polishing process is to buff the fretboard. This helps to restore its natural shine and smoothness. To achieve this, you can use a microfiber cloth or a soft cloth specifically designed for buffing. Start by gently rubbing the cloth in circular motions across the fretboard, paying attention to all areas. This action helps to remove any remaining residue and brings out the natural beauty of the wood. With each pass, you’ll notice the fretboard becoming more vibrant and lustrous.
Cleaning the Frets
While polishing the fretboard is important, it’s equally crucial to clean the frets themselves. Over time, dirt and grime can accumulate on the frets, affecting playability and tone. To clean the frets, you can use a small brush or toothbrush with soft bristles. Carefully scrub each fret, removing any buildup or residue. Be sure to reach the edges and corners of the frets where dirt tends to accumulate. By cleaning the frets, you not only enhance the overall appearance of your guitar, but also improve its performance and playability.
Re-stringing the Guitar
Once you have completed the polishing and cleaning process, it’s time to re-string your guitar. While this may seem like a simple task, it is crucial to do it correctly to ensure optimal performance and longevity. Start by removing the old strings one at a time, being careful not to scratch the fretboard or damage the guitar. Then, take your new set of strings and thread them through the bridge, over the nut, and into the tuning pegs. Make sure to wind the strings properly, avoiding any excess slack or overtightening. Once all the strings are in place, tune your guitar to the desired pitch. This final step completes the process of polishing and finishing touches, leaving your guitar looking and sounding its best.
In conclusion, the process of polishing and applying finishing touches to your guitar is an essential part of its maintenance. By removing excess oil, buffing the fretboard, cleaning the frets, and re-stringing the guitar, you can ensure that your instrument remains in top-notch condition. Not only will this enhance its visual appeal, but it will also improve playability and overall performance. So take the time to give your guitar the attention it deserves, and you’ll be rewarded with a beautiful, well-maintained instrument that continues to bring joy and inspiration for years to come.
