Installing in-ceiling speakers can be intimidating, but with the right tools and our step-by-step guide, you can do it yourself. We cover everything from preparing the room to common issues.
Types of In-Ceiling Speakers
In-ceiling speakers are a great way to add high-quality audio to any room without taking up space or creating clutter with bulky speakers. They are easy to install and can be used for a variety of purposes, from background music to home theater systems. There are three main types of in-ceiling speakers: round speakers, square speakers, and in-wall speakers.
Round Speakers
Round speakers are the most common type of in-ceiling speaker. They are easy to install and come in a variety of sizes and styles to fit any room decor. Round speakers are typically mounted directly into the ceiling and can be angled for optimum sound projection. They are ideal for use as background music speakers or as part of a home theater system.
Square Speakers
Square speakers are less common than round speakers but offer a unique look that can fit certain room designs. They are often larger than round speakers and produce a wider range of sound. Like round speakers, they are mounted directly into the ceiling and can be angled for optimal sound projection. Square speakers are ideal for use as part of a home theater system or for rooms where high-quality sound is a priority.
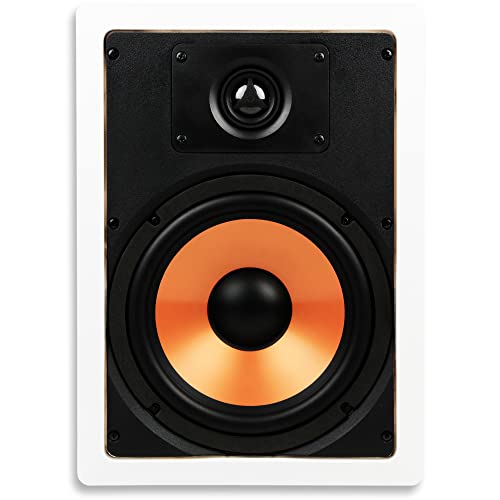
In-Wall Speakers
In-wall speakers are mounted directly into the wall and are often used in conjunction with a flat-screen TV. They are typically larger than in-ceiling speakers and produce a more robust sound. In-wall speakers are ideal for use as part of a home theater system or for rooms where high-quality sound is a priority. They can be more difficult to install than in-ceiling speakers, as they require cutting into the wall and running wires through the wall cavity.

When choosing the type of in-ceiling speaker to install, it is important to consider the intended use of the speaker and the room decor. Round speakers are a safe choice for most rooms, while square speakers offer a unique look for rooms with modern or unique designs. In-wall speakers are ideal for home theater systems or rooms where high-quality sound is a priority.
To help you choose the right speaker for your room, consider creating a table that lists the pros and cons of each type of speaker. This can help you make an informed decision and ensure that you choose the best speaker for your needs.
(*) Pros and Cons of In-Ceiling Speaker Types
| Speaker Type | Pros | Cons |
|---|---|---|
| Round Speakers | Easy to install, come in a variety of sizes and styles, ideal for background music or home theater systems | Limited sound projection, may not fit unique room designs |
| Square Speakers | Unique look, produce a wider range of sound, ideal for home theater systems or rooms where high-quality sound is a priority | Less common, may be more difficult to install |
| In-Wall Speakers | Produce a robust sound, ideal for home theater systems or rooms where high-quality sound is a priority | More difficult to install, require cutting into the wall and running wires through the wall cavity |
Necessary Tools and Materials
When it comes to installing in-ceiling speakers, having the right tools and materials is essential. Here are the tools and materials you’ll need:
Speaker Wires
- 16-gauge speaker wire
- Wire cutter/stripper
Drill
- Cordless drill
- 2-inch hole saw
- Drill bit
Fish Tape
Fish tape

Wire Strippers
Wire stripper
Screwdriver
- Phillips head screwdriver
- Flathead screwdriver
Before you start your installation, make sure you have all of the necessary tools and materials listed above. It’s also a good idea to have a helper on hand to make the installation process go more smoothly.
Hiring a professional installer can be costly, but with the right tools and materials, you can save a lot of money by doing it yourself. This guide will help you install your in-ceiling speakers like a pro.
Now that you have all of the necessary tools and materials, it’s time to move on to the next step: preparing the room.
Preparing the Room
When it comes to installing in-ceiling speakers, preparation is key. Before you start cutting holes in your ceiling, you need to take some time to locate the studs, gather your tools and materials, and plan your wiring. This section will guide you through the necessary steps to prepare your room for in-ceiling speaker installation.
Locate the Studs
Locating the studs in your ceiling is essential for ensuring that your speakers are securely mounted. Use a stud finder to locate the studs in the area where you plan to install your speakers. Mark the location of each stud with a pencil or tape measure. Take note of any obstructions, such as pipes, wires, or ductwork, that may interfere with your installation.
Cut the Hole
Once you have located the studs, it’s time to start cutting the holes for your speakers. Use a template or compass to mark the size of the hole you need to cut. Use a drywall saw or jigsaw to cut along the marked lines. Be careful not to damage any wires or pipes in the ceiling. If you’re not confident in your ability to cut the holes, consider hiring a professional to do the job for you.
Run the Wires
Before you can install your speakers, you need to run the wires to each location. Start by determining the route that the wires will take. Use a fish tape to pull the wires through the ceiling, making sure to avoid any obstructions. Use wire strippers to remove any insulation from the ends of the wires. If you’re unsure about how to run the wires or connect them to the speakers, refer to the instructions that came with your speakers.
Install the Back Box
The back box is a protective enclosure that fits into the hole in your ceiling and provides a secure mounting point for your speakers. Install the back box by inserting it into the hole in the ceiling and screwing it into place. Make sure that the back box is securely mounted to the studs in the ceiling. This will ensure that your speakers are stable and won’t fall out of the ceiling.
In summary, preparing the room for in-ceiling speaker installation involves locating the studs, cutting the holes for the speakers, running the wires, and installing the back boxes. By taking the time to properly prepare your room, you can ensure that your speakers are securely mounted and will provide high-quality sound for years to come.

Wiring the Speakers
When it comes to in-ceiling speakers, wiring them properly is essential for getting the most out of your sound system. In this section, we’ll cover everything you need to know about wiring your in-ceiling speakers, including how to connect the speaker wires, how to connect to the TV, and how to connect to the amplifier.
Connecting the Speaker Wires
Before you can connect your in-ceiling speakers, you’ll need to run the speaker wires. To do this, you’ll need to drill a hole in the ceiling where you plan to install the speakers. Once you’ve done that, you can run the wires through the hole and down to your amplifier.
To connect the speaker wires, you’ll first need to strip the ends of the wires using wire strippers. Once the wires are stripped, you can connect them to the terminals on the back of the speaker. Be sure to match the positive and negative terminals on the speaker with the corresponding wires.
Connecting to the TV
Connecting your in-ceiling speakers to your TV is a great way to enhance your viewing experience. To do this, you’ll need to connect the audio output from your TV to the audio input on your amplifier. You can do this using an RCA cable or an optical cable, depending on the connections available on your TV and amplifier.
Once you’ve connected the audio output from your TV to your amplifier, you can then connect the speaker wires from your in-ceiling speakers to the amplifier. Be sure to follow the same process for connecting the speaker wires as outlined in the previous section.

Connecting to the Amplifier
Connecting your in-ceiling speakers to your amplifier is the final step in the wiring process. To do this, you’ll need to connect the speaker wires from your in-ceiling speakers to the terminals on the back of your amplifier. Be sure to match the positive and negative terminals on the amplifier with the corresponding wires.
Once you’ve connected the speaker wires, you can then turn on your amplifier and test your speakers to ensure they’re working properly.
In summary, wiring your in-ceiling speakers requires a few essential tools and materials, including speaker wires, a drill, fish tape, wire strippers, and a screwdriver. To connect your speakers, you’ll need to run the speaker wires, connect to the TV, and connect to the amplifier. By following these steps, you can enjoy high-quality sound from your in-ceiling speakers.
Testing the Speakers
When it comes to in-ceiling speakers, testing them is crucial to ensure that they are properly installed and functioning correctly. Testing the sound, adjusting the volume, and calibrating the speakers are all important steps in the testing process.
Testing the Sound
Before testing the sound, make sure that all the necessary wiring is properly connected. Once that is done, play a song or any other audio file to test the sound. Listen for any distortion or other sound issues that may be present. If the sound quality is not up to par, there may be an issue with the wiring or the speakers themselves.
Adjusting the Volume
If the sound is present but too low, adjusting the volume is the next step. This can be done through the TV, amplifier, or any other device that the speakers are connected to. Make sure that the volume is not too high, as this can damage the speakers over time. A good rule of thumb is to keep the volume at a moderate level and adjust it as needed.
Calibrating the Speakers
Calibrating the speakers is the final step in ensuring that they are properly installed and functioning correctly. This can be done through a sound calibration tool or manually adjusting the settings on the amplifier or other device. Make sure that the speakers are balanced and that the sound is coming from all speakers equally. If the sound is not balanced, adjust the settings until it is.
In summary, testing in-ceiling speakers is crucial to ensure that they are functioning correctly. Testing the sound, adjusting the volume, and calibrating the speakers are all important steps in this process. By following these steps, you can ensure that your in-ceiling speakers are properly installed and providing high-quality sound for years to come.
Make sure that all wiring is properly connected before testing the sound.
Listen for any sound issues such as distortion or low volume.
Adjust the volume to a moderate level and avoid setting it too high.
Calibrate the speakers to ensure that the sound is balanced and coming from all speakers equally.
Troubleshooting
If you’ve installed your in-ceiling speakers and are experiencing issues with sound quality or no sound output, don’t worry. Troubleshooting is a necessary process to ensure optimal performance, and the most common issues are easily resolved.
No Sound
If you’re experiencing no sound output from your in-ceiling speakers, the first step is to check the connections. Ensure that the speaker wires are securely connected to the amplifier and the speaker itself. If the connections appear to be fine, check the amplifier settings to ensure that the correct input is selected.
Another common issue that can cause no sound output is a blown speaker. If you suspect this is the case, you can test the speaker by connecting it directly to the amplifier. If the speaker produces no sound, it may need to be replaced.
Poor Sound Quality
If you’re experiencing poor sound quality from your in-ceiling speakers, there are a few things you can check. First, ensure that the speakers are properly installed and aligned. If they are not aligned correctly, it can affect the sound quality.
Another common issue that can cause poor sound quality is the type of speaker wire used. Low-quality speaker wire can result in interference and reduced sound quality. Ensure that you’re using high-quality speaker wire that is appropriate for the length of the wire run.
Speaker Not Working
If one of your in-ceiling speakers is not working, the first step is to check the connections. Ensure that the speaker wire is securely connected to the speaker and the amplifier. If the connections appear to be fine, you can test the speaker by connecting it directly to the amplifier. If the speaker produces no sound, it may need to be replaced.
Another common issue that can cause a speaker to not work is a blown fuse. Check the speaker fuse and replace it if necessary. It’s also important to ensure that the speaker is properly installed and aligned.
Amplifier Not Working
If the amplifier is not working, there are a few things you can check. First, ensure that the power cord is securely connected to the amplifier and the power outlet. Check the power outlet to ensure that it is providing power.
Another common issue that can cause the amplifier to not work is the speaker settings. Ensure that the correct input is selected and that the volume is turned up. If the amplifier still isn’t working, it may need to be replaced.
In conclusion, is a necessary process when installing in-ceiling speakers. The most common issues can be easily resolved by checking the connections, ensuring proper installation, and using high-quality materials. By following these steps, you can ensure optimal performance and enjoy high-quality sound from your in-ceiling speakers.
