Discover effective solutions to fix echo on your microphone. From adjusting mic settings to troubleshooting external factors, learn how to eliminate echo and improve audio quality.
Common Causes of Mic Echo
Microphone echo can be a frustrating issue, affecting the quality of audio recordings and communication. Understanding the common causes of mic echo is essential in resolving this problem. In this section, we will explore three factors that contribute to mic echo: room acoustics, mic placement, and audio feedback.
Room Acoustics
The acoustics of a room play a significant role in the occurrence of mic echo. When sound waves bounce off hard surfaces such as walls, floors, and ceilings, they can create a reverberation effect, leading to echo. To minimize this issue, consider the following tips:
- Use sound-absorbing materials: Adding curtains, carpets, or acoustic panels to the room can help absorb sound waves, reducing the chances of echo.
- Rearrange furniture: Furniture can affect the way sound waves travel within a room. Experiment with different furniture placements to find the setup that minimizes echo.
- Consider room size: Larger rooms tend to have more echo due to the increased distance for sound waves to travel. If possible, choose a smaller room or section off a smaller area to minimize echo.
Mic Placement
Proper mic placement is crucial for obtaining clear and echo-free audio. Here are some tips to ensure optimal mic placement:
- Maintain the right distance: Position the microphone at an appropriate distance from the sound source. Too close can result in distortion, while too far can introduce echo.
- Avoid reflective surfaces: Place the microphone away from surfaces that reflect sound waves, such as walls or hard objects. This helps prevent sound from bouncing back into the microphone and causing echo.
- Experiment with angles: Adjust the angle of the microphone to find the position that captures the sound without picking up unnecessary reverberations.
Audio Feedback
Audio feedback occurs when sound from the speakers is picked up by the microphone, creating a loop that results in echo. To prevent audio feedback, consider the following steps:

- Manage speaker volume: Lower the volume of speakers or headphones to an appropriate level. High volumes increase the risk of audio feedback.
- Position speakers strategically: Place speakers in a way that directs sound away from the microphone. This helps minimize the chances of the microphone picking up the audio from the speakers.
- Use headphones or earphones: Using headphones or earphones can eliminate the possibility of audio feedback altogether, as the sound is contained within the listener’s ears.
By addressing these common causes of mic echo, you can significantly improve the audio quality of your recordings and communications. However, there are additional adjustments and troubleshooting steps you can take to further enhance your audio setup. In the upcoming sections, we will explore adjusting mic settings, using headphones or earphones, updating audio drivers, fixing hardware issues, adjusting software settings, troubleshooting external factors, and seeking professional help. Stay tuned for more valuable insights and solutions.
Adjusting Mic Settings
When it comes to adjusting mic settings, there are a few key factors to consider in order to optimize your audio experience. By making adjustments to mic sensitivity, volume, and enabling noise cancellation, you can ensure clear and crisp sound quality. Let’s dive into each of these settings and explore how they can enhance your microphone performance.
Decreasing Mic Sensitivity
Mic sensitivity refers to how responsive your microphone is to sound. If your mic sensitivity is too high, it may pick up even the slightest noises, resulting in background noise and echo. On the other hand, if your mic sensitivity is too low, it may not capture your voice adequately. Finding the right balance is crucial.
To decrease mic sensitivity, you can follow these steps:
- Locate the microphone settings on your device or software.
- Look for an option to adjust mic sensitivity or gain.
- Decrease the sensitivity or gain settings incrementally to find the optimal level.
- Test your microphone by speaking into it and monitoring the audio levels. Adjust as needed until you achieve the desired clarity without picking up excessive background noise.
Remember, it’s a trial and error process, and what works for one person may not work for another. Take the time to experiment and find the setting that suits your needs best.
Adjusting Mic Volume
Mic volume refers to how loud or soft your microphone captures your voice. If your mic volume is too low, your voice may be difficult to hear, while if it’s too high, it can lead to distortion and clipping. Adjusting the mic volume is essential to ensure your voice comes through clearly.
To adjust mic volume effectively, consider these steps:
- Locate the microphone settings on your device or software.
- Look for an option to adjust mic volume or input level.
- Start by setting the volume at a moderate level and test it by speaking into the microphone.
- Monitor the audio levels and make adjustments as necessary until you achieve clear and balanced sound without distortion.
It’s important to find the right balance where your voice is audible without overpowering the audio or causing any distortion. Take the time to test different volume levels until you find the sweet spot.
Enabling Noise Cancellation
Noise cancellation is a valuable feature that helps eliminate unwanted background noise, improving the overall audio quality. By enabling noise cancellation, you can minimize distractions and ensure your voice takes center stage.
To enable noise cancellation, follow these steps:

- Check if your microphone or audio software has a noise cancellation feature.
- Locate the settings for noise cancellation.
- Enable the noise cancellation feature.
- Test your microphone by speaking into it while in a noisy environment.
- Monitor the audio levels and assess whether the background noise is significantly reduced.
Noise cancellation can be particularly useful in environments where there is constant background noise, such as offices, cafes, or outdoor settings. It allows your voice to stand out and ensures a more professional and pleasant listening experience for your audience.
Using Headphones or Earphones
When it comes to addressing the issue of mic echo, using headphones or earphones can be a helpful solution. By incorporating these devices into your setup, you can minimize the chances of echo occurring during your audio recordings or conversations. In this section, we will explore the different aspects of using headphones or earphones, including the benefits of closed-back headphones, the importance of positioning earphones correctly, and the advantages of trying out different headphone types.
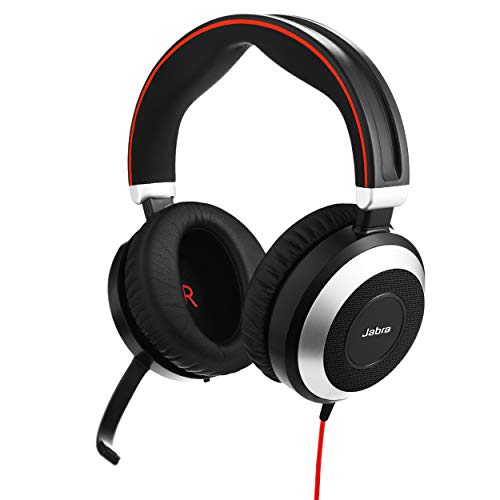
Using Closed-Back Headphones
One effective way to reduce mic echo is by using closed-back headphones. Closed-back headphones are designed with sealed ear cups that prevent sound from leaking out. This means that the audio produced by your microphone will be less likely to be picked up and echoed back into the recording. The closed-back design creates a barrier between the mic and the headphone’s speakers, resulting in a more controlled audio environment.
Closed-back headphones are especially useful in situations where you may be recording in a noisy environment or sharing a space with others. The closed design helps to isolate the sound, allowing you to focus on your audio without distractions. Additionally, closed-back headphones tend to provide better sound quality and clarity compared to open-back headphones, making them a great choice for minimizing mic echo.
Positioning Earphones Correctly
In order to effectively reduce mic echo, it is crucial to position your earphones correctly. Improper placement can lead to sound leakage and potential echo issues. To ensure optimal performance, follow these simple guidelines:

- Insert the earphones properly: Make sure that the earphones are securely inserted into your ears. This will create a seal that helps to block out external sounds and prevent audio leakage.
- Position the earphones close to the ear canal: Properly positioning the earphones close to your ear canal ensures that the sound is directed towards your ears and not towards the microphone. This reduces the chances of the microphone picking up the audio from the earphones and causing an echo.
- Adjust the fit: Take the time to adjust the fit of your earphones to ensure they are snug and comfortable. A proper fit will help maintain the seal and prevent any sound leakage that could potentially lead to echo.
By following these positioning tips, you can maximize the effectiveness of your earphones in minimizing mic echo and create a more enjoyable audio experience.
Trying Different Headphone Types
While closed-back headphones are often recommended for reducing mic echo, it’s worth experimenting with different headphone types to find the best fit for your specific needs. Each type of headphone offers its own unique sound characteristics, and what works for one person may not work as well for another.
Some popular headphone types include:
- Open-back headphones: These headphones have ear cups that are partially or fully open, allowing some sound to escape. While they may not be as effective in reducing mic echo as closed-back headphones, they can provide a more natural and spacious sound experience.
- In-ear monitors (IEMs): IEMs are small earphones that fit directly into the ear canal, providing a secure and isolated listening experience. They are particularly useful for situations where portability is important or when you need a high level of noise isolation.
- Wireless headphones: Wireless headphones offer the convenience of freedom from tangled cables. They can be a great option if you prefer a wireless setup or need to move around while recording or conversing.
By trying out different headphone types, you can find the one that suits your preferences and helps minimize mic echo effectively.
Updating Audio Drivers
Updating audio drivers is an essential step in troubleshooting and resolving issues related to microphone echo. Outdated or incompatible drivers can often cause problems with microphone functionality, resulting in unwanted echo. Therefore, it is crucial to regularly check for driver updates and ensure that you have the latest versions installed on your system.
Checking for Driver Updates
To begin, you need to check for available driver updates for your audio device. There are several ways to do this, depending on your operating system. Let’s explore some common methods:
- Automatic Updates: Many operating systems, such as Windows and macOS, provide automatic driver updates. You can enable this feature in your system settings to ensure that your audio drivers are always up to date. This option is convenient as it takes care of driver updates in the background without requiring any manual intervention.
- Device Manufacturer’s Website: Another reliable method is to visit the official website of your audio device manufacturer. Look for a “Support” or “Downloads” section on their website, where you can typically find the latest driver releases. Enter your audio device model or serial number to access the appropriate driver downloads.
- Driver Update Utilities: Various third-party software tools are available that can scan your system, detect outdated drivers, and provide you with the necessary updates. These utilities simplify the process by automatically identifying the correct drivers for your audio device and downloading them for you.
Downloading and Installing Latest Drivers
Once you have identified the latest driver updates for your audio device, it’s time to download and install them. Here’s a step-by-step guide to help you through the process:
- Download the Drivers: Click on the download link provided by the manufacturer or the driver update utility. Ensure that you are downloading the correct driver version compatible with your operating system. It’s always a good practice to save the downloaded file in an easily accessible location on your computer.
- Backup Existing Drivers (Optional): Before proceeding with the installation, it is advisable to create a backup of your existing audio drivers. This step acts as a safety net in case any issues arise during the installation process. You can use a driver backup tool or manually copy the existing drivers to a separate folder.
- Install the Drivers: Double-click on the downloaded driver file to initiate the installation process. Follow the on-screen instructions provided by the driver installer. Typically, you will need to agree to the license agreement and choose the installation location. Once the installation completes, restart your computer for the changes to take effect.
- Verify Driver Installation: After the restart, it is essential to ensure that the new drivers are installed correctly. You can do this by accessing the device manager on your operating system. Look for the audio device in the “Sound, video and game controllers” section, and verify that the driver version matches the one you downloaded.
Troubleshooting Driver Issues
Sometimes, despite updating the audio drivers, issues may persist. In such cases, it is crucial to troubleshoot and identify any underlying driver-related problems. Here are some troubleshooting steps you can follow:
- Roll Back Drivers: If you encounter problems after updating the drivers, you can try rolling them back to the previous version. Access the device manager, locate the audio device, right-click on it, and select “Properties.” In the “Driver” tab, choose the “Roll Back Driver” option. This reverts the driver to the previous version and may resolve any compatibility issues.
- Uninstall and Reinstall Drivers: In some cases, a clean installation of the audio drivers can help resolve persistent issues. To do this, access the device manager, right-click on the audio device, and select “Uninstall device.” Make sure to check the box that says “Delete the driver software for this device” to remove all traces of the driver. After uninstalling, restart your computer and follow the previous steps to reinstall the audio drivers.
- Seek Professional Help: If you have exhausted all troubleshooting options and the microphone echo issue still persists, it may be time to seek professional help. Contacting audio technicians or reaching out to the manufacturer’s support team can provide you with expert guidance and assistance in resolving complex driver-related problems.
Fixing Hardware Issues
Microphone issues can be frustrating, especially when you’re trying to communicate with others. If you’re experiencing problems with your microphone, it’s essential to troubleshoot and fix any hardware issues that may be causing the problem. In this section, we will explore some common hardware problems and provide solutions to help you get your microphone working smoothly again.
Checking Mic Connections
One of the first things you should check when experiencing microphone issues is the connection. A loose or faulty connection can result in poor audio quality or no sound at all. To ensure that your microphone is properly connected, follow these steps:
- Inspect the cable: Start by examining the cable connecting your microphone to your device. Look for any signs of damage, such as fraying or kinks. If you notice any issues, consider replacing the cable.
- Check the ports: Ensure that the microphone is plugged into the correct port on your device. Sometimes, devices have multiple ports, and plugging the microphone into the wrong one can lead to connectivity problems.
- Secure the connection: Ensure that the microphone is securely plugged into the port. Sometimes, the connection can become loose over time, resulting in intermittent audio or no sound at all. Gently push the plug into the port to ensure a secure connection.
Testing with Different Cables
If you’ve checked the connection and are still experiencing issues with your microphone, it may be worth trying a different cable. Sometimes, cables can become damaged or worn out, leading to connectivity problems. Follow these steps to test your microphone with a different cable:
- Obtain a spare cable: If you have access to another microphone cable, use it to replace your current cable temporarily. If you don’t have a spare cable, consider borrowing one from a friend or purchasing a new one.
- Connect the new cable: Disconnect the current cable from your microphone and device. Then, connect the new cable to both the microphone and the device. Ensure that the connections are secure.
- Test the microphone: Once the new cable is connected, test your microphone to see if the issue persists. If the problem is resolved, it indicates that the previous cable was causing the problem, and you should consider replacing it.
Cleaning the Mic
Over time, microphones can accumulate dirt, dust, and debris, which can affect their performance. Cleaning your microphone regularly can help maintain its functionality and improve audio quality. Here are some steps to clean your microphone properly:
- Disconnect the microphone: Before cleaning your microphone, ensure that it is disconnected from your device. This will prevent any accidental damage while cleaning.
- Remove any visible debris: Use a soft, lint-free cloth or a small brush to gently remove any visible dirt or debris from the microphone. Be careful not to apply too much pressure, as this can damage the microphone.
- Clean the microphone grille: The grille is the part of the microphone that captures sound. It can often accumulate dust or other particles. Use a soft brush or a can of compressed air to clean the grille, ensuring that there is no blockage.
- Wipe down the body: Using a slightly damp cloth, wipe down the body of the microphone to remove any smudges or fingerprints. Avoid using harsh chemicals or abrasive materials, as they can damage the microphone’s surface.
- Allow it to dry: After cleaning, allow the microphone to dry completely before reconnecting it to your device. This will prevent any potential damage due to moisture.
By checking mic connections, testing with different cables, and cleaning your microphone regularly, you can troubleshoot and fix common hardware issues that may be affecting its performance. Remember to always handle your microphone with care and follow the manufacturer’s instructions for cleaning and maintenance to ensure its longevity.
Adjusting Software Settings
When it comes to troubleshooting mic echo issues, adjusting the software settings on your device can often make a big difference. By making a few tweaks to your input device settings, configuring echo cancellation, and modifying recording preferences, you can improve the overall audio quality and reduce unwanted echoes.
Changing Input Device Settings
One of the first steps you can take to address mic echo is to adjust your input device settings. These settings determine how your microphone interacts with your computer or recording device. By optimizing these settings, you can minimize the chances of experiencing echo during your audio recordings or calls.
To change your input device settings, follow these steps:
- Open the audio settings on your device. This can usually be done by accessing the audio or sound settings in your operating system or application.
- Locate the input or recording tab within the audio settings. This is where you can configure the settings for your microphone.
- Adjust the input volume or gain. If your microphone sensitivity is too high, it can pick up background noise and cause echoes. Decrease the input volume or gain to a level where your voice is clear without picking up unnecessary sounds.
- Enable or adjust microphone boost. Some devices have a microphone boost option that amplifies the input volume. While this can be useful in certain situations, it can also amplify background noise and potentially cause echoes. If you’re experiencing echo, try disabling or reducing the microphone boost.
- Test your changes. After making adjustments, test your microphone by recording your voice or engaging in a call. If the echo persists, you may need to further modify the settings or explore other solutions.
Configuring Echo Cancellation
Echo cancellation is another important setting to consider when addressing mic echo. This feature helps to eliminate echoes by intelligently filtering out any sounds that resemble the original audio signal. By configuring echo cancellation, you can significantly reduce or eliminate unwanted echoes during your audio recordings or calls.
To configure echo cancellation, follow these steps:
- Open the audio settings on your device.
- Locate the echo cancellation or noise reduction option within the audio settings. This option may be found in the input or recording tab.
- Enable echo cancellation. If the option is available, enable it to activate the feature.
- Adjust the echo cancellation strength. Some devices allow you to adjust the strength or intensity of the echo cancellation. Experiment with different levels to find the setting that works best for your specific situation.
- Test your changes. After configuring the echo cancellation, test your microphone to see if the echo has been reduced or eliminated. If the echo persists, you may need to further adjust the settings or explore other solutions.
Modifying Recording Preferences
In addition to adjusting input device settings and configuring echo cancellation, modifying your recording preferences can also help address mic echo. By fine-tuning the recording settings, you can optimize the audio quality and minimize the chances of encountering echo issues.
To modify your recording preferences, consider the following:
- Choose the appropriate audio format. Different audio formats have varying levels of compression and quality. Select a format that suits your needs and ensures optimal recording quality.
- Adjust the sample rate and bit depth. These settings determine the quality and accuracy of the recorded audio. Higher sample rates and bit depths generally result in better audio fidelity.
- Enable noise reduction or audio enhancement features. Some recording software or applications offer additional features to reduce background noise or enhance the overall audio quality. Explore these options and enable them if necessary.
- Position the microphone correctly. Proper mic placement is crucial for capturing clear audio and minimizing echoes. Experiment with different microphone positions to find the optimal placement that works best for your specific setup.
- Test your changes. After modifying the recording preferences, test your microphone by recording your voice or engaging in a call. Check if the echo issue has been resolved or improved. If not, consider revisiting the settings or seeking further assistance.
By adjusting your software settings and making these modifications, you can significantly reduce mic echo and improve the overall audio quality of your recordings or calls. Remember to test and fine-tune the settings based on your specific setup and preferences.
Troubleshooting External Factors
When it comes to troubleshooting mic echo and improving the overall audio quality of your recordings, it’s essential to consider external factors that may be contributing to the problem. By addressing these factors, you can significantly minimize background noise, room echo, and other unwanted audio artifacts. In this section, we will explore some practical solutions to troubleshoot external factors and enhance your recording experience.
Avoiding Background Noise
Background noise can be a nuisance when recording audio, especially if you’re in a noisy environment. Whether it’s the hum of an air conditioner, the chatter of people in the background, or the sound of traffic outside, these unwanted noises can find their way into your recordings and cause distractions.
To minimize background noise, here are a few tips you can try:
- Find a quiet space: Choose a room or location where external noises are minimal. If possible, opt for a room with soundproofing or acoustic treatment to reduce the intrusion of outside sounds.
- Close windows and doors: Ensure that all windows and doors are closed to minimize the entry of external noises. If there are gaps or cracks, consider using weatherstripping or draft stoppers to seal them effectively.
- Use a noise gate: A noise gate is a useful tool that can help eliminate background noise during silent moments in your recordings. It works by automatically muting the microphone when the input falls below a certain threshold.
- Consider a microphone with noise-cancelling features: Some microphones come equipped with built-in noise-cancelling technology. These microphones use advanced algorithms to filter out unwanted background noise, resulting in cleaner recordings.
By implementing these strategies, you can significantly reduce the impact of background noise on your recordings and achieve a more professional sound.
Minimizing Room Echo
Room echo is another common issue that can affect the quality of your recordings. It occurs when sound waves bounce off the walls, floor, and ceiling, creating a reverberation effect. This can make your audio sound muddled and less clear.
To minimize room echo, here are a few techniques you can try:
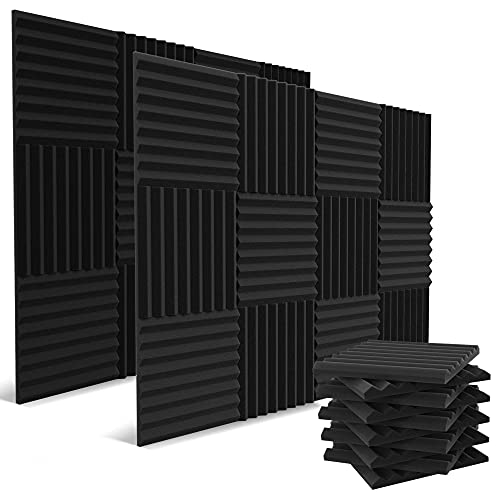
- Use acoustic panels or foam: Acoustic panels or foam can absorb sound waves and reduce the amount of echo in a room. Place them strategically on the walls, ceiling, and even the floor to create a more acoustically balanced environment.
- Add curtains or drapes: Thick curtains or drapes can help absorb sound and reduce echo. They can be particularly effective if your recording space has large windows or hard surfaces that reflect sound.
- Position the microphone correctly: Experiment with microphone placement to find the sweet spot where you capture the clearest sound without picking up excessive room echo. Moving the microphone closer to the sound source and away from reflective surfaces can help minimize echo.
- Use a reflection filter: A reflection filter is a portable device that surrounds the microphone and helps reduce room reflections. It works by absorbing sound waves before they can bounce off the walls and reach the microphone.
By implementing these techniques, you can create a more controlled recording environment and minimize the impact of room echo on your audio recordings.
Using a Pop Filter
Pop filters are essential tools for any recording setup, especially when working with vocal recordings. They help minimize plosive sounds, such as “p” and “b” sounds, which can cause unwanted popping noises in your recordings.
Here are some tips for using a pop filter effectively:
- Position the pop filter correctly: Place the pop filter between the microphone and your mouth, ensuring that it is a few inches away from the microphone. This distance helps prevent plosive sounds from directly hitting the microphone capsule.
- Maintain proper microphone technique: In addition to using a pop filter, it’s essential to practice good microphone technique. Keep a consistent distance from the microphone and speak across it rather than directly into it to further minimize plosive sounds.
- Choose the right type of pop filter: Pop filters come in different shapes and sizes. Some are made of fabric, while others are made of metal or nylon. Experiment with different types to find the one that works best for your specific recording needs.
By incorporating a pop filter into your recording setup, you can ensure cleaner and more professional-sounding vocals without the interference of plosive sounds.
Seeking Professional Help
When it comes to troubleshooting mic echo issues, sometimes the best course of action is to seek professional help. While there are many DIY solutions and tips available, consulting audio technicians, contacting mic manufacturer support, or exploring warranty options can provide valuable insights and assistance. Let’s explore each of these options in more detail.
Consulting Audio Technicians
If you’ve tried various troubleshooting methods and still can’t resolve the mic echo problem, it may be time to reach out to audio technicians for expert guidance. These professionals have extensive knowledge and experience in dealing with audio issues, including mic echo. They can assess your specific situation, analyze the root causes of the problem, and provide tailored solutions.
Audio technicians can conduct thorough diagnostics to identify any underlying issues with your audio setup. They may inspect your mic, audio interface, cables, and other related equipment to ensure everything is functioning properly. Additionally, they can evaluate your room acoustics and suggest improvements to minimize echo and other audio disturbances.
By consulting audio technicians, you can benefit from their expertise and receive personalized recommendations to resolve the mic echo problem effectively. They can also offer insights on proper mic placement, adjusting software settings, or utilizing external factors to improve audio quality.
Contacting Mic Manufacturer Support
Another avenue worth exploring is reaching out to the support team of your mic manufacturer. Most reputable mic manufacturers provide customer support services to assist users with any technical issues they encounter. If you’re experiencing mic echo despite following the recommended troubleshooting steps, contacting the manufacturer’s support can be a valuable resource.
Mic manufacturer support teams are well-versed in their product line and can provide specific troubleshooting advice tailored to your mic model. They may ask you to provide detailed information about your setup, software settings, and any other relevant factors to help pinpoint the cause of the echo. They can guide you through specific adjustments or firmware updates that may be necessary to resolve the issue.
While contacting mic manufacturer support doesn’t guarantee an immediate fix, their expertise can shed light on potential solutions or identify if there’s a known issue with your mic model. They may also be able to provide additional resources, such as user manuals or online forums, where you can find further guidance or connect with other users experiencing similar problems.
Exploring Warranty Options
If you’ve tried consulting audio technicians and contacting mic manufacturer support without success, it’s worth exploring your warranty options. Most microphones come with a warranty that covers manufacturing defects and malfunctions. If your mic is still within the warranty period and the echo issue is determined to be a hardware problem, you may be eligible for a replacement or repair.
Before exploring warranty options, it’s essential to thoroughly document the steps you’ve taken to troubleshoot the mic echo problem. Keep records of any communication with audio technicians or mic manufacturer support, including details of their recommendations and any troubleshooting attempts you’ve made. This documentation can be useful when submitting a warranty claim.
To explore your warranty options, start by reviewing the warranty terms and conditions provided by your mic manufacturer. Determine the duration of the warranty, any specific requirements for filing a claim, and whether you need to contact the retailer or the manufacturer directly. Follow the designated process for initiating a warranty claim, which may involve submitting proof of purchase, providing a detailed description of the issue, and sending the faulty mic for inspection.
Remember that warranty coverage can vary depending on the manufacturer and the specific circumstances of the issue. It’s essential to familiarize yourself with the warranty terms to understand what is and isn’t covered. If the mic echo problem is determined to be outside the scope of the warranty, you may need to consider alternative solutions or seek professional assistance.
In conclusion, when dealing with persistent mic echo issues, seeking professional help can often provide the expertise and support needed to resolve the problem effectively. Whether consulting audio technicians, contacting mic manufacturer support, or exploring warranty options, these avenues can offer valuable insights and guidance tailored to your specific situation. Don’t hesitate to reach out for assistance if your DIY efforts haven’t yielded the desired results. Remember, experts are available to help you troubleshoot and overcome mic echo challenges.
