Discover the art of playing the mandolin with our comprehensive guide for beginners. From choosing the right instrument to mastering chords and melodies, we’ve got you covered.
Choosing a Mandolin
Types of Mandolins
When it comes to choosing a mandolin, it’s important to understand the different types available. Each type of mandolin has its own unique characteristics and sound. Here are some popular types of mandolins:
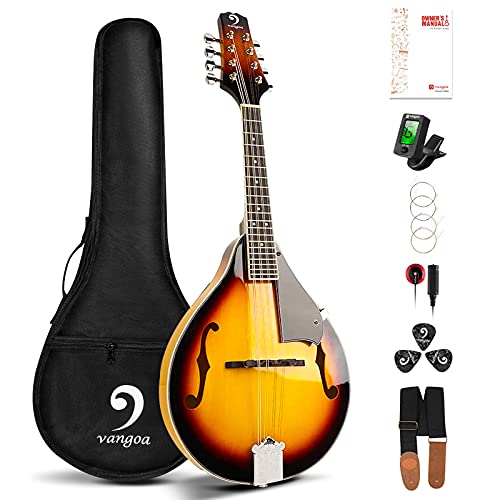
A-style Mandolins
A-style mandolins are characterized by their teardrop shape and oval soundhole. They are known for their warm and mellow tone, making them a popular choice for folk and classical music. A-style mandolins are also generally more affordable compared to other types.
F-style Mandolins
F-style mandolins are known for their distinctive scroll-shaped body and f-holes. They are often favored by bluegrass and country musicians due to their bright and powerful tone. F-style mandolins are typically more expensive than A-style mandolins, but they offer superior craftsmanship and aesthetics.
Bowl-back Mandolins
Bowl-back mandolins, also known as round-back mandolins, have a rounded back instead of a flat one. They are commonly associated with traditional Italian music and have a unique, resonant sound. Bowl-back mandolins can be a bit more challenging to play, but they offer a rich and distinct tone.

Electric Mandolins
For those looking to amplify their sound or experiment with different effects, electric mandolins are a great option. These mandolins have built-in pickups that allow you to connect them to an amplifier or other audio equipment. Electric mandolins come in various styles, including A-style and F-style.
Considerations for Choosing a Mandolin
Choosing the right mandolin can be a daunting task, but considering a few key factors can help you make an informed decision. Here are some important considerations to keep in mind:
Budget
Before diving into the world of mandolins, it’s essential to determine your budget. Mandolins can vary significantly in price, ranging from affordable beginner models to high-end professional instruments. Setting a budget will help narrow down your options and ensure you find a mandolin that suits your needs without breaking the bank.
Skill Level
Your skill level as a mandolin player is another vital aspect to consider. If you’re a beginner, it’s generally recommended to start with a more affordable and beginner-friendly mandolin. As you progress and improve your skills, you can invest in a higher-quality instrument. Intermediate and advanced players often seek mandolins with superior craftsmanship and tonal qualities.
Playing Style and Genre
Consider the style of music you intend to play on the mandolin. Different types of mandolins are better suited for specific genres. For example, if you’re into bluegrass or country music, an F-style mandolin might be the ideal choice. On the other hand, if you prefer classical or folk music, an A-style mandolin could be more suitable. Understanding your preferred playing style and genre will help you select a mandolin that complements your musical preferences.

Build Quality and Materials
The build quality and materials used in a mandolin can greatly affect its sound and playability. Look for mandolins made from high-quality tonewoods such as spruce, maple, and mahogany. These tonewoods contribute to the instrument’s resonance, projection, and overall tone. Additionally, pay attention to the craftsmanship, ensuring that the mandolin is well-constructed and free from any defects.
Where to Buy a Mandolin
Now that you have a better understanding of the types of mandolins and the considerations to keep in mind, you might be wondering where to buy one. Here are some options to consider:
Local Music Stores
Visiting local music stores is an excellent way to try out different mandolins in person. You can get a feel for the instrument, test its sound, and consult with knowledgeable staff. Local stores often have a variety of mandolin brands and models to choose from, allowing you to compare and find the best fit for you.
Online Retailers
Online retailers offer convenience and a wide selection of mandolins. Websites dedicated to musical instruments provide detailed product descriptions, customer reviews, and sometimes even audio samples. While you won’t be able to physically try the instrument before purchasing, online retailers often have generous return policies in case you’re not satisfied with your purchase.
Secondhand Markets
Exploring secondhand markets such as online classifieds, auction websites, and music forums can be an excellent way to find a quality mandolin at a more affordable price. However, when purchasing secondhand, be sure to thoroughly research the seller, ask for detailed photos, and inquire about the mandolin’s condition and history.

Direct from Luthiers
If you’re looking for a custom-made or handcrafted mandolin, going directly to luthiers is a fantastic option. Luthiers are skilled craftsmen who specialize in building and repairing stringed instruments. They can create a mandolin tailored to your specific preferences and requirements. Keep in mind that custom-made mandolins can be more expensive and may require a longer waiting period.
Tuning the Mandolin
Tuning your mandolin is an essential step in getting the best sound out of your instrument. Whether you are a beginner or an experienced player, having your mandolin properly tuned will ensure that you are playing in the correct pitch and that your music sounds harmonious. In this section, we will discuss the standard tuning for a mandolin, how to tune a mandolin, and the various tools you can use for tuning.
Standard Tuning for Mandolin
The standard tuning for a mandolin is G-D-A-E, from lowest to highest string. This tuning is similar to the tuning of a violin, with the strings tuned in fifths. The G string is the lowest and thickest string, followed by the D, A, and E strings. It is important to note that there are alternative tunings for the mandolin, but for the purpose of this guide, we will focus on the standard tuning.
How to Tune a Mandolin
Tuning a mandolin can be done using various methods, depending on your preference and the tools you have available. One common method is to use a pitch pipe or a tuning fork to get the initial reference pitch for each string. You can then adjust the tension of the strings by turning the tuning pegs located on the headstock of the mandolin.
Another popular method is using an electronic tuner or a tuning app on your smartphone or tablet. These tools provide a visual representation of the pitch of each string, making it easier to tune accurately. Simply pluck each string and adjust the tuning pegs until the tuner indicates that the string is in tune.

Using a Tuner or App for Tuning
Using a tuner or app for tuning your mandolin is a convenient and precise way to ensure that your instrument is in tune. There are many tuner apps available for both iOS and Android devices, some of which are specifically designed for tuning string instruments like the mandolin.
To use a tuner app, simply open the app on your device and select the mandolin option. Pluck each string individually and observe the visual display on the screen. The tuner will indicate whether the string is sharp (too high in pitch), flat (too low in pitch), or in tune. Adjust the tuning pegs accordingly until the tuner indicates that the string is in tune.
Using a tuner or app takes the guesswork out of tuning and allows you to achieve precise tuning quickly. It is especially helpful for beginners who may not have developed a trained ear for pitch yet.
Holding the Mandolin
When it comes to playing the mandolin, how you hold and position the instrument is crucial for achieving optimal sound quality and comfort. In this section, we will explore the proper mandolin position, holding the pick correctly, and hand placement on the fretboard.
Proper Mandolin Position
To begin your mandolin journey on the right note, it’s important to establish a proper mandolin position. Here are some steps to help you find the ideal position:
- Sit or stand comfortably, ensuring that your back is straight and relaxed. Good posture is essential for playing the mandolin efficiently.
- Hold the mandolin against your chest with your left forearm supporting the instrument’s weight. The mandolin’s body should rest against your upper abdomen.
- Position the neck of the mandolin at a slight upward angle, allowing your left hand easy access to the fretboard.
- Keep your right arm relaxed and draped over the mandolin’s body, with your hand positioned near the bridge. This will enable easy picking and strumming.
Remember, finding the proper mandolin position may require some adjustments based on your body size and personal comfort. Experiment with different positions until you find what works best for you.
Holding the Pick Correctly
The way you hold and control the pick greatly influences the sound and articulation of your mandolin playing. Follow these guidelines for holding the pick correctly:
- Place the pick between your thumb and index finger. The pick should be held firmly but not too tight, allowing for flexibility and control.
- Angle the pick slightly downward towards the strings. This angle helps the pick glide smoothly across the strings and produce a clear tone.
- Experiment with different pick thicknesses and materials to find the one that suits your playing style and preferences. Thinner picks generally offer more flexibility, while thicker picks provide a crisper sound.
Remember, holding the pick is a personal preference, and different players may have various techniques. The key is to find a comfortable grip that allows you to play with precision and ease.
Hand Placement on the Fretboard
Once you have established a proper mandolin position and mastered holding the pick, it’s time to focus on hand placement on the fretboard. This is where the magic happens as you navigate the strings and create melodies. Here are some tips for proper hand placement:
- Position your left hand so that the fingers are perpendicular to the frets. This allows for clean and accurate finger placement on the strings.
- Use the tips of your fingers to press down on the strings, ensuring that you are not touching any adjacent strings. This will prevent unwanted buzzing or muffled notes.
- Keep your thumb positioned behind the fretboard, providing support and stability to your hand. Avoid placing your thumb too high on the back of the neck, as this can restrict your finger movement.
- Practice proper finger placement by starting with simple chord shapes and gradually progressing to more complex patterns. This will help develop muscle memory and enhance your overall playing ability.
By maintaining proper hand placement on the fretboard, you will have better control over the mandolin’s sound, allowing you to execute chords, scales, and melodies with precision.
(Note: The information provided in this section focuses specifically on holding the mandolin, pick, and hand placement. For information on other aspects of mandolin playing, such as tuning, techniques, and maintenance, please refer to the corresponding sections in this guide.)
Basic Mandolin Techniques
The mandolin is a beautiful instrument with a unique sound that can add a touch of elegance to any musical composition. Whether you’re a beginner or an experienced musician, mastering the basic techniques of playing the mandolin is essential. In this section, we will explore three fundamental techniques: strumming patterns, picking exercises, and chord shapes and fingerings.
Strumming Patterns
Strumming patterns are the rhythmic foundation of any mandolin performance. They help create the desired groove and provide a framework for melody and harmony. When it comes to strumming the mandolin, there are various patterns you can learn and incorporate into your playing:
- Downward Strumming: This is the most basic strumming pattern, where you strum all the strings in a downward motion using a pick or your fingers. It’s a great starting point for beginners and can be used in a wide range of musical styles.
- Upward Strumming: Once you’ve mastered downward strumming, you can add upward strums to create more complex patterns. Upward strumming involves strumming the strings in an upward motion. Experiment with different combinations of downward and upward strums to add depth and variety to your playing.
- Alternate Strumming: This technique involves alternating between downward and upward strums to create a continuous flow of sound. It can be challenging at first, but with practice, you’ll be able to execute seamless transitions between the two directions.
- Syncopated Strumming: Syncopation adds a syncopated or “off-beat” feel to your strumming patterns. It involves emphasizing the weaker beats in a measure, creating a rhythmic tension that adds interest to your playing. Experiment with syncopated strumming patterns to add a unique touch to your mandolin performances.
Picking Exercises
Picking exercises are essential for developing speed, accuracy, and control in your mandolin playing. They focus on picking individual strings with precision and can help you improve your overall technique. Here are a few picking exercises to get you started:
- Single String Picking: This exercise involves picking each string individually in a sequential order. Start with the open strings and gradually work your way up the fretboard. Focus on maintaining a consistent tone and rhythm as you pick each string.
- Cross-Picking: Cross-picking is a technique where you pick across multiple strings in a specific pattern. It helps develop coordination between your picking hand and the fretting hand. Start with simple cross-picking patterns and gradually increase the complexity as you become more comfortable.
- Alternate Picking: Alternate picking is a technique where you alternate between picking downward and upward in a consistent motion. It’s important to maintain a steady rhythm and focus on accuracy as you alternate between strings.
- String Skipping: String skipping exercises involve skipping strings while picking. This technique helps improve your accuracy and dexterity across the fretboard. Start with simple string skipping patterns and gradually increase the difficulty as you progress.
Chord Shapes and Fingerings
Chords are the building blocks of music, and mastering chord shapes and fingerings on the mandolin is crucial for creating harmonies and accompaniments. Here are some common chord shapes and fingerings to get you started:
- Open Chords: Open chords are played using open strings in combination with fretted notes. They are relatively easy to play and provide a full, resonant sound. Some common open chords on the mandolin include G, C, D, and A.
- Barre Chords: Barre chords involve using a finger to press down multiple strings across a fret. They allow you to play chords in different positions and keys. Start with simple barre chords like F and Bb, and gradually work your way up to more complex shapes.
- Common Chord Progressions: Understanding common chord progressions is essential for playing songs and improvising on the mandolin. Some popular progressions include the I-IV-V progression, the I-V-vi-IV progression, and the ii-V-I progression. Familiarize yourself with these progressions and practice playing them in different keys.
Learning Mandolin Tabs and Sheet Music
Learning to read and interpret mandolin tabs and sheet music is an essential skill for any musician. Whether you’re a beginner or an experienced player, understanding these musical notations opens up a whole new world of possibilities for your mandolin playing. In this section, we will explore the fundamentals of mandolin tabs, reading sheet music specifically for the mandolin, and learning music notation.
Understanding Mandolin Tabs
Mandolin tabs, short for tablature, provide a visual representation of the mandolin’s strings and frets. Unlike traditional sheet music, which uses standard musical notation, tabs are much simpler to understand, especially for beginners. Tabs consist of numbers placed on horizontal lines, each line representing a specific string on the mandolin. The numbers indicate which fret to press down on that particular string, enabling you to play specific notes or chords.
One of the advantages of mandolin tabs is their intuitive nature. Even without prior musical training, you can quickly grasp the finger positions required to play a particular melody or chord progression. Tabs are widely used in various genres and are especially popular in folk, bluegrass, and country music.
To illustrate this further, let’s take a look at a simple mandolin tab for the popular folk song “Amazing Grace”:
e|-----------------0-1-0---------------

B|-------------0-3-------3-0-----------

G|---------0-2---------------2-0-------

D|-----0-2-----------------------2-0---

A|-0-2-------------------------------2-

E|-------------------------------------
In this tab, each line represents a string on the mandolin, with the top line representing the highest-pitched string (e-string) and the bottom line representing the lowest-pitched string (E-string). The numbers indicate the frets to press down on each string, and the hyphens represent open strings.
Reading Sheet Music for Mandolin
While mandolin tabs provide a straightforward way to learn melodies and chords, it’s also valuable to understand how to read sheet music specifically written for the mandolin. Sheet music uses standard musical notation, consisting of a staff with notes and various symbols that represent pitch, duration, and other musical elements.
The mandolin is typically notated in treble clef, which is also known as the G clef. This clef indicates that the notes are written for a higher range instrument like the mandolin. The notes on the staff correspond to specific strings and frets on the mandolin, allowing you to play a wide range of melodies and harmonies.
In addition to the notes themselves, sheet music for mandolin may also include symbols such as sharps (#) and flats (b) to indicate alterations in pitch, dynamic markings to indicate the volume or intensity of the music, and various articulation marks to indicate how the notes should be played, such as staccato or legato.
To give you a visual representation, here’s an example of sheet music for a simple melody:
e|-----------------0-1-0---------------

B|-------------0-3-------3-0-----------

G|---------0-2---------------2-0-------

D|-----0-2-----------------------2-0---

A|-0-2-------------------------------2-

E|-------------------------------------
In this example, each note is represented by its position on the staff, and the duration of the note is indicated by the shape of the notehead and any accompanying flags or beams.
Learning Music Notation
Learning music notation may seem daunting at first, but with practice and patience, it becomes an invaluable skill. By understanding the language of music notation, you can communicate and interpret musical ideas more effectively.
To start your journey into music notation, begin by familiarizing yourself with the basic elements, such as notes, rests, clefs, key signatures, and time signatures. There are countless resources available, including online tutorials, books, and even mobile apps, that can guide you through the process of learning music notation.
As you progress, it’s essential to practice reading and playing sheet music regularly. Start with simple melodies and gradually work your way up to more complex compositions. Don’t be afraid to challenge yourself and explore different genres and styles of music.
Remember, learning mandolin tabs and sheet music is not about memorizing every single note or tab on the page. It’s about developing your musical intuition and understanding the patterns and structures that make up a piece of music. With time and dedication, you’ll be able to read and play a wide range of music on the mandolin.
Playing Chords on the Mandolin
The mandolin is a versatile instrument that can be used to play a wide range of chords. Whether you are a beginner or an experienced player, understanding how to play chords on the mandolin is essential. In this section, we will explore two types of chords – open chords and barre chords – as well as common chord progressions.
Open Chords on the Mandolin
Open chords are a great starting point for beginners learning to play the mandolin. These chords are played using open strings, which means that some of the strings are not pressed down on any fret. This allows for a clear and vibrant sound.
One of the most commonly used open chords on the mandolin is the G major chord. To play this chord, place your index finger on the second fret of the A string, your middle finger on the third fret of the E string, and your ring finger on the third fret of the D string. Strum all the strings, making sure each note rings out clearly.
Another popular open chord is the C major chord. To play this chord, place your index finger on the first fret of the B string, your middle finger on the second fret of the D string, and your ring finger on the second fret of the A string. Again, strum all the strings to produce a beautiful C major sound.
Open chords provide a solid foundation for playing songs on the mandolin. By mastering a few basic open chords, you can quickly start strumming along to your favorite tunes.
Barre Chords on the Mandolin
Barre chords, also known as movable chords, are a bit more challenging but offer greater flexibility on the mandolin. Unlike open chords, barre chords require you to press down on multiple strings with a single finger, creating a fuller and richer sound.
One example of a barre chord is the F major chord. To play this chord, use your index finger to bar all the strings at the first fret. Then, place your ring finger on the third fret of the A string and your pinky finger on the third fret of the D string. Strumming all the strings will produce a powerful F major sound.
Barre chords can be moved up and down the neck, allowing you to play different chords without changing the finger positions. This versatility makes them a valuable tool for mandolin players who want to explore various keys and musical styles.
Common Chord Progressions
Chord progressions are a series of chords played in a specific order and are the backbone of many songs. Learning common chord progressions on the mandolin will enable you to play a vast array of songs and create your own music.
One popular chord progression is the I-IV-V progression. In the key of G, this progression consists of the G major, C major, and D major chords. By strumming these chords in sequence, you can create a catchy and familiar sound that is found in countless songs across different genres.
Another common chord progression is the I-V-vi-IV progression. In the key of C, this progression includes the C major, G major, A minor, and F major chords. This progression is widely used in pop music and can be heard in many popular songs.
By learning and practicing these common chord progressions, you will develop a strong foundation in playing chords on the mandolin. As you become more comfortable, you can explore more complex progressions and experiment with different chord voicings to add your own unique touch to your playing.
Playing Melodies on the Mandolin
The mandolin is a versatile instrument that can produce beautiful melodies. Whether you’re a beginner or an experienced player, learning how to play melodies on the mandolin is an essential skill. In this section, we will explore various techniques to help you master playing melodies on the mandolin.
Playing Single Notes
Playing single notes is the foundation of playing melodies on the mandolin. It involves plucking one string at a time to produce individual notes. To play single notes on the mandolin, follow these steps:
- Finger Placement: Start by placing your left-hand fingers on the fretboard. Each finger corresponds to a specific fret. For example, the index finger is typically used to play notes on the first fret, the middle finger on the second fret, and so on.
- Picking Hand Technique: Use a pick to pluck the strings. Hold the pick between your thumb and index finger, allowing a small portion of the pick to extend beyond your fingers. This will give you more control and precision when plucking the strings.
- Note Selection: Choose a note to play by identifying its position on the fretboard. Each fret corresponds to a specific note. Start by playing simple melodies using one string at a time. As you gain confidence, you can explore playing melodies across multiple strings.
- Timing and Rhythm: Pay attention to the timing and rhythm of the melody. Use a metronome or play along with a backing track to develop a sense of timing and to stay in sync with the music.
Remember to start slowly and gradually increase your speed as you become more comfortable. Practice playing single notes using different scales and melodies to enhance your skills.
Using Scales and Arpeggios
Scales and arpeggios are fundamental tools for playing melodies on the mandolin. They provide a framework for understanding the notes and intervals used in a melody. Here’s how you can use scales and arpeggios to enhance your melodic playing:
- Major and Minor Scales: Start by learning major and minor scales. These scales consist of a series of notes played in a specific order. Practice playing these scales in different keys to familiarize yourself with their patterns and fingerings.
- Modes: Explore different modes, such as the Ionian, Dorian, and Mixolydian modes. Each mode has a unique sound and character, which can add depth and variety to your melodies.
- Arpeggios: Arpeggios are broken chords that play the individual notes of a chord in sequence. They can be used to add complexity and texture to your melodies. Practice playing arpeggios in different positions and keys to expand your melodic possibilities.
- Melodic Patterns: Experiment with different melodic patterns using scales and arpeggios. By combining these patterns with single notes, you can create interesting and captivating melodies.
As with playing single notes, practicing scales and arpeggios should be done gradually. Start with slow tempos and gradually increase your speed and accuracy. Focus on precision and clarity in your playing.
Learning Melodies by Ear
Learning melodies by ear is a valuable skill that can greatly enhance your musicality on the mandolin. It allows you to play songs and melodies without relying on sheet music or tablature. Here are some tips to help you develop your ear for learning melodies:
- Active Listening: Listen attentively to the melodies you want to learn. Pay close attention to the pitch, rhythm, and phrasing of the notes. Try to identify the intervals between the notes and the overall structure of the melody.
- Repetition and Singing: Repeat the melody you’re trying to learn and sing along with it. This will help you internalize the melody and develop a deeper understanding of its nuances.
- Transcribing: Transcribe the melody by playing it on your mandolin. Start by identifying the key and the first note of the melody. Then, listen carefully and figure out the subsequent notes. Break the melody into smaller phrases and practice each phrase separately before putting them together.
- Play Along with Recordings: Play along with recordings of the melody you’re learning. This will help you develop a sense of timing and phrasing, as well as improve your ability to play in a musical context.
Learning melodies by ear can be challenging at first, but with practice, it becomes easier and more rewarding. It allows you to develop your own unique interpretations of songs and melodies, and it opens up a world of musical possibilities.
Mandolin Exercises and Practice Tips
Playing the mandolin is not just about learning chords and melodies; it also requires practice and exercises to improve your skills. In this section, we will explore some essential warm-up exercises, exercises for building finger strength and dexterity, and techniques for developing speed and accuracy on the mandolin.
Warm-up Exercises for the Mandolin
Before diving into intense practice sessions, it’s essential to warm up your fingers and muscles to prevent injuries and improve your overall playing. Here are a few warm-up exercises to get you started:
- Finger Stretches: Gently stretch your fingers by spreading them apart and bringing them back together. Repeat this exercise several times to increase flexibility and reduce tension.
- Finger Roll: Starting with your index finger, roll each finger over the strings, one at a time, while maintaining a relaxed hand position. This exercise helps to warm up your fingers, promoting better control and agility.
- Thumb Exercise: Place your thumb on the edge of the fretboard and move it up and down, applying gentle pressure. This exercise helps to activate the muscles in your thumb and prepares it for efficient fretting.
- Scales and Arpeggios: Play through various scales and arpeggios across the fretboard. This exercise helps to warm up your entire hand and improves coordination between your fingers.
Remember, warming up is crucial to prevent injuries and ensure a smooth playing experience. Spend at least 5-10 minutes on these warm-up exercises before moving on to more challenging techniques.
Building Finger Strength and Dexterity
To become proficient on the mandolin, it’s important to develop finger strength and dexterity. With consistent practice, you can build the necessary finger muscles and improve your ability to navigate the fretboard. Here are some exercises to help you achieve this:
- Finger Independence: Practice playing individual notes using each finger of your fretting hand. Start with simple patterns and gradually increase the complexity. This exercise enhances finger independence and control.
- Fretboard Exercises: Choose a specific section of the fretboard and practice playing scales, arpeggios, and chords in that area. This exercise helps you become more familiar with different positions and strengthens your fingers.
- Hammer-ons and Pull-offs: These techniques involve playing notes by “hammering” onto the fretboard or “pulling off” from a higher fret to a lower one, without picking the string again. Incorporate hammer-ons and pull-offs into your practice routine to improve finger strength and coordination.
- Chord Transitions: Focus on smoothly transitioning between different chords. Start with simple chord progressions and gradually increase the difficulty. This exercise not only strengthens your fingers but also improves your overall playing fluency.
By regularly practicing these finger-strengthening exercises, you’ll notice significant improvements in your playing technique and speed.
Developing Speed and Accuracy
Once you have built a solid foundation of finger strength and dexterity, it’s time to focus on developing speed and accuracy on the mandolin. Here are some tips and exercises to help you achieve this:
- Metronome Practice: Use a metronome to practice playing scales, arpeggios, and other exercises at different tempos. Start at a comfortable speed and gradually increase it as you become more comfortable. This practice improves your sense of timing and helps you play with precision.
- Alternate Picking: Alternate picking involves using both downstrokes and upstrokes to pick the strings. Practice playing scales and patterns using alternate picking to develop speed and accuracy. Start slow and gradually increase the tempo.
- Rhythm Training: Focus on playing exercises with different rhythmic patterns. This helps you develop a strong sense of rhythm and improves your ability to play complex melodies and solos.
- Slow Practice: When learning challenging passages or techniques, slow down the tempo and practice them at a comfortable speed. This allows you to focus on accuracy and gradually build up speed over time.
Remember, developing speed and accuracy takes time and consistent practice. Be patient with yourself and celebrate small improvements along the way.
Mandolin Maintenance and Care
Proper maintenance and care are essential for keeping your mandolin in top shape and ensuring it produces the best sound possible. In this section, we will discuss the important aspects of cleaning and polishing the mandolin, changing mandolin strings, and storing and protecting your beloved instrument.
Cleaning and Polishing the Mandolin
Keeping your mandolin clean is vital for its longevity and performance. Regular cleaning helps remove dirt, sweat, and oils that can accumulate on the instrument. Here are some steps to follow when cleaning your mandolin:
- Start by gently wiping the body, neck, and fingerboard with a soft, lint-free cloth. This will remove any surface dust or debris.
- For stubborn dirt or grime, lightly dampen the cloth with water or a mild soap solution. Be careful not to use excessive moisture, as it can damage the wood or finish.
- Use a separate cloth to wipe down the strings, removing any dirt or residue that may have accumulated.
- Pay special attention to the bridge and tailpiece, as these areas often accumulate sweat and oils from your hands. Use a cotton swab dipped in isopropyl alcohol to clean these parts.
- Once the mandolin is clean, it’s time to polish it. Apply a small amount of high-quality instrument polish to a clean cloth and gently buff the body, neck, and headstock. Avoid getting polish on the fingerboard or strings.
- Finally, use a dry cloth to remove any excess polish and give your mandolin a beautiful shine.
Regular cleaning and polishing not only keep your mandolin looking its best but also help protect the wood and enhance its resonance. Make sure to perform these maintenance tasks at least once every few months or as needed.
Changing Mandolin Strings
Changing mandolin strings is a necessary part of maintenance, as strings gradually lose their tone and clarity over time. Here’s a step-by-step guide to help you change your mandolin strings:
- Start by loosening the tension of the old strings by turning the tuning pegs counterclockwise. This will relieve the pressure on the strings and make them easier to remove.
- Once the strings are loose, use wire cutters or a string winder to snip off the ends near the tailpiece. Remove the strings from the tuning pegs and discard them.
- Clean the areas where the old strings were attached, removing any dirt or debris that may have accumulated.
- Take the new set of mandolin strings and unwrap them. Each string is typically labeled with a number indicating its gauge and position.
- Begin by threading the first string (usually the thinnest) through the hole in the tailpiece. Extend the string up to the corresponding tuning peg, making sure it passes over the bridge and nut.
- Pull the string tight and wind it around the tuning peg clockwise. Make sure to leave enough slack for several winds around the peg.
- Use a string winder or your fingers to turn the tuning peg clockwise, tightening the string. Tune the string to the desired pitch.
- Repeat this process for the remaining strings, following the same order and ensuring that each string is properly secured and tuned.
Changing your mandolin strings regularly not only improves the sound quality but also helps maintain the instrument’s playability. Aim to change the strings every few months or as needed, depending on how frequently you play and the condition of the strings.
Storing and Protecting the Mandolin
Proper storage and protection are crucial for preserving the condition of your mandolin when it’s not in use. Here are some tips to help you store and protect your instrument:
- Invest in a high-quality mandolin case or gig bag. This will provide protection from dust, moisture, and accidental bumps or falls. Look for a case with a plush interior lining and secure closures.
- When placing your mandolin in the case, make sure the strings are properly loosened to relieve tension on the neck and bridge. This helps prevent warping or damage to the instrument.
- Store your mandolin in a cool, dry place, away from direct sunlight or extreme temperature changes. Avoid leaving it in areas prone to humidity, such as basements or attics.
- If possible, use a hygrometer to monitor the humidity levels in the storage area. Aim for a humidity range of 45-55%, as excessive dryness or moisture can damage the wood.
- Avoid hanging your mandolin on a wall or leaving it out in the open. This exposes it to dust, sunlight, and accidental knocks.
- If you need to transport your mandolin, always use a protective case or gig bag. Secure the instrument inside the case to prevent any movement during transport.
By following these storage and protection guidelines, you can ensure that your mandolin remains in excellent condition, ready to be played whenever inspiration strikes.
Note: The information provided in this section is for general guidance only. Always refer to the manufacturer’s instructions and consult with a professional if you have any specific concerns or questions about maintaining your mandolin.
