Discover the best techniques and tools for recording audio on your Chromebook. From using the built-in microphone to exploring online tools and Chromebook apps, we’ll show you how to achieve high-quality recordings. Plus, troubleshoot common audio recording issues for crystal-clear sound.
Recording Audio on Chromebook
Recording audio on your Chromebook is a straightforward process that allows you to capture high-quality sound for various purposes. Whether you need to record a voice memo, create a podcast, or conduct an interview, your Chromebook provides you with the necessary tools to get the job done. In this section, we will explore the different methods you can use to record audio on your Chromebook, including utilizing the built-in microphone, connecting an external microphone, and adjusting audio settings.
Using the Built-in Microphone
The built-in microphone on your Chromebook is a convenient and accessible option for recording audio. To begin recording using the built-in microphone, follow these simple steps:
- Open the application or program you wish to use for audio recording. This can be a voice recorder app or any other program that supports audio recording.
- Locate the microphone icon within the application’s interface. This icon typically resembles a small microphone or may be labeled as “Record” or “Start Recording.”
- Click on the microphone icon to start recording. Speak clearly and ensure that you are in a quiet environment for the best audio quality.
- Once you have finished recording, locate the “Stop” or “Finish Recording” button within the application and click on it to stop the recording.
- Your recorded audio will now be saved within the application or program. You can typically access your recordings by navigating to the “Recordings” or “Saved” section within the application.
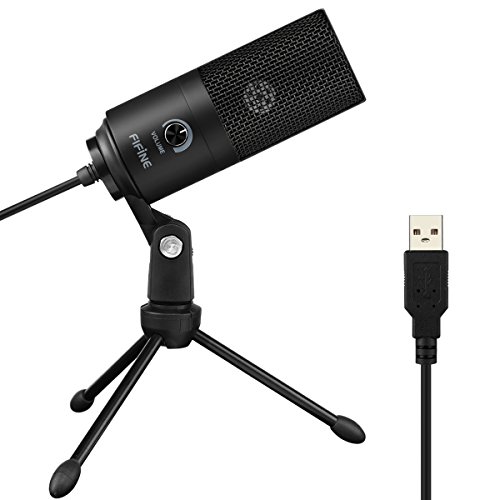
The built-in microphone on your Chromebook is a convenient option for quick and on-the-go audio recording. However, it may not offer the same level of sound quality as an external microphone. If you require professional-grade audio recordings or need to capture audio in a noisy environment, connecting an external microphone is recommended.
Connecting an External Microphone
Connecting an external microphone to your Chromebook allows you to enhance the audio quality and capture more precise sound. Whether you are a content creator, musician, or podcaster, utilizing an external microphone can significantly improve the overall recording experience. Here’s how you can connect an external microphone to your Chromebook:

- Identify the type of external microphone you have or plan to use. Chromebooks typically support USB microphones, 3.5mm jack microphones, or Bluetooth-enabled microphones.
- If you have a USB microphone, simply plug it into one of the available USB ports on your Chromebook. The Chromebook should automatically detect the microphone, and you can proceed with your preferred audio recording application.
- If you have a 3.5mm jack microphone, locate the headphone jack on your Chromebook. This is usually located on the side or front of the device. Plug in the microphone jack into the headphone jack, and your Chromebook should recognize the external microphone.
- For Bluetooth-enabled microphones, ensure that Bluetooth is enabled on your Chromebook. Go to the settings menu and navigate to the Bluetooth section. Follow the on-screen instructions to pair and connect your Bluetooth microphone to your Chromebook.
Once you have successfully connected your external microphone, you can start recording audio using the same steps mentioned earlier for the built-in microphone. Keep in mind that the specific features and settings of your external microphone may vary, so refer to the manufacturer’s instructions for additional guidance.
Adjusting Audio Settings
To ensure optimal audio recording quality on your Chromebook, it is essential to adjust the audio settings according to your preferences. The Chrome OS provides various options for customizing the audio input and output. Here are some key audio settings you can adjust:
- Open the system tray by clicking on the time in the bottom-right corner of your Chromebook’s screen.
- Click on the gear icon to access the settings menu.
- In the settings menu, select the “Sound” option.
- Under the “Input” section, you can adjust the volume level of your microphone. Use the slider to increase or decrease the input volume according to your needs.
- Additionally, you can choose the input source if you have multiple microphones connected to your Chromebook. Select the desired microphone from the drop-down menu.
- To further enhance the audio quality, you can enable the “Noise Reduction” option. This feature helps reduce background noise during recordings, resulting in clearer audio.
- If you are using an external microphone, you may need to adjust its specific settings using the manufacturer’s software or control panel.
By adjusting these audio settings, you can tailor the recording experience to suit your requirements. Experiment with different settings to find the optimal balance between volume, clarity, and noise reduction.
Recording Audio with Online Tools
Recording audio on a Chromebook has become more accessible than ever with the availability of online tools. These tools offer convenient and user-friendly options for capturing audio, whether it’s for personal use, online content creation, or professional purposes. In this section, we will explore two popular methods of recording audio using online tools: online voice recorders and web-based audio recording apps.

Using Online Voice Recorders
Online voice recorders are simple yet effective tools that allow you to record audio directly from your Chromebook without the need for any additional software or hardware. With just a few clicks, you can start capturing your voice or any other sound you want to preserve. Let’s take a closer look at how to use online voice recorders:
- Choose a reliable online voice recorder: There are several online voice recorders available, each with its own set of features and capabilities. Some popular options include Vocaroo, Online Voice Recorder, and Voice Spice. Explore these platforms and choose the one that best suits your needs.
- Grant microphone permissions: Before you start recording, make sure to grant the necessary microphone permissions to the online voice recorder. Chromebook requires you to manually enable microphone access for each website or app. Simply click on the padlock icon in the address bar, select “Site settings,” and under the “Permissions” section, allow access to the microphone.
- Test the microphone: It’s always a good idea to test your microphone before recording any important audio. Most online voice recorders have a built-in microphone test feature that allows you to check if your Chromebook’s microphone is working properly. Follow the instructions provided by the online voice recorder to perform the test.
- Record your audio: Once you have selected the online voice recorder, granted microphone permissions, and tested your microphone, it’s time to start recording. Click on the designated “Record” or “Start” button on the online voice recorder’s interface and begin speaking or capturing the desired sound. Make sure to speak clearly and position yourself close to the Chromebook’s microphone for optimal audio quality.
- Save and export your recording: After you have finished recording, online voice recorders typically provide options to save and export your audio file. You can usually choose the desired file format (such as MP3 or WAV) and location for saving the recording. Some platforms also offer additional features like trimming, editing, or adding effects to your recording before saving it.
Using online voice recorders is a convenient and efficient way to record audio on your Chromebook. Whether you need to capture voice memos, interviews, or create podcasts, these tools offer a hassle-free experience with decent sound quality.
Using Web-based Audio Recording Apps
Web-based audio recording apps provide a more comprehensive and feature-rich approach to recording audio on your Chromebook. These apps offer additional functionalities such as real-time editing, advanced effects, and integration with other online tools. Let’s explore how to use web-based audio recording apps:
- Find a suitable web-based audio recording app: Similar to online voice recorders, there are various web-based audio recording apps available for Chromebook users. Some popular options include Soundtrap, TwistedWave, and Soundation. Take some time to research and select an app that aligns with your recording needs and preferences.
- Install the app: Once you have chosen the web-based audio recording app, you may need to install it as a Chrome extension or add it to your Chromebook’s applications. Follow the installation instructions provided by the app’s developer to ensure proper installation.
- Grant necessary permissions: Like online voice recorders, web-based audio recording apps require access to your Chromebook’s microphone. Make sure to grant the necessary permissions by following the same steps mentioned earlier, such as allowing microphone access through the Chromebook’s site settings.
- Explore the app’s features: Web-based audio recording apps often offer a wide range of features and tools to enhance your recording experience. Take the time to explore these features, such as real-time monitoring, multi-track recording, equalizers, and effects. Familiarize yourself with the app’s interface and functionalities to make the most of your recording sessions.
- Record and edit your audio: Once you are comfortable with the app’s features, it’s time to start recording. Click on the designated “Record” or “Start” button within the app’s interface and begin capturing your audio. The advantage of web-based audio recording apps is that they allow you to make real-time adjustments, edit your recordings, and apply effects while recording.
- Save and export your recording: After you have finished recording and editing your audio, web-based audio recording apps usually provide options to save and export your recordings. You can typically choose the desired file format, quality, and location for saving your audio file. Some apps even offer direct integration with online storage platforms like Google Drive or Dropbox for seamless file management.
Web-based audio recording apps offer a more comprehensive and professional approach to recording audio on your Chromebook. They provide advanced features and editing capabilities, making them suitable for content creators, musicians, and anyone looking for a more versatile recording solution.
Recording Audio with Chromebook Apps
Recording audio on a Chromebook has never been easier, thanks to a wide range of apps available for this purpose. Whether you’re a podcaster, musician, or simply someone who enjoys capturing audio, these apps provide a convenient way to record and edit your audio files. In this section, we will explore how to install recording apps, discuss different options available, and delve into some advanced audio features to enhance your recording experience.
Installing Audio Recording Apps
To start recording audio on your Chromebook, the first step is to install a reliable audio recording app. Luckily, the Chrome Web Store offers a plethora of options to choose from. Here are some popular apps that you can consider:
- Soundtrap: Soundtrap is a versatile recording app that allows you to create professional-quality audio recordings. It offers a user-friendly interface and a wide range of features like multi-track recording, virtual instruments, and real-time collaboration. Simply head to the Chrome Web Store, search for Soundtrap, and click on the “Add to Chrome” button to install it.
- Audacity: Audacity is a powerful open-source audio editor and recorder that has been a favorite among audio enthusiasts for years. It provides a comprehensive set of tools for recording, editing, and enhancing audio files. To install Audacity, visit the Chrome Web Store, search for Audacity, and click on “Add to Chrome” to get started.
- TwistedWave: TwistedWave is a user-friendly audio recording and editing app that offers a range of features to enhance your recordings. It supports multi-track recording, real-time effects, and easy sharing options. Installing TwistedWave is as simple as searching for it in the Chrome Web Store and clicking on the “Add to Chrome” button.
Exploring Different App Options
Once you have installed an audio recording app on your Chromebook, it’s time to explore the different options available within the app. Each app has its own unique set of features and functionalities, so it’s important to find one that suits your specific recording needs. Here are some key features to look out for:
- Interface and Ease of Use: Consider the app’s user interface and how easy it is to navigate. A clean and intuitive interface can make the recording process more seamless and enjoyable.
- Recording Quality: Check if the app allows you to adjust the recording quality. Higher recording quality ensures better audio fidelity, especially if you’re recording music or podcasts.
- Editing Tools: Look for apps that offer a range of editing tools such as trimming, cutting, and applying effects. These tools can help you refine your recordings and eliminate any unwanted noise.
- Export Options: Consider the app’s export options. Can you save your recordings in different file formats? Can you easily share them on various platforms?
Remember, every app has its own strengths and weaknesses, so take the time to explore different options and read user reviews to find the one that best suits your needs.
Utilizing Advanced Audio Features
Once you have familiarized yourself with the basic functionalities of the recording app, it’s time to dive into some advanced audio features that can take your recordings to the next level. Here are a few features to consider:
- Multi-Track Recording: If you’re working on a project that requires multiple audio sources, such as recording a band or podcast with multiple hosts, look for apps that support multi-track recording. This feature allows you to record and mix different audio sources separately for more precise control over your final mix.
- Real-Time Effects and Plugins: Some apps offer real-time effects and plugins that allow you to enhance your recordings on the fly. From reverb and delay to EQ and compression, these effects can add depth and polish to your audio.
- Virtual Instruments: If you’re into music production, explore apps that offer virtual instruments. These instruments allow you to create and record music directly within the app, eliminating the need for external hardware.
- Collaboration Tools: If you’re working on a project with others, consider apps that offer collaboration features. These features enable real-time editing and sharing, making it easier to collaborate with fellow musicians, podcasters, or content creators.
By utilizing these advanced audio features, you can elevate the quality and creativity of your recordings, giving your audio projects a professional touch.
Troubleshooting Audio Recording Issues
When it comes to recording audio on your Chromebook, there can sometimes be issues that arise. These can range from microphone permissions not being set correctly to sound quality problems. In this section, we will explore some common troubleshooting steps to help you overcome these challenges.
Checking Microphone Permissions
One of the first things you should check when experiencing audio recording issues on your Chromebook is the microphone permissions. Without the proper permissions, your Chromebook may not be able to access the microphone, resulting in no audio being recorded.
To check the microphone permissions, follow these steps:
- Click on the clock in the bottom-right corner of your screen.
- Click on the gear icon to open the Settings menu.
- Scroll down and click on “Privacy and security.”
- Under the “Privacy” section, click on “Site settings.”
- Scroll down and click on “Microphone.”
Here, you will see a list of websites that have requested microphone access. Make sure that the website or application you are using to record audio is listed and that the permission is set to “Allow.” If it is not listed or the permission is set to “Block,” you can click on the trash can icon to remove any blocked sites or click on the “Add” button to manually add a website and grant it microphone access.
Updating Chromebook Software
Another common cause of audio recording issues on Chromebook is outdated software. Keeping your Chromebook’s operating system and applications up to date is essential for optimal performance and compatibility.

To update your Chromebook software, follow these steps:
- Click on the clock in the bottom-right corner of your screen.
- Click on the gear icon to open the Settings menu.
- Scroll down and click on “About Chrome OS.”
- Click on “Check for updates.”
If there are any available updates, your Chromebook will automatically download and install them. Once the updates are installed, restart your Chromebook and try recording audio again to see if the issue has been resolved.
Resolving Sound Quality Problems
If you are experiencing sound quality problems during audio recording on your Chromebook, there are a few troubleshooting steps you can take to improve the overall audio quality.
- Check the microphone placement: Ensure that the microphone is positioned correctly and is not obstructed by any objects. Adjusting the microphone’s position can sometimes improve sound quality.
- Adjust microphone settings: Open the audio settings on your Chromebook and experiment with different microphone settings. You can try adjusting the microphone sensitivity or volume to see if it improves the sound quality.
- Use an external microphone: If the built-in microphone on your Chromebook is not providing satisfactory sound quality, consider using an external microphone. Connecting an external microphone can often result in better audio recording quality.
- Check for background noise: Background noise can significantly impact the sound quality of your recordings. Make sure you are in a quiet environment when recording audio, and try to minimize any background noise that may be present.
By following these troubleshooting steps, you should be able to resolve most audio recording issues on your Chromebook. Remember to regularly check for updates and ensure that microphone permissions are set correctly. Additionally, experimenting with different microphone settings and considering external microphone options can greatly enhance the overall sound quality of your recordings.
In the next section, we will explore the various options available for recording audio with online tools.
