Whether you’re a podcaster, musician, or voiceover artist, headphones are an essential tool for recording high-quality audio. In this guide, we cover everything you need to know about choosing the right headphones, setting up your recording space, connecting your headphones to your computer, with headphones, editing your recorded audio, and tips and tricks for achieving the best results.
Types of Headphones for Recording Audio
When it comes to , having the right pair of is crucial. There are three main types of headphones to choose from: over-ear, in-ear, and on-ear. Each type has its own unique features and benefits. Let’s take a closer look at each one.
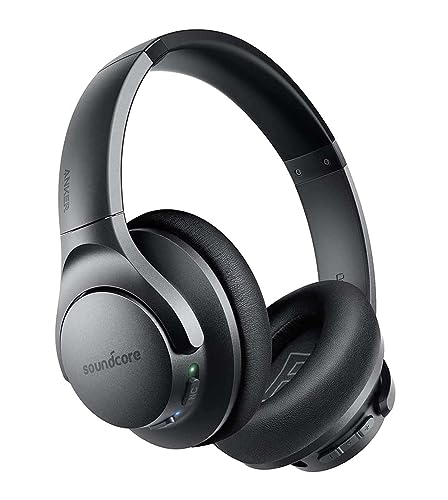
Over-Ear Headphones
Over-ear headphones are also known as circumaural headphones. They are designed to completely cover your ears and create a seal around them, which helps to block out external noise. This makes them an excellent choice for recording in noisy environments.
One of the main benefits of over-ear headphones is their sound quality. They typically have larger drivers than other types of headphones, which means they can produce a wider frequency range and more detailed sound. This makes them ideal for critical listening and mixing.
Another advantage of over-ear headphones is their comfort. Since they completely cover your ears, they distribute the weight of the headphones more evenly across your head. This reduces pressure points and makes them more comfortable to wear for long periods of time.
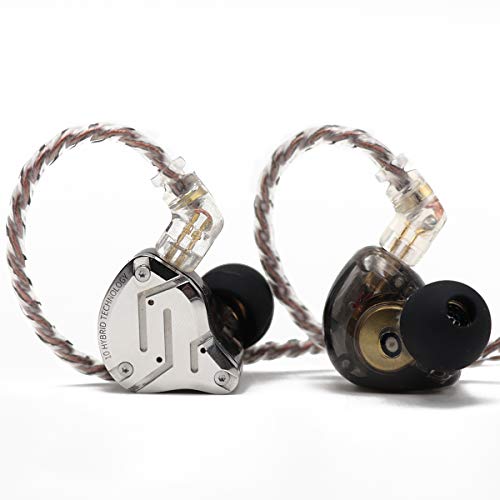
In-Ear Headphones
In-ear headphones, also known as earbuds or earphones, are small headphones that fit directly into your ear canal. They are a popular choice for recording on the go since they are lightweight and portable.
One of the main benefits of in-ear headphones is their noise isolation. Since they fit directly into your ear canal, they create a seal that blocks out external noise. This makes them an excellent choice for recording in noisy environments.
Another advantage of in-ear headphones is their convenience. They are small enough to fit in your pocket or purse, making them easy to carry around with you. They are also great for your recordings while you’re on the move.
On-Ear Headphones
On-ear headphones, also known as supra-aural headphones, sit on top of your ears rather than completely covering them. They are a good compromise between the sound quality of over-ear and the portability of in-ear headphones.
One of the main benefits of on-ear headphones is their size. They are smaller and more lightweight than over-ear headphones, making them easier to carry around. They are also more comfortable to wear in warm weather since they don’t completely cover your ears.

Another advantage of on-ear headphones is their sound quality. While they may not be as detailed as over-ear headphones, they still provide a good balance of bass, midrange, and treble frequencies. This makes them a great choice for recording and your audio.
- Over-ear headphones provide excellent noise isolation and sound quality
- In-ear headphones are convenient and provide excellent noise isolation
- On-ear are a good compromise between sound quality and portability
Setting Up Your Recording Space
When it comes to , the environment in which you do it can be just as important as the equipment you use. A lot of factors can affect the quality of your audio, including background noise, echoes, and vibrations. In this section, we’ll cover the steps you need to take to set up your recording space and ensure that you get the best possible audio quality.
Choosing a Quiet Location
The first step in your recording space is to choose a location that is as quiet as possible. Ideally, you want a space that is free from outside noise, such as traffic or construction, as well as internal noise, such as the hum of appliances or the sound of people walking around. Even small sounds can make a big difference in the quality of your audio, so it’s important to take this step seriously.
One way to determine if a space is quiet enough is to do a test recording. Set up your microphone and headphones and record a few seconds of audio. Listen back to the recording and listen for any unwanted background noise. If you can hear anything other than your voice, you may need to find a quieter location.
Reducing Echoes and Background Noise
Once you’ve found a quiet location, the next step is to reduce any echoes or background noise that might be present. Echoes can be caused by hard surfaces, such as walls or floors, that reflect sound waves. Background noise, on the other hand, can come from a variety of sources, including air conditioning, fans, or even your computer.
To reduce echoes, you can use acoustic treatment, such as sound-absorbing panels, to dampen the sound waves. You can also use furniture, such as bookshelves or couches, to help absorb sound. For background noise, try to identify the source and eliminate it if possible. For example, you can turn off your air conditioning or move your computer to a different room.
Positioning Your Microphone and Headphones
The final step in setting up your recording space is to position your microphone and headphones. The goal is to get the best possible sound quality while also minimizing any unwanted background noise. Here are some tips to keep in mind:
- Place your microphone as close to your mouth as possible without obstructing your view of your computer screen.
- Use a stand to keep the in place and reduce unwanted noise from handling.
- Position your headphones so that they cover your ears completely and create a seal to block out external noise.
- Make sure that the volume of your headphones is not too loud, as this can lead to hearing damage over time.
By taking the time to set up your recording space properly, you can ensure that you get the best possible audio quality. Remember to test your setup before you start recording and make any necessary adjustments to optimize your sound.
Connecting Your Headphones to a Computer or Audio Interface
When it comes to with headphones, the first step is to connect them to your computer or audio interface. This process involves choosing the right cable, adjusting audio settings on your computer, and using an for better sound quality.
Choosing the Right Cable
Choosing the right cable is crucial for ensuring that your headphones work properly and deliver high-quality sound. The most common types of cables for connecting headphones to a computer or are USB, TRS, and XLR.

USB cables are the simplest option and are usually included with most headphones. They are easy to connect and can be used with any computer or that has a USB port. However, they may not offer the best sound quality and can be susceptible to interference.
TRS cables are another popular option and are often used with audio interfaces. They have a 1/4-inch or 3.5mm jack on one end and a TRS plug on the other. These cables are more durable than USB cables and can provide better sound quality.
XLR cables are the most professional option and are commonly used in recording studios. They have a three-pin connector on each end and are designed to deliver high-quality audio with minimal interference. However, they can be more expensive and may require an audio interface with XLR inputs.
Adjusting Audio Settings on Your Computer
Once you have connected your headphones to your computer or audio interface, the next step is to adjust the audio settings. This involves configuring the sound output and input options to ensure that your headphones are working properly and delivering the best possible sound quality.
On a Windows computer, you can access the audio settings by clicking on the volume icon in the system tray and selecting “Sound settings.” From there, you can choose your headphones as the default playback device and adjust the volume and other settings as needed.

On a Mac computer, you can access the audio settings by clicking on the Apple menu and selecting “System Preferences.” From there, you can choose your headphones as the output device and adjust the volume and other settings as needed.
Using an Audio Interface for Better Sound Quality
If you want to achieve the highest possible sound quality when recording audio with headphones, using an audio interface is recommended. An audio interface is a device that connects to your computer and allows you to record audio with professional-grade equipment.
Audio interfaces typically have multiple inputs and outputs, which can be used to connect microphones, instruments, and headphones. They also have built-in preamps and converters, which can improve the sound quality and reduce noise and distortion.
When using an audio interface with headphones, it is important to choose the right output settings and adjust the levels to ensure that the sound is balanced and clear. Many audio interfaces come with software that allows you to control these settings and make adjustments in real-time.
In summary, connecting your headphones to a computer or audio interface is an important step in recording high-quality audio. By choosing the right cable, adjusting the audio settings, and using an audio interface, you can ensure that your headphones are working properly and delivering the best possible sound quality.
Recording Audio with Headphones
Are you looking to produce high-quality audio recordings? Whether you’re a musician, podcaster, or voice-over artist, the right headphones and microphone can make all the difference. In this section, we’ll explore the key factors to consider when with headphones.
Choosing the Right Microphone
Choosing the right is crucial for capturing clear and accurate sound. There are several types of microphones to choose from, each with its own strengths and weaknesses. Here are the most common types of microphones for recording audio with headphones:
- Dynamic Microphones – These are ideal for recording loud sounds, such as drums or electric guitars. They are durable and can handle high sound pressure levels, but they may not capture subtle nuances in quieter sounds.
- Condenser Microphones – These are more sensitive than dynamic microphones and are great for capturing a wide range of sounds. They require an external power source and can be more fragile than dynamic microphones.
- Ribbon Microphones – These are known for their warm and natural sound. They are also very fragile and require careful handling.
When choosing a microphone, consider the type of sound you want to capture and the environment in which you’ll be recording. You may also want to invest in a pop filter to reduce pops and hisses in your recordings.
Adjusting Volume Levels
Once you’ve chosen your , it’s important to adjust the volume levels to ensure that your recordings are clear and balanced. Here are some tips for adjusting volume levels when recording with :
- Start by setting your gain to a low level and gradually increase the volume until you reach the desired level.
- Use a limiter to prevent clipping and distortion in your recordings.
- Adjust the gain on your to ensure that you can hear the audio clearly without damaging your hearing.
- Use a reference track to help you set the volume levels for your recordings. A reference track is a professionally produced audio recording that you can use as a benchmark for your own recordings.
Monitoring Your Audio While Recording
Monitoring your audio while recording is essential for ensuring that your recordings are accurate and free from errors. Here are some tips for your audio while recording with headphones:
- Use closed-back headphones to isolate your ears from external sounds and prevent audio leakage.
- Use a headphone amp to ensure that you can hear the audio clearly without distortion.
- Set the volume levels for your headphones and to ensure that you can hear yourself and any other audio sources clearly.
- Use a mixer or audio interface to control the levels of your audio sources and monitor your recordings in real-time.
Editing Your Recorded Audio
Editing your recorded audio is an essential part of the recording process. It allows you to fine-tune and enhance your audio, making it sound professional and polished. In this section, we’ll explore the different aspects of editing your recorded audio, including choosing editing software, removing background noise, and adjusting audio levels and EQ.
Choosing Editing Software
Choosing the right editing software is crucial in achieving professional-sounding audio. There are many editing software options available, each with its own unique features and capabilities. Some popular choices include:
- Adobe Audition: A professional-grade editing software that offers powerful editing tools, including spectral editing and noise reduction.
- Audacity: A free, open-source editing software that is easy to use and offers basic editing tools.
- Logic Pro X: A software designed for Mac users that offers advanced editing tools, including multi-track editing and MIDI sequencing.
When selecting an editing software, consider your budget, level of expertise, and the features you need. It’s also essential to ensure that the software is compatible with your computer and recording equipment.
Removing Background Noise
Background noise is a common issue in recorded audio, and it can be distracting for listeners. Fortunately, there are several ways to remove background noise, depending on the severity of the noise.
One of the simplest ways to remove background noise is to use a noise gate. A noise gate is a tool that eliminates low-level background noise by cutting off the audio signal below a specific threshold. Another option is to use a noise reduction plugin, which analyzes the audio and removes the background noise.
It’s important to note that removing background noise can also remove some of the natural ambiance of the recording. Use these tools sparingly and only when necessary to avoid compromising the quality of the audio.
Adjusting Audio Levels and EQ
Adjusting audio levels and EQ is an essential part of editing your recorded audio. Audio levels refer to the loudness of the audio, while EQ refers to the balance of frequencies in the audio.
When adjusting audio levels, it’s important to ensure that the levels are consistent throughout the recording. This can be achieved by using a compressor, which reduces the dynamic range of the audio, making the quiet parts louder and the loud parts quieter.
EQ is used to adjust the balance of frequencies in the audio. This can be useful for removing unwanted frequencies, such as background hum, or enhancing specific frequencies, such as the bass or treble.
When adjusting audio levels and EQ, it’s essential to use your ears and trust your instincts. Take the time to experiment and fine-tune the audio until it sounds just right.
Tips and Tricks for Recording Audio with Headphones
When it comes to with headphones, there are a few tips and tricks that can make a big difference in the quality of your recordings. Here are three techniques that every recording artist should know:
Using a Pop Filter to Reduce Plosives
Plosives are the sharp, explosive sounds that occur when you pronounce certain consonants, like “P” and “B.” These sounds can be particularly problematic when recording vocals, as they can cause distortion and make it more difficult to get a clear, clean recording.
One way to reduce plosives when recording with is to use a pop filter. A pop filter is a simple device that you attach to your microphone, and it works by diffusing the air coming from your mouth when you speak. This helps to prevent plosives from reaching the microphone and causing distortion.
Another benefit of using a pop filter is that it can help to improve the overall clarity of your recordings. By reducing plosives, you’ll be able to capture a cleaner, more focused sound that’s easier to work with during the editing process.
Taking Breaks to Prevent Ear Fatigue
Recording audio with headphones can be a long and tiring process, particularly if you’re working on a large project. One of the biggest challenges that recording artists face is ear fatigue, which occurs when your ears become tired and overworked from listening to audio for an extended period of time.
To prevent ear fatigue when recording with headphones, it’s important to take regular breaks. This will give your ears a chance to rest and recover, which can help to prevent hearing damage and maintain your overall audio quality.
One effective technique for taking breaks is the 20-20-20 rule. This involves taking a break every 20 minutes, and focusing on an object 20 feet away for 20 seconds. This can help to reduce eye strain and give your ears a break at the same time.
Experimenting with Different Microphone Placements
The position of your can have a big impact on the quality of your recordings. Different microphone placements can produce different tonal qualities, and experimenting with different positions can help you to find the best sound for your particular recording.
When experimenting with placement, try moving the microphone closer or further away from the sound source, or changing the angle of the microphone. You can also try using different types of microphones, such as dynamic or condenser microphones, to achieve different sounds.
One thing to keep in mind when experimenting with microphone placement is to avoid placing the microphone too close to the sound source. This can cause distortion and make it more difficult to get a clean, clear recording.
In conclusion, these tips and tricks can help you to produce high-quality recordings when using headphones. By using a pop filter to reduce plosives, taking breaks to prevent ear fatigue, and experimenting with different microphone placements, you’ll be able to achieve better sound quality and produce more professional recordings.
