Discover the best ways to turn on your Beats headphones, including using the power button and connecting to a power source. Learn how to pair your Beats with a device, adjust volume and playback controls, customize sound settings, and care for your Beats to ensure optimal performance.
Ways to Turn Beats On
Turning on your Beats headphones is a simple process that can be done in a few different ways. Whether you prefer to use the power button, connect to a power source, or charge your Beats, we’ve got you covered. In this section, we’ll walk you through each method and troubleshoot any power issues you may encounter along the way.
Using the Power Button
The power button is the most straightforward way to turn on your Beats headphones. Located on one of the ear cups, it is usually marked with a small icon or symbol. To turn your Beats on using the power button, follow these steps:
- Locate the power button on your Beats headphones.
- Press and hold the power button for a few seconds until you see a light indicator or hear a power-on sound.
- Once the indicator light is on or you hear the power-on sound, release the power button.
- Your Beats headphones are now turned on and ready to use.
Using the power button is a quick and convenient way to activate your Beats headphones, especially if you’re in a hurry or don’t have access to a power source.
Connecting to a Power Source
If you prefer to connect your Beats headphones to a power source, such as a computer or wall adapter, you can do so using the included charging cable. Here’s how to connect your Beats to a power source:
- Take the charging cable that came with your Beats headphones.
- Plug the USB end of the cable into a power source, such as a computer or wall adapter.
- Connect the other end of the cable to the charging port on your Beats headphones.
- Once connected, your Beats headphones will begin to charge.
Connecting to a power source is a convenient option when you have access to a computer or wall outlet. It allows you to charge your Beats headphones while you continue to use them or leave them to charge overnight for extended battery life.
Charging the Beats
Charging your Beats headphones is essential to ensure optimal battery performance and longevity. Here are some important things to know about charging your Beats:
- It is recommended to fully charge your Beats headphones before using them for the first time.
- Use the included charging cable and a compatible power source to charge your Beats.
- The charging port is typically located on one of the ear cups. Make sure to connect the charging cable securely.
- When your Beats headphones are charging, you may see an indicator light or hear a charging sound.
- It is best to charge your Beats headphones in a cool and dry location, away from direct sunlight or excessive heat.
To charge your Beats headphones:
- Connect the charging cable to a power source, such as a computer or wall adapter.
- Plug the other end of the cable into the charging port on your Beats headphones.
- Allow your Beats headphones to charge until the battery is full. This may take a couple of hours, depending on the model.
Remember to periodically check the battery level of your Beats headphones and charge them as needed to ensure uninterrupted listening enjoyment.
Troubleshooting Power Issues
Encountering power issues with your Beats headphones can be frustrating, but there are some troubleshooting steps you can take to resolve them. Here are a few common power issues and their solutions:
- No Power: If your Beats headphones are not turning on, try the following:
- Ensure the power button is not stuck or jammed.
- Connect your Beats headphones to a different power source or charging cable.
- Perform a reset by holding down the power button for 10 seconds, then release it.
- Intermittent Power: If your Beats headphones turn on and off randomly, try the following:
- Check the battery level and charge your Beats headphones if necessary.
- Make sure the charging cable is securely connected to both your Beats headphones and the power source.
- Clean the charging port and connectors using a soft, dry cloth to remove any debris or dirt.
- Battery Drain: If your Beats headphones are losing battery power quickly, consider the following:
- Adjust the volume or sound settings to optimize battery life.
- Disable any unnecessary features, such as noise cancellation or transparency mode, when not in use.
- Update the firmware or software of your Beats headphones to ensure the latest optimizations for battery performance.
If you have tried these troubleshooting steps and are still experiencing power issues with your Beats headphones, it may be necessary to contact customer support for further assistance.
Pairing Beats with a Device
Pairing your Beats headphones with a device is a simple process that allows you to enjoy your favorite music wirelessly. Whether you’re using an iPhone, Android device, or any other Bluetooth-enabled device, this step-by-step guide will walk you through the process of pairing your Beats with ease.
Enabling Bluetooth on the Device
First things first, ensure that Bluetooth is enabled on your device. To do this, follow these simple steps:
- Open the settings menu on your device.
- Look for the Bluetooth option and tap on it.
- Toggle the switch to enable Bluetooth if it’s not already turned on.
Enabling Bluetooth allows your device to detect and connect to other Bluetooth devices, including your Beats headphones.
Putting the Beats in Pairing Mode
Now that Bluetooth is enabled on your device, it’s time to put your Beats headphones in pairing mode. Here’s how you can do it:

- Turn on your Beats headphones by pressing and holding the power button until the LED indicator light turns on.
- Locate the pairing button on your Beats headphones. This button is usually located on the side or bottom of the headphones.
- Press and hold the pairing button until the LED indicator light starts flashing. This indicates that your Beats headphones are now in pairing mode.
Putting your Beats headphones in pairing mode allows them to be discovered by your device during the pairing process.
Selecting the Beats in the Device’s Bluetooth Settings
With your Beats headphones in pairing mode, it’s time to connect them to your device. Follow these steps to select your Beats in the device’s Bluetooth settings:
- Open the settings menu on your device.
- Tap on the Bluetooth option to access the Bluetooth settings.
- Wait for your device to scan for available Bluetooth devices.
- Look for your Beats headphones in the list of available devices. They may appear as “Beats,” “Beats Solo,” or a similar name.
- Tap on your Beats headphones to select them.
Once you’ve selected your Beats headphones, your device will establish a connection with them. You may hear a confirmation sound or see a notification on your device when the pairing is successful.
Troubleshooting Pairing Issues
If you’re experiencing difficulties pairing your Beats headphones with your device, don’t worry. Here are some troubleshooting tips to help you overcome common pairing issues:

- Make sure your Beats headphones are charged. Low battery levels can interfere with the pairing process. If needed, connect your headphones to a power source and let them charge for a while before attempting to pair them.
- Double-check that Bluetooth is enabled on your device. Sometimes, Bluetooth can accidentally get disabled, preventing the pairing process. Go to your device’s settings and ensure that Bluetooth is turned on.
- Restart your device. Sometimes, a simple restart can resolve any temporary software glitches that may be causing pairing issues.
- Move closer to your device. If you’re too far away from your device, the Bluetooth signal may weaken, resulting in pairing problems. Try moving closer to your device and see if that helps.
- Reset your Beats headphones. Refer to the user manual or the Beats website for instructions on how to reset your specific model of headphones. Resetting can often resolve any minor issues that may be preventing successful pairing.
By following these troubleshooting steps, you should be able to overcome any pairing issues and enjoy your Beats headphones wirelessly.
Adjusting Volume and Playback Controls
Locating the Volume Buttons
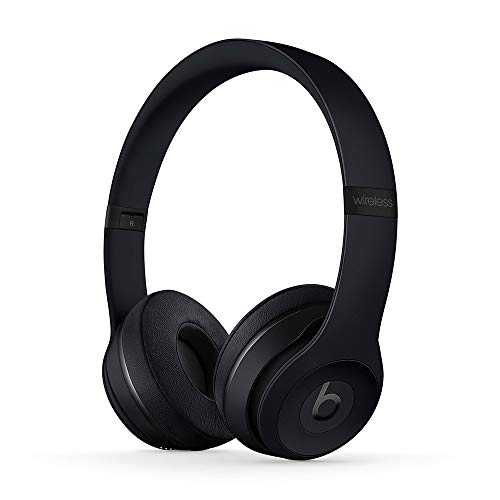
When it comes to adjusting the volume on your Beats headphones, it’s important to know where the volume buttons are located. The exact placement of these buttons may vary depending on the specific model of your Beats, but they are typically found on one of the ear cups. Take a moment to familiarize yourself with the physical layout of your headphones and locate the volume buttons.
Increasing or Decreasing the Volume
Once you have located the volume buttons, adjusting the volume on your Beats is a breeze. To increase the volume, simply press the volume up button. Conversely, if you want to decrease the volume, press the volume down button. These buttons provide a convenient way to quickly adjust the audio level to your preference, whether you’re listening to music, watching a movie, or engaging in a phone call.
Using the Play/Pause Button
In addition to the volume buttons, your Beats headphones also feature a play/pause button. This button allows you to control the playback of your audio content with ease. Whether you want to start or pause a song, podcast, or video, simply press the play/pause button. It offers a convenient way to quickly pause your audio when needed, without reaching for your device.
Skipping or Repeating Tracks
To enhance your listening experience, Beats headphones also provide the ability to skip or repeat tracks. When you’re listening to a playlist or album, and you want to skip to the next track, press the skip forward button. Conversely, if you want to go back to the previous track, press the skip backward button. This feature allows you to effortlessly navigate through your music library without having to touch your device.
In addition to skipping tracks, some models of Beats headphones also offer the option to repeat tracks. If you have a favorite song that you want to listen to on repeat, simply press the repeat button. This function ensures that your preferred track will play continuously until you decide to turn off the repeat mode.
Remember, the volume and playback controls on your Beats headphones are designed to make your listening experience as seamless as possible. Whether you’re adjusting the volume, pausing a song, or skipping tracks, these intuitive controls offer convenience and ease of use.
So, the next time you want to turn up the volume, pause your music, or skip to your favorite track, simply reach for the volume buttons or play/pause button on your Beats headphones. Enjoy your music the way you like it, with precise control at your fingertips.
Table: Volume and Playback Controls
| Control | Function |
|---|---|
| Volume Up Button | Increases the volume |
| Volume Down Button | Decreases the volume |
| Play/Pause Button | Starts or pauses audio playback |
| Skip Forward Button | Skips to the next track |
| Skip Backward Button | Goes back to the previous track |
| Repeat Button | Repeats the current track |
Customizing Sound Settings
When it comes to getting the most out of your Beats headphones, customizing the sound settings can make a world of difference. By accessing the Beats app or software, you can unlock a range of features and options to personalize your listening experience. In this section, we’ll explore how to access the app or software, adjust the equalizer settings, enable noise cancellation or transparency mode, and save and apply sound profiles.
Accessing the Beats App or Software
To begin customizing your sound settings, you’ll need to access the Beats app or software on your device. The app or software provides a user-friendly interface where you can fine-tune various audio parameters. Whether you’re using a smartphone, tablet, or computer, you can easily download the app or software from the respective app store or Beats website.
Once you have the app or software installed, open it up and connect your Beats headphones to your device. Depending on the model, you may need to enable Bluetooth pairing or use a wired connection. Once connected, you’ll be able to access a range of settings and options to enhance your listening experience.
Adjusting Equalizer Settings
One of the key features of the Beats app or software is the ability to adjust the equalizer settings. The equalizer allows you to fine-tune the frequency response of your headphones, tailoring the sound to your personal preferences. Whether you prefer a bass-heavy sound or a more balanced audio profile, the equalizer gives you the flexibility to customize your listening experience.
Within the app or software, you’ll find a graphical representation of the equalizer, with sliders corresponding to different frequency bands. By sliding these controls up or down, you can boost or cut specific frequencies to shape the sound to your liking. Experiment with different settings to find the perfect balance that suits your music genre or listening environment.
Enabling Noise Cancellation or Transparency Mode
Another feature available in the Beats app or software is the ability to enable noise cancellation or transparency mode. Noise cancellation technology actively blocks out external sounds, allowing you to immerse yourself in your music without distractions. Transparency mode, on the other hand, lets you hear the world around you while still enjoying your audio.
To enable noise cancellation or transparency mode, navigate to the respective settings within the app or software. Depending on the model of your Beats headphones, you may have different levels or options to choose from. Experiment with these modes to find the one that suits your needs in different situations, whether you’re commuting, working out, or simply relaxing at home.
Saving and Applying Sound Profiles
Once you’ve customized your sound settings to perfection, you’ll want to save and apply those profiles for future use. The Beats app or software allows you to save multiple sound profiles, so you can easily switch between them depending on your mood or activity. This feature is especially useful if you listen to different genres of music or if you share your headphones with others.
To save a sound profile, simply navigate to the settings within the app or software and look for the option to save or create a new profile. Give your profile a descriptive name, such as “Bass Boost” or “Acoustic Clarity,” to easily identify it later on. Once saved, you can apply the profile with just a few taps or clicks, instantly transforming the sound signature of your Beats headphones.
Caring for and Maintaining Beats
Taking proper care of your Beats headphones is essential to ensure they continue to provide you with the best audio experience. In this section, we will discuss some important aspects of caring for and maintaining your Beats.
Cleaning the Beats
Keeping your Beats headphones clean not only helps in maintaining their appearance but also improves their longevity and performance. Here are some tips to effectively clean your Beats:
- Gentle Cleaning: To remove dirt, dust, and smudges from the external surfaces of your Beats, use a soft, lint-free cloth. Gently wipe the headphones, including the ear cups, headband, and any other visible areas. Avoid using abrasive materials or harsh chemicals as they can damage the finish.
- Cleaning the Ear Cushions: Over time, the ear cushions may accumulate dirt and sweat, which can affect comfort and audio quality. To clean them, you can use a damp cloth or mild soap solution. Gently wipe the cushions, being careful not to saturate them with water. Allow them to air dry completely before using the headphones.
- Removing Stubborn Stains: If you encounter stubborn stains or marks on your Beats, you can use a mild cleaning solution specifically designed for electronics. Apply a small amount of the solution to a cloth and gently rub the affected area. Ensure that the cloth is not too wet to avoid any liquid seeping into the headphones.
- Cleaning the Audio Ports: The audio ports on your Beats can sometimes get clogged with debris, affecting sound quality. To clean them, use a soft brush or a can of compressed air. Gently brush or blow away any dust or particles from the ports to maintain optimal audio performance.
Storing and Protecting the Beats
Proper storage and protection play a crucial role in preserving the quality and lifespan of your Beats headphones. Follow these tips to ensure their longevity:
- Invest in a Protective Case: When not in use, store your Beats in a protective case specifically designed for them. This will shield them from accidental drops, scratches, and dust. Additionally, a case provides a convenient way to carry your headphones while traveling.
- Avoid Extreme Temperatures: Exposing your Beats to extreme temperatures can damage the internal components and affect their performance. Avoid leaving them in hot cars, direct sunlight, or extremely cold environments. Optimal storage conditions are within a temperature range of 32°F to 95°F (0°C to 35°C).
- Handle with Care: Always handle your Beats headphones with care. Avoid unnecessary twisting or bending of the headband and be gentle when adjusting the size. Rough handling can lead to structural damage or loosening of internal components.
- Secure Cable Management: If your Beats have a detachable cable, make sure to disconnect it properly when not in use. Avoid pulling or yanking the cable forcefully, as this can damage the connectors. Proper cable management prevents tangling and reduces strain on the wires.
Updating Firmware or Software
Regularly updating the firmware or software of your Beats headphones is important to ensure optimal performance and access to new features. Here’s how you can update them:
- Check for Updates: Visit the official Beats website or use the Beats app to check for any available firmware or software updates. Download and install the latest version compatible with your specific Beats model.
- Connectivity and Power: Ensure that your Beats headphones are fully charged or connected to a power source before initiating the update. A stable internet connection is also necessary for a successful update process.
- Follow Instructions: Carefully follow the instructions provided by Beats during the update process. This may involve connecting your headphones to a computer or using Bluetooth connectivity to update wirelessly. Be patient and allow the update to complete without interruption.
- Test and Verify: After the update is complete, test your Beats headphones to ensure they are functioning correctly. Check if any new features or improvements are now available and explore the updated functionalities.
Troubleshooting Common Issues
Even with proper care and maintenance, you may encounter some common issues with your Beats headphones. Here are a few troubleshooting tips to address these problems:
- No Sound or Low Volume: If you’re experiencing no sound or low volume, check the audio settings on your device. Ensure that the volume is turned up and the Beats headphones are selected as the audio output. Additionally, inspect the cable connection for any damage or looseness.
- Intermittent Bluetooth Connectivity: If your Beats headphones are having trouble maintaining a stable Bluetooth connection, try resetting the Bluetooth settings on both your headphones and the connected device. Ensure that there are no obstacles or interference between the devices.
- Unresponsive Controls: If the volume buttons, play/pause button, or other controls on your Beats are unresponsive, try resetting the headphones. Refer to the user manual or the Beats website for the specific reset procedure for your model.
- Poor Battery Life: If your Beats headphones are not holding a charge for as long as they used to, it may be time to replace the battery. Contact Beats customer support or visit an authorized service center for assistance.
By following these care and maintenance tips, you can enjoy your Beats headphones for years to come. Remember to clean them regularly, store them properly, update their firmware or software, and troubleshoot any common issues that may arise.
