Get a comprehensive understanding of speaker wire colors, including their codes, how to identify positive and negative wires, tips for connecting and troubleshooting speaker wire connections, and the benefits of upgrading for better sound quality.
Understanding Speaker Wire Colors
When it comes to setting up a speaker system, one of the important aspects to consider is understanding speaker wire colors. While it may seem like a small detail, speaker wire colors play a significant role in ensuring proper connections and optimal sound quality. In this section, we will explore the importance of speaker wire colors, common speaker wire color codes, and how to differentiate between positive and negative wires.
Importance of Speaker Wire Colors
Speaker wire colors serve a crucial purpose in speaker installations. They help to identify the polarity of the wires, which is essential for achieving accurate sound reproduction. Polarity refers to the positive (+) and negative (-) electrical connections of the speakers. When the polarity is correct, the speakers will produce sound in phase, resulting in a clear and well-balanced audio experience. However, if the polarity is reversed, the speakers will produce sound out of phase, leading to a distorted and muffled sound.
By using speaker wire colors, individuals can easily determine the correct polarity and ensure that the speakers are connected accurately. This not only enhances the overall audio performance but also prevents potential damage to the speakers and audio equipment.

Common Speaker Wire Color Codes
While there is no universal standard for speaker wire color codes, there are some commonly used conventions that can provide guidance when connecting speakers. These color codes may vary depending on the manufacturer or region, so it is essential to refer to the manual or documentation provided with the speakers. Here are some of the common speaker wire color codes:
- Red Speaker Wire: The red wire is typically used to indicate the positive (+) connection. It is often referred to as the “hot” wire and is responsible for carrying the audio signal from the amplifier or receiver to the speaker.
- Black Speaker Wire: The black wire is commonly used to represent the negative (-) connection. It is also known as the “ground” wire and completes the electrical circuit by providing a return path for the audio signal.
- White Speaker Wire: In some speaker wire color codes, the white wire is used as an alternative to the black wire for the negative (-) connection. This variation helps individuals differentiate between the positive and negative wires more easily.
- Green Speaker Wire: The green wire is occasionally used as an additional color code for the positive (+) connection. It provides an alternative to the standard red wire and can be helpful in situations where multiple speakers need to be connected.
It is important to note that these color codes are not universally followed, and it is always best to refer to the specific documentation provided with the speakers for accurate identification.
Differentiating between Positive and Negative Wires
Differentiating between positive and negative wires is crucial in speaker installations. While the color codes mentioned above can be helpful, it is essential to have a clear understanding of how to identify the positive and negative wires correctly. Here are some tips to help you differentiate between the two:
- Polarity in Speaker Wire Connections: The positive and negative terminals on a speaker or amplifier are usually marked with a “+” and “-” symbol respectively. When connecting the speaker wires, ensure that the positive wire is connected to the positive terminal and the negative wire to the negative terminal. This ensures the correct polarity and optimal sound reproduction.
- Tips for Identifying Positive and Negative Wires: If the speaker wires are not clearly marked with color codes or symbols, there are a few visual cues that can help you identify the positive and negative wires. The positive wire is often thicker or marked with a ridge or stripe, while the negative wire is usually smoother or plain. Additionally, some speaker wires may have a printed “+” or “-” indicator on the insulation.
- Using a Multimeter to Identify Positive and Negative Wires: If visual cues are not sufficient, using a multimeter can help determine the polarity of the wires. Set the multimeter to the resistance (ohms) mode and place the probes on the speaker wires. If the multimeter shows a positive reading, it indicates that the probes are connected to the positive and negative wires correctly. If the reading is negative or shows no reading, switch the probes to reverse the connection.
By following these tips, you can accurately differentiate between positive and negative wires, ensuring proper polarity and optimal sound quality in your speaker system. Understanding speaker wire colors and their significance is essential for anyone setting up or troubleshooting a speaker system.
As we have explored the importance of speaker wire colors, common speaker wire color codes, and how to differentiate between positive and negative wires, we can now move on to the next section: “Speaker Wire Color Codes.”

Speaker Wire Color Codes
When it comes to speaker wire connections, understanding the color codes is crucial. The colors of speaker wires are not just random; they serve a specific purpose in ensuring proper audio transmission. In this section, we will explore the different speaker wire color codes and their significance.
Red Speaker Wire
The red speaker wire is commonly used to denote the positive terminal or the “hot” wire in speaker connections. It is essential to connect the red wire to the corresponding positive terminal on both the amplifier or receiver and the speaker. This ensures that the audio signal flows in the correct direction, allowing for optimal sound reproduction.
Black Speaker Wire
Contrary to the red wire, the black speaker wire represents the negative terminal or the “ground” wire. Just like with the red wire, it is crucial to connect the black wire to the negative terminal on both the amplifier or receiver and the speaker. By doing so, you complete the circuit and enable the audio signal to flow smoothly.
White Speaker Wire
While not as commonly used as the red and black wires, the white speaker wire serves a specific purpose in certain audio setups. In some cases, the white wire is used as a secondary positive wire, especially when connecting multiple speakers or for specialized applications. It is important to consult the equipment’s manual or the manufacturer’s instructions to determine the specific usage of the white wire in your particular setup.
Green Speaker Wire
Similar to the white wire, the green speaker wire is not as widely used as the red and black wires. It is often used as an additional negative wire, especially when connecting multiple speakers or for specific audio configurations. As with the white wire, it is crucial to refer to the equipment’s manual or the manufacturer’s instructions to understand the intended usage of the green wire in your specific setup.
Understanding the speaker wire color codes is vital for a successful audio setup. By correctly connecting the red and black wires to their respective terminals, you ensure that the audio signal flows in the right direction and that the circuit is complete. Additionally, being aware of the usage of the white and green wires, if applicable, allows for more flexibility and customization in your speaker connections.
To summarize the key points:
- Red speaker wire: Represents the positive terminal or the “hot” wire.
- Black speaker wire: Represents the negative terminal or the “ground” wire.
- White speaker wire: Used as a secondary positive wire in certain setups.
- Green speaker wire: Used as an additional negative wire in specific configurations.
Remember to always consult the equipment’s manual or the manufacturer’s instructions to verify the color codes and their usage in your particular audio setup. By following these guidelines, you can ensure proper speaker wire connections and achieve optimal sound quality.
Identifying Positive and Negative Speaker Wires
When connecting speakers, it’s crucial to understand how to identify positive and negative wires. Proper polarity ensures that the speakers and audio equipment work together harmoniously, producing the best sound quality possible. In this section, we will explore the concept of polarity in speaker wire connections, share some tips for identifying positive and negative wires, and explain how to use a multimeter for this purpose.
Polarity in Speaker Wire Connections
Polarity refers to the direction of electrical flow in a circuit. In the context of speaker wire connections, it determines whether the speaker diaphragm moves in the correct direction to produce sound accurately. When the positive and negative wires are connected correctly, the speaker moves forward when it receives a positive signal and moves backward when it receives a negative signal, resulting in proper sound reproduction.

Tips for Identifying Positive and Negative Wires
Identifying positive and negative wires can be a bit tricky, especially if the speaker wires are not color-coded. Here are some tips to help you determine which wire is positive and which wire is negative:
- Look for markings: Some speaker wires may have markings such as “+” or “-” to indicate the polarity. These markings are usually found near the ends of the wires or on the insulation.
- Check for color-coding: Many speaker wires come in pairs, with one wire having a solid color and the other having a stripe or a different color. In most cases, the solid-colored wire is positive, while the striped or differently colored wire is negative. However, it’s essential to refer to the manufacturer’s documentation or the wire’s labeling to confirm the polarity.
- Inspect the insulation: Speaker wires usually have different types of insulation, such as clear or white for positive and black or red for negative. If the wires have different insulations, it’s a good indication of their polarity.
- Follow the manufacturer’s instructions: If you’re unsure about the polarity of your speaker wires, it’s always best to consult the manufacturer’s instructions or contact their customer support for guidance. They will be able to provide you with accurate information specific to the product you are using.
Using a Multimeter to Identify Positive and Negative Wires
A multimeter is a versatile tool that can help you determine the polarity of speaker wires with precision. Here’s how you can use a multimeter to identify positive and negative wires:
- Set the multimeter: Start by setting the multimeter to the “Ohms” or “Resistance” mode. This mode allows the multimeter to measure the resistance of the wires accurately.
- Strip the wire ends: Carefully strip about half an inch of insulation from the ends of the speaker wires, exposing the metal conductors.
- Connect the multimeter: Insert the positive lead of the multimeter into the exposed conductor of one wire and the negative lead into the other wire’s conductor. Make sure the leads are making direct contact with the metal.
- Observe the reading: The multimeter will display a resistance reading. If the reading is positive, it means that the leads are correctly connected to the positive and negative wires. If the reading is negative or shows no resistance, you need to switch the leads’ positions to get an accurate reading.
Using a multimeter is particularly helpful when the speaker wires are not color-coded or when you are dealing with older or custom-made speaker systems that may not adhere to standard color-coding practices.
Connecting Speaker Wires
When setting up your audio system, properly connecting the speaker wires is essential for ensuring optimal sound quality. In this section, we will discuss three key steps: stripping the speaker wire insulation, twisting the wire strands, and attaching the wires to the terminals.
Stripping Speaker Wire Insulation
Before you can connect your speaker wires, you need to strip off a portion of the insulation. This allows for a clean and secure connection to the terminals. To strip the insulation, follow these steps:

- Start by using wire strippers or a utility knife to carefully cut away the outer insulation of the wire. Be cautious not to cut too deeply, as you don’t want to damage the wire strands inside.
- Once you’ve made the initial cut, gently pull back the insulation to expose the wire strands underneath. Take care not to tug too hard, as this can cause the strands to break or become frayed.
- After exposing the wire strands, trim off any excess insulation to ensure a neat and tidy connection.
Remember, the amount of insulation you strip off will depend on the type of speaker terminals you are connecting to. Some terminals may require more exposed wire, while others may only need a small portion to be stripped.
Twisting Speaker Wire Strands
Once you have stripped the insulation, it’s essential to twist the wire strands together. Twisting the strands helps to create a strong and secure connection. Here’s how you can do it:
- Gather the exposed wire strands and hold them firmly between your thumb and forefinger.
- Using a twisting motion, rotate your hand in one direction to twist the strands together. Continue twisting until the strands are tightly wound around each other.
- Make sure that all the strands are included in the twist, as loose or unraveled wires can lead to a poor connection and affect sound quality.
By twisting the wire strands together, you create a solid conductor that helps to maintain a consistent flow of electrical signals between your audio components.
Attaching Speaker Wires to Terminals
Now that you have stripped and twisted the speaker wire strands, it’s time to attach them to the terminals. The speaker terminals are where the wires make contact with your speakers or amplifier, allowing the electrical signal to flow through. Follow these steps to ensure a proper connection:
- Identify the positive (+) and negative (-) terminals on your speakers or amplifier. These terminals are usually labeled or color-coded for easy identification.
- For each speaker wire, locate the corresponding positive and negative terminals. It’s crucial to connect the positive wire to the positive terminal and the negative wire to the negative terminal to maintain proper polarity.
- Insert the stripped and twisted wire strands into the appropriate terminals. Some terminals may have screws or clamps that need to be loosened before inserting the wires. Once inserted, tighten the screws or clamps to secure the connection.
- Give the wires a gentle tug to ensure they are securely attached. A loose connection can result in intermittent sound or signal loss.
Remember to repeat these steps for each speaker in your audio setup, ensuring that all connections are secure and properly polarized.
Troubleshooting Speaker Wire Connections
One of the most common challenges when setting up a speaker system is dealing with speaker wire connections. Whether you’re experiencing issues with sound quality or simply need to fix a loose connection, troubleshooting speaker wire connections is an essential skill for any audio enthusiast. In this section, we will explore some common issues with speaker wire connections, discuss how to test speaker wire continuity, and provide tips for fixing loose or damaged connections.
Common Issues with Speaker Wire Connections
Speaker wire connections can present a range of issues that may affect the overall performance of your audio system. Understanding these common issues can help you diagnose and resolve problems effectively. Here are a few common problems you may encounter:
- Loose Connections: Loose connections are a frequent issue with speaker wire setups. When the wire is not securely attached to the terminal, it can result in intermittent sound or complete audio dropout. Loose connections can occur due to improper stripping of the wire insulation or inadequate tightening of the terminal screws.
- Crossed Wires: Another common problem is crossed wires, where the positive and negative wires are accidentally swapped. This can lead to phase cancellation and a distorted soundstage. It is important to ensure that the positive and negative wires are correctly connected to the corresponding terminals.
- Damaged Wires: Over time, speaker wires can become damaged due to wear and tear, bending, or accidental cuts. This can result in poor sound quality or no sound at all. It is essential to inspect the wires regularly for any signs of damage and replace them if necessary.
Testing Speaker Wire Continuity
Testing the continuity of your speaker wire is crucial to ensure a proper connection between your audio components. Continuity refers to the uninterrupted flow of electrical current through the wire. By testing continuity, you can identify any breaks or interruptions in the wire that may be causing issues. Here’s how you can test speaker wire continuity:
- Prepare the Equipment: To test continuity, you will need a multimeter set to the continuity or resistance mode. Ensure that the multimeter is properly calibrated and functioning correctly.
- Disconnect the Speaker Wires: Start by disconnecting the speaker wires from your audio components. This will prevent any interference or false readings during the testing process.
- Set the Multimeter: Set your multimeter to the continuity mode or the resistance mode if it has that option. This mode allows the multimeter to measure the flow of electricity through the wire.
- Touch the Probes: Take the probes of the multimeter and touch one probe to each end of the speaker wire. The multimeter will emit a beep or display a reading if there is continuity. If there is no beep or the reading shows infinite resistance, it indicates a break or interruption in the wire.
- Check for Breaks or Interruptions: If the multimeter indicates no continuity, carefully inspect the wire for any breaks, frayed ends, or loose connections. Repair or replace the wire if necessary.
Fixing Loose or Damaged Speaker Wire Connections
Fixing loose or damaged speaker wire connections is vital for optimal sound quality and performance. Here are some tips to help you fix these issues:
- Stripping the Wire Insulation: To fix a loose connection, start by stripping the wire insulation properly. Use a wire stripper or a sharp utility knife to remove approximately 1/2 inch of insulation from the end of each wire. Ensure that the bare wire is clean and free from any frayed strands.
- Twisting the Speaker Wire Strands: After stripping the insulation, twist the strands of each wire tightly together. This will create a solid connection and prevent any loose strands from causing interference or signal loss.
- Attaching the Speaker Wires to Terminals: Once the wires are properly prepared, attach them securely to the corresponding terminals. Ensure that the positive wire is connected to the positive terminal and the negative wire to the negative terminal. Tighten the terminal screws firmly but avoid over-tightening, as it may damage the wire or the terminal.
By following these steps, you can fix loose connections and ensure a stable and reliable speaker wire connection.
Upgrading Speaker Wire
The quality of the speaker wire you use can have a significant impact on the overall audio experience. Upgrading your speaker wire might not be the first thing that comes to mind when improving your sound system, but it can make a noticeable difference. Let’s explore the benefits of upgrading speaker wire, how to choose the right gauge, and how it can enhance sound quality.
Benefits of Upgrading Speaker Wire
Upgrading your speaker wire can bring several benefits to your audio setup. One of the primary advantages is improved signal transmission. Higher quality speaker wire has better conductivity, which means that the electrical signals from your amplifier to your speakers will travel more efficiently. This can result in cleaner and more accurate sound reproduction.
Another benefit of upgrading speaker wire is reduced resistance. Lower-quality wires often have higher resistance, which can impede the flow of electrical current. Upgrading to thicker gauge wire can help minimize this resistance, ensuring that the full power of your amplifier reaches your speakers. This can result in louder and more dynamic sound, especially in larger rooms or when playing music at higher volumes.
Additionally, upgrading speaker wire can help reduce signal loss. Cheaper wires may not be as shielded, leading to interference from nearby electronic devices or power cables. By investing in higher quality wire with better shielding properties, you can minimize the chance of picking up unwanted noise and maintain a cleaner audio signal.
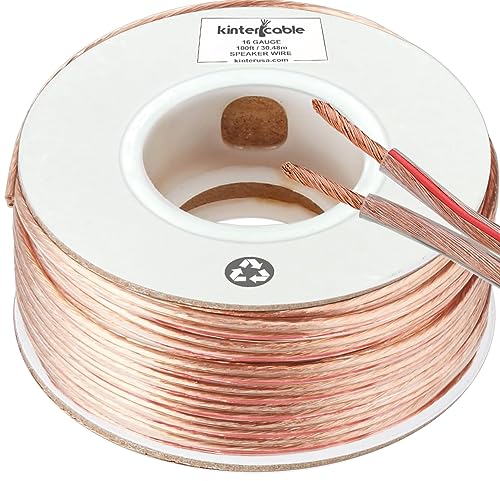
Choosing the Right Gauge of Speaker Wire
When upgrading your speaker wire, it’s crucial to choose the right gauge for your specific setup. The gauge of wire refers to its thickness, with lower gauge numbers indicating thicker wire. While there are various gauge options available, the most common choices for home audio systems are 14, 16, and 18 gauge.
For most average-sized rooms and speakers with a typical power rating, 16 gauge wire is usually sufficient. It strikes a good balance between cost and performance, providing adequate conductivity and resistance for most setups. However, if you have larger speakers or plan to place them in a larger room, you might consider using 14 gauge wire to ensure optimal power delivery.
On the other hand, if you have smaller speakers or a setup with limited power requirements, 18 gauge wire can be a suitable choice. It is thinner and more flexible, making it easier to handle and route around tight spaces. However, keep in mind that using 18 gauge wire for more demanding setups may lead to a noticeable loss in sound quality and overall performance.
Upgrading Speaker Wire for Better Sound Quality
Upgrading your speaker wire can significantly enhance the sound quality of your audio system. With improved signal transmission, reduced resistance, and minimized signal loss, you can expect clearer, more detailed audio reproduction. The upgraded wire allows the full range of frequencies to flow seamlessly from your amplifier to your speakers, resulting in a more balanced and immersive listening experience.
Think of your audio system as a highway, where the speaker wire serves as the lanes for the electrical signals. Upgrading your speaker wire is like widening those lanes, allowing for smoother and faster traffic flow. The improved conductivity ensures that the delicate nuances in the music are faithfully transmitted, delivering a more accurate representation of the original recording.
In conclusion, upgrading your speaker wire can have a significant impact on the overall performance of your sound system. It offers benefits such as improved signal transmission, reduced resistance, and minimized signal loss. By choosing the right gauge for your setup and investing in higher quality wire, you can enhance the sound quality and enjoy a more immersive audio experience. So, why settle for average when you can take your audio setup to the next level with upgraded speaker wire?
