Find the best preamp for turntable that offers high-quality conversion, low noise levels, and adjustable settings. Learn how to install and maintain a preamp for optimal sound quality.
What is a Preamp for Turntable?
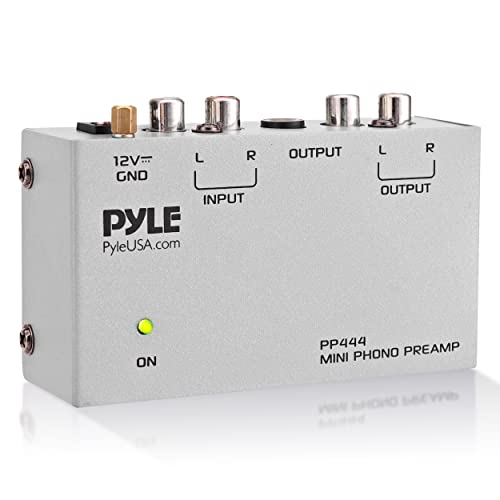
A preamp for a turntable is an essential component in the audio setup that helps boost the signal from the turntable’s cartridge to a level suitable for amplification. It acts as a bridge between the turntable and the amplifier, ensuring that the delicate analog signal from the vinyl records is properly amplified and reproduced with clarity and accuracy.
Definition and Function
The primary function of a preamp for a turntable is to amplify the low-level signal produced by the cartridge. The cartridge, which contains a stylus that tracks the grooves on the vinyl record, generates a very weak electrical signal. This signal needs to be boosted to a level that can be efficiently processed by an amplifier.
The preamp takes this weak signal and amplifies it to a line-level signal, which is the standard signal level used by most audio equipment. This line-level signal is then fed into the amplifier, which further boosts the signal to drive the speakers and produce sound.
In addition to amplification, a preamp for a turntable also performs other important functions. It provides the necessary equalization, known as RIAA correction, to compensate for the frequency response characteristics of vinyl records. Vinyl records have their bass frequencies reduced and their high frequencies boosted during the recording process, and the preamp ensures that the original audio signal is accurately reproduced.
Importance of a Preamp for Turntable
The importance of a preamp for a turntable cannot be overstated. Without a preamp, the signal from the cartridge would be too weak and distorted, resulting in poor sound quality. A preamp ensures that the delicate nuances of the music on vinyl records are faithfully reproduced, preserving the warmth and depth that is characteristic of analog audio.
Furthermore, a preamp allows for compatibility between turntables and amplifiers. Many modern amplifiers do not have a dedicated phono input, which is necessary for connecting a turntable directly. By using a preamp, you can connect your turntable to any line-level input on the amplifier, making it versatile and compatible with a wide range of audio systems.
A preamp also provides flexibility in adjusting the gain and impedance settings according to the specific characteristics of your turntable and cartridge. This allows you to optimize the performance and sound quality of your setup, ensuring that you get the best possible audio experience.
In summary, a preamp for a turntable is a crucial component that enhances the sound quality, provides compatibility, and allows for fine-tuning of the audio setup. Whether you are a casual listener or a serious audiophile, investing in a good preamp can greatly enhance your enjoyment of vinyl records and ensure that you have a high-fidelity audio experience.
Factors to Consider When Choosing a Preamp for Turntable
When it comes to choosing a preamp for your turntable, there are several important factors to consider. From compatibility with turntable models to the type of preamp, gain and input impedance adjustments, budget considerations, and user reviews, each aspect plays a crucial role in finding the right preamp that suits your needs.

Compatibility with Turntable Models
The first factor to consider is the compatibility of the preamp with your turntable model. Not all turntables are created equal, and some may require specific preamps to ensure optimal performance. Before making a purchase, it is essential to check if the preamp is compatible with your turntable. This information can usually be found in the product specifications or by contacting the manufacturer.
Analog vs. Digital Preamps
Another important consideration is whether to choose an analog or digital preamp. Analog preamps are known for their warm and rich sound, while digital preamps offer more versatility and often come with additional features such as USB connectivity. The choice between analog and digital ultimately depends on your personal preferences and the type of sound you want to achieve.
Adjustable Gain and Input Impedance
Adjustable gain and input impedance are crucial features to look for in a preamp. Gain refers to the amplification of the audio signal, and having the ability to adjust it allows you to fine-tune the volume and achieve the desired sound output. Input impedance, on the other hand, determines how well the preamp matches with the cartridge of your turntable. It is recommended to choose a preamp with adjustable gain and input impedance to have more control over the audio performance.
Budget and Price Range
Budget considerations are always important when making any purchase, and the same applies to preamps for turntables. It is essential to determine your budget and explore the options available within that price range. While higher-priced preamps may offer advanced features and better sound quality, there are also affordable options that can deliver excellent performance. It is crucial to strike a balance between your budget and the features you prioritize.
User Reviews and Recommendations
Lastly, it is highly recommended to read user reviews and consider recommendations from other turntable enthusiasts. User reviews provide valuable insights into the performance, reliability, and overall satisfaction of a particular preamp. You can find these reviews on various online platforms or forums dedicated to turntables and audio equipment. Additionally, seeking recommendations from experienced users or professionals in the field can help you make an informed decision.

Table: Comparison of Preamp Features
| Feature | Analog Preamp | Digital Preamp |
|---|---|---|
| Sound Quality | Warm and rich | Versatile |
| Additional Features | Limited | USB Connectivity, EQ options, etc. |
| Adjustable Gain | Yes | Yes |
| Adjustable Input Impedance | Yes | Yes |
| Price Range | Affordable to High-end | Affordable to High-end |
| User Reviews | Varied opinions | Varied opinions |
(Note: The table above is for illustrative purposes only and may not include all preamp features. It is recommended to refer to product specifications for accurate information.)
Top Features to Look for in a Preamp for Turntable
When it comes to choosing a preamp for your turntable, there are several important features to consider. These features can greatly impact the sound quality and overall performance of your turntable setup. In this section, we will explore the that you should look for in a preamp for turntable.
High-Quality Analog-to-Digital Conversion
One of the key features to consider in a preamp for turntable is its analog-to-digital conversion capability. This feature is particularly important if you plan on digitizing your vinyl records or connecting your turntable to a digital audio source. A high-quality analog-to-digital converter ensures that the audio signal from your turntable is accurately and faithfully converted into a digital format, preserving the warmth and depth of the original vinyl sound.
Low Noise and Distortion Levels
Another crucial feature to look for is low noise and distortion levels. A good preamp should have a high signal-to-noise ratio, meaning that it can effectively amplify the audio signal without introducing unwanted background noise. Additionally, low distortion levels ensure that the audio signal remains clean and free from any unwanted artifacts or distortion. This is especially important for audiophiles who value pure and accurate sound reproduction.

Adjustable Input Capacitance and Resistance
The ability to adjust the input capacitance and resistance of a preamp is an essential feature for optimizing the performance of your turntable. Different turntable cartridges require different input capacitance and resistance settings to achieve the best sound quality. Having a preamp with adjustable settings allows you to fine-tune the sound to match your specific cartridge, resulting in a more detailed and accurate audio reproduction.
Multiple Input and Output Options
Flexibility in connectivity is another important feature to consider. Look for a preamp that offers multiple input and output options, such as RCA, XLR, or digital connections. This ensures compatibility with a wide range of audio equipment, giving you the freedom to connect your turntable to various audio systems or recording devices. Additionally, having multiple output options allows you to connect your preamp to both powered speakers and amplifiers, depending on your setup preferences.
Built-in Phono EQ and RIAA Correction
Some preamps come with built-in phono equalization (EQ) and RIAA correction. This feature is particularly useful if your turntable does not have a built-in phono stage or if you want to have control over the EQ settings. The RIAA equalization curve is necessary for accurate playback of vinyl records, and having it built into the preamp eliminates the need for additional external EQ devices. This feature allows you to fine-tune the sound to your liking and ensures that the audio signal is properly equalized for optimal playback.
Best Preamps for Turntable
When it comes to choosing the best preamp for your turntable, there are several options available in the market. Each preamp offers unique features and capabilities that can enhance your listening experience. Let’s take a closer look at some of the top preamps for turntables:
Preamp A
Preamp A is a highly recommended option for turntable enthusiasts. It is known for its exceptional sound quality and versatility. With its high-quality analog-to-digital conversion, it ensures that your vinyl records are reproduced with utmost accuracy and fidelity. The low noise and distortion levels of Preamp A guarantee a clean and clear audio output, allowing you to enjoy the true essence of your vinyl collection. Additionally, it offers adjustable input capacitance and resistance, allowing you to fine-tune the sound according to your preferences. Its multiple input and output options provide flexibility in connecting to other audio devices. Preamp A also features a built-in phono EQ and RIAA correction, which further enhances the sound quality and ensures accurate playback.
Preamp B
If you are looking for a preamp that offers excellent performance at an affordable price, Preamp B is worth considering. It is compatible with a wide range of turntable models, making it a versatile choice for any setup. The analog-to-digital conversion of Preamp B is of high quality, ensuring that the sound from your vinyl records is faithfully reproduced. It also boasts low noise and distortion levels, delivering a clean and immersive listening experience. With adjustable gain and input impedance, you have the flexibility to customize the sound output to your liking. Preamp B comes with multiple input and output options, allowing you to connect it to various audio devices effortlessly. While it does not have a built-in phono EQ and RIAA correction, it still delivers exceptional sound quality at an affordable price point.
Preamp C
For audiophiles who demand the utmost precision and performance, Preamp C is an excellent choice. It is designed to deliver unrivaled sound quality and accuracy. With its advanced analog-to-digital conversion technology, Preamp C ensures that every detail of your vinyl records is captured with exceptional clarity and precision. The low noise and distortion levels guarantee a pristine audio output, allowing you to immerse yourself in the music. Preamp C offers adjustable input capacitance and resistance, enabling you to fine-tune the sound to match your preferences. Its multiple input and output options provide versatility in connecting to other audio devices. Additionally, Preamp C features a built-in phono EQ and RIAA correction, further enhancing the sound quality and ensuring accurate playback.
Preamp D
Preamp D is a reliable and versatile option for turntable enthusiasts. It is known for its solid performance and user-friendly design. With its high-quality analog-to-digital conversion, Preamp D ensures that the sound from your vinyl records is faithfully reproduced. The low noise and distortion levels guarantee a clean and enjoyable listening experience. Preamp D offers adjustable gain and input impedance, allowing you to customize the sound output to your liking. Its multiple input and output options make it easy to connect to other audio devices. While it does not have a built-in phono EQ and RIAA correction, Preamp D delivers reliable performance at an affordable price.
Preamp E
If you are on a tight budget but still want to enjoy the benefits of a preamp, Preamp E is a great option. It offers decent sound quality at an affordable price point. While it may not have all the advanced features of higher-end preamps, Preamp E still delivers a clean and clear audio output. It is compatible with various turntable models, making it a versatile choice for any setup. Preamp E offers adjustable gain and input impedance, allowing you to customize the sound to your liking. It also provides multiple input and output options, making it easy to connect to other audio devices. While it does not have a built-in phono EQ and RIAA correction, Preamp E is a budget-friendly option for those who are just starting out in the world of vinyl records.
How to Install a Preamp for Turntable
Installing a preamp for your turntable may seem like a daunting task, but with a little guidance, it can be a straightforward process. In this section, we will walk you through the steps of connecting the preamp to the turntable and amplifier, adjusting gain and impedance settings, and troubleshooting common installation issues.
Connecting the Preamp to the Turntable and Amplifier
Connecting the preamp to your turntable and amplifier is a crucial step in the installation process. Follow these steps to ensure a proper connection:
- Check the Connections: Before starting, make sure you have all the necessary cables and adapters. Most turntables have either a built-in phono stage or a dedicated phono output. If your turntable has a built-in phono stage, you can skip the preamp and connect it directly to the amplifier. However, if your turntable doesn’t have a phono stage, you’ll need to connect the turntable to the preamp using RCA cables.
- Power Off: Before making any connections, ensure that both the turntable and amplifier are powered off. This will prevent any potential damage to the equipment.
- Connect the Turntable: Take the RCA cables and connect them to the output jacks on the turntable. The cables usually have color-coded connectors, with red for the right channel and white (or black) for the left channel. Plug the corresponding cables into the appropriate jacks on the turntable.
- Connect the Preamp: Take the other end of the RCA cables and connect them to the input jacks on the preamp. Again, match the colors to ensure proper channel identification.
- Connect the Amplifier: Using another set of RCA cables, connect the output jacks on the preamp to the input jacks on the amplifier. Ensure that you match the colors correctly for the left and right channels.
- Power On: Once all the connections are made, you can power on the turntable, preamp, and amplifier. Make sure to follow the manufacturer’s instructions for each device.
- Test the Setup: To ensure everything is working correctly, play a record and listen for sound coming from the speakers. If you don’t hear anything or encounter any issues, refer to the troubleshooting section for assistance.
Adjusting Gain and Impedance Settings
After connecting the preamp, you may need to adjust the gain and impedance settings to optimize the sound quality. Here’s how you can do it:
- Gain Settings: The gain setting controls the amplification of the audio signal from the turntable. It allows you to adjust the volume level to match your preferences. Most preamps have a gain control knob or switch that allows you to adjust the amplification. Start by setting the gain to a neutral position and gradually increase or decrease it until you achieve the desired volume level.
- Impedance Settings: The impedance setting on a preamp determines the compatibility with different types of cartridges. Moving magnet (MM) and moving coil (MC) cartridges have different impedance requirements. Some preamps have adjustable impedance settings, while others have fixed impedance. Consult the user manual of your preamp to determine if it has adjustable impedance settings and how to set it correctly for your cartridge type.
- Fine-Tuning: Once you have set the gain and impedance, you can fine-tune the sound by adjusting the equalization settings on your amplifier or receiver. This will allow you to shape the sound to your liking and compensate for any deficiencies in the audio signal.
Troubleshooting Common Installation Issues
Even with careful installation, you may encounter some common issues when installing a preamp for your turntable. Here are a few troubleshooting tips:
- No Sound: If you don’t hear any sound after connecting the preamp, check the connections and ensure that all cables are securely connected. Make sure the turntable, preamp, and amplifier are powered on. Also, check the input settings on your amplifier to ensure it is set to the correct input source.
- Hum or Grounding Issues: If you hear a constant hum or buzzing sound, it may be due to grounding issues. Ensure that the turntable, preamp, and amplifier are properly grounded. You can try connecting a separate grounding wire between the turntable and the preamp or amplifier to eliminate any grounding problems.
- Distorted Sound: If the sound from your speakers is distorted or muffled, check the gain settings on the preamp. Adjust the gain to a lower level to prevent over-amplification, which can cause distortion. Additionally, ensure that the cartridge is properly aligned and the stylus is clean and in good condition.
- Channel Imbalance: If you notice an imbalance in the volume or sound quality between the left and right channels, check the connections and ensure that the cables are securely plugged in. You can also try swapping the left and right channel cables to determine if the issue is with the cables or the equipment.
Remember, if you encounter any difficulties during the installation process, consult the user manuals of your turntable, preamp, and amplifier for specific instructions. Additionally, reaching out to the manufacturer’s customer support or seeking assistance from an audio professional can help resolve any complex issues you may encounter.
Maintenance and Care Tips for Preamps
Taking proper care of your preamp is crucial to ensure optimal performance and longevity. In this section, we will discuss some essential maintenance and care tips to keep your preamp in top condition.
Cleaning the Preamp
Cleaning your preamp regularly is essential to remove dust, dirt, and debris that can affect its performance. Here are some simple steps to clean your preamp:
- Gently dust the exterior: Use a soft, lint-free cloth to gently wipe the exterior of the preamp. Avoid using abrasive materials or harsh chemicals that can damage the surface.
- Clean the connectors: Over time, the connectors of your preamp may accumulate dirt or oxidation, affecting the audio signal. Use a contact cleaner specifically designed for electronics to clean the connectors. Apply a small amount of cleaner to a cotton swab and gently clean the connectors, ensuring they are dry before reconnecting any cables.
- Check the ventilation: Ensure that the ventilation holes of your preamp are free from dust and debris. Use compressed air or a soft brush to clean the ventilation areas, allowing proper airflow to prevent overheating.
- Avoid liquid spills: Preamps are sensitive electronic devices, and liquid spills can cause irreversible damage. Keep drinks and other liquids away from your preamp to prevent accidental spills.
Avoiding Overheating and Power Surges
Overheating and power surges can significantly affect the performance and lifespan of your preamp. Here are some tips to avoid these issues:
- Proper ventilation: Ensure that your preamp has sufficient space for proper airflow. Avoid placing it in enclosed spaces or stacking it with other electronic devices that generate heat. This will help prevent overheating and maintain optimal performance.
- Use a surge protector: Invest in a high-quality surge protector to protect your preamp from sudden power surges or voltage spikes. This will help safeguard your preamp against damage caused by electrical fluctuations.
- Avoid excessive power load: Be mindful of the power load on your preamp. Avoid connecting too many devices or power-hungry equipment to the same circuit. Distribute the load evenly to prevent overloading and potential damage to your preamp.
- Power off during electrical storms: During thunderstorms or instances of lightning, it is advisable to power off your preamp and disconnect it from the power source. This precautionary measure can help protect your preamp from electrical surges caused by lightning strikes.
Regular Inspection and Maintenance Procedures
Regular inspection and maintenance procedures are integral to keeping your preamp in optimal condition. Here are some important steps to follow:
- Check for loose connections: Periodically inspect all the cables and connections of your preamp to ensure they are securely plugged in. Loose connections can lead to audio issues or signal loss. Tighten any loose connections to maintain a stable and uninterrupted audio signal.
- Inspect the power supply: Check the power supply and the power cord for any signs of damage. If you notice any frayed wires or other issues, replace the power cord immediately. A faulty power supply can cause performance issues and potential damage to your preamp.
- Monitor signal quality: Regularly listen to your audio output to monitor the signal quality. If you notice any distortion, noise, or inconsistencies, troubleshoot the issue or seek professional assistance if needed. Addressing any audio quality issues promptly can prevent further damage to your preamp.
- Schedule professional maintenance: Consider scheduling periodic professional maintenance for your preamp. Experienced technicians can perform detailed inspections, clean internal components, and make any necessary adjustments or repairs. This ensures that your preamp continues to deliver optimal performance over time.
Taking care of your preamp through regular cleaning, protection against overheating and power surges, and conducting routine inspections will help extend its lifespan and maintain its audio performance. By following these maintenance and care tips, you can enjoy high-quality sound reproduction from your turntable for years to come.
Frequently Asked Questions about Preamps for Turntable
One of the most common questions that arise when it comes to turntables is whether a preamp is necessary. Let’s dive into this topic and explore some other frequently asked questions about preamps for turntables.
Do I Need a Preamp for My Turntable?
If you own a turntable that doesn’t have a built-in preamp, then the answer is yes, you will need a separate preamp. Turntables produce a very low-level signal called a phono signal, which needs to be amplified and equalized before it can be connected to a receiver or amplifier. A preamp is designed specifically to perform this task, boosting the signal and applying the necessary equalization to achieve optimal sound quality.
Can I Use a Phono Stage as a Preamp?
Yes, you can use a phono stage as a preamp. In fact, a phono stage is essentially a preamp that is specifically designed for turntables. It performs the same functions as a regular preamp, such as amplifying and equalizing the phono signal. However, it is important to note that not all phono stages have the same features as a dedicated preamp, such as adjustable gain or input impedance. So, if you have specific requirements or preferences, it’s worth considering a dedicated preamp.
How Does a Preamp Improve Sound Quality?
A preamp plays a crucial role in improving the sound quality of your turntable. It does so in several ways:
- Amplification: The phono signal produced by a turntable is very weak, typically around 1-5 millivolts. A preamp boosts this signal to a level that is compatible with other audio equipment, such as receivers or amplifiers.
- Equalization: Vinyl records are mastered with a specific equalization curve known as the RIAA curve. This curve compensates for the limitations of vinyl records and ensures accurate playback. A preamp applies the necessary equalization to the phono signal, allowing the music to be reproduced with the intended tonal balance.
- Noise Reduction: Turntables are susceptible to various types of noise, such as hum and interference. A preamp helps to minimize these unwanted noises by employing techniques like shielding and grounding.
By performing these essential functions, a preamp ensures that the audio signal from your turntable is optimized for playback, resulting in improved sound quality and a more enjoyable listening experience.
Can I Use a Preamp with a Built-in Phono Stage?
If your turntable already has a built-in phono stage, you may wonder if you can still use a separate preamp. The answer is yes, you can. In fact, using a separate preamp with a built-in phono stage can offer additional flexibility and customization options. You can bypass the built-in phono stage and connect your turntable directly to the separate preamp, allowing you to take advantage of its specific features, such as adjustable gain or input impedance. This gives you more control over the sound and allows you to tailor it to your preferences.
Do All Turntables Require a Preamp?
Not all turntables require a separate preamp. Some turntables come with a built-in preamp, also known as a phono preamp or phono stage. These turntables have the necessary amplification and equalization built-in, allowing you to connect them directly to an amplifier or receiver without the need for a separate preamp. If your turntable has a line-level output, it means it already has a built-in preamp and can be connected directly to your audio system. However, it is important to note that not all built-in preamps are created equal, and some may not provide the same level of performance as a dedicated preamp. So, if you’re looking for the highest quality sound, you may still consider using a separate preamp even if your turntable has a built-in option.
In conclusion, a preamp is an essential component for turntables that don’t have a built-in preamp. It amplifies and equalizes the phono signal, improving the sound quality and allowing you to connect your turntable to other audio equipment. Whether you choose a dedicated preamp or utilize a built-in phono stage depends on your specific needs and preferences. By understanding the role of a preamp and considering the frequently asked questions, you can make an informed decision and enhance your turntable listening experience.
